Showing posts with label one lucky day. Show all posts

Saturday, June 11, 2022

Perfection

 Hello Friends,

I'm excited to share this Mini Etcetera Tag I created for the Stampers Anonymous Live.  The new stamps and stencils from Tim and Stampers Anonymous worked so well to create this vintage look.  Let me show you exactly how I created that good grungy layered background.
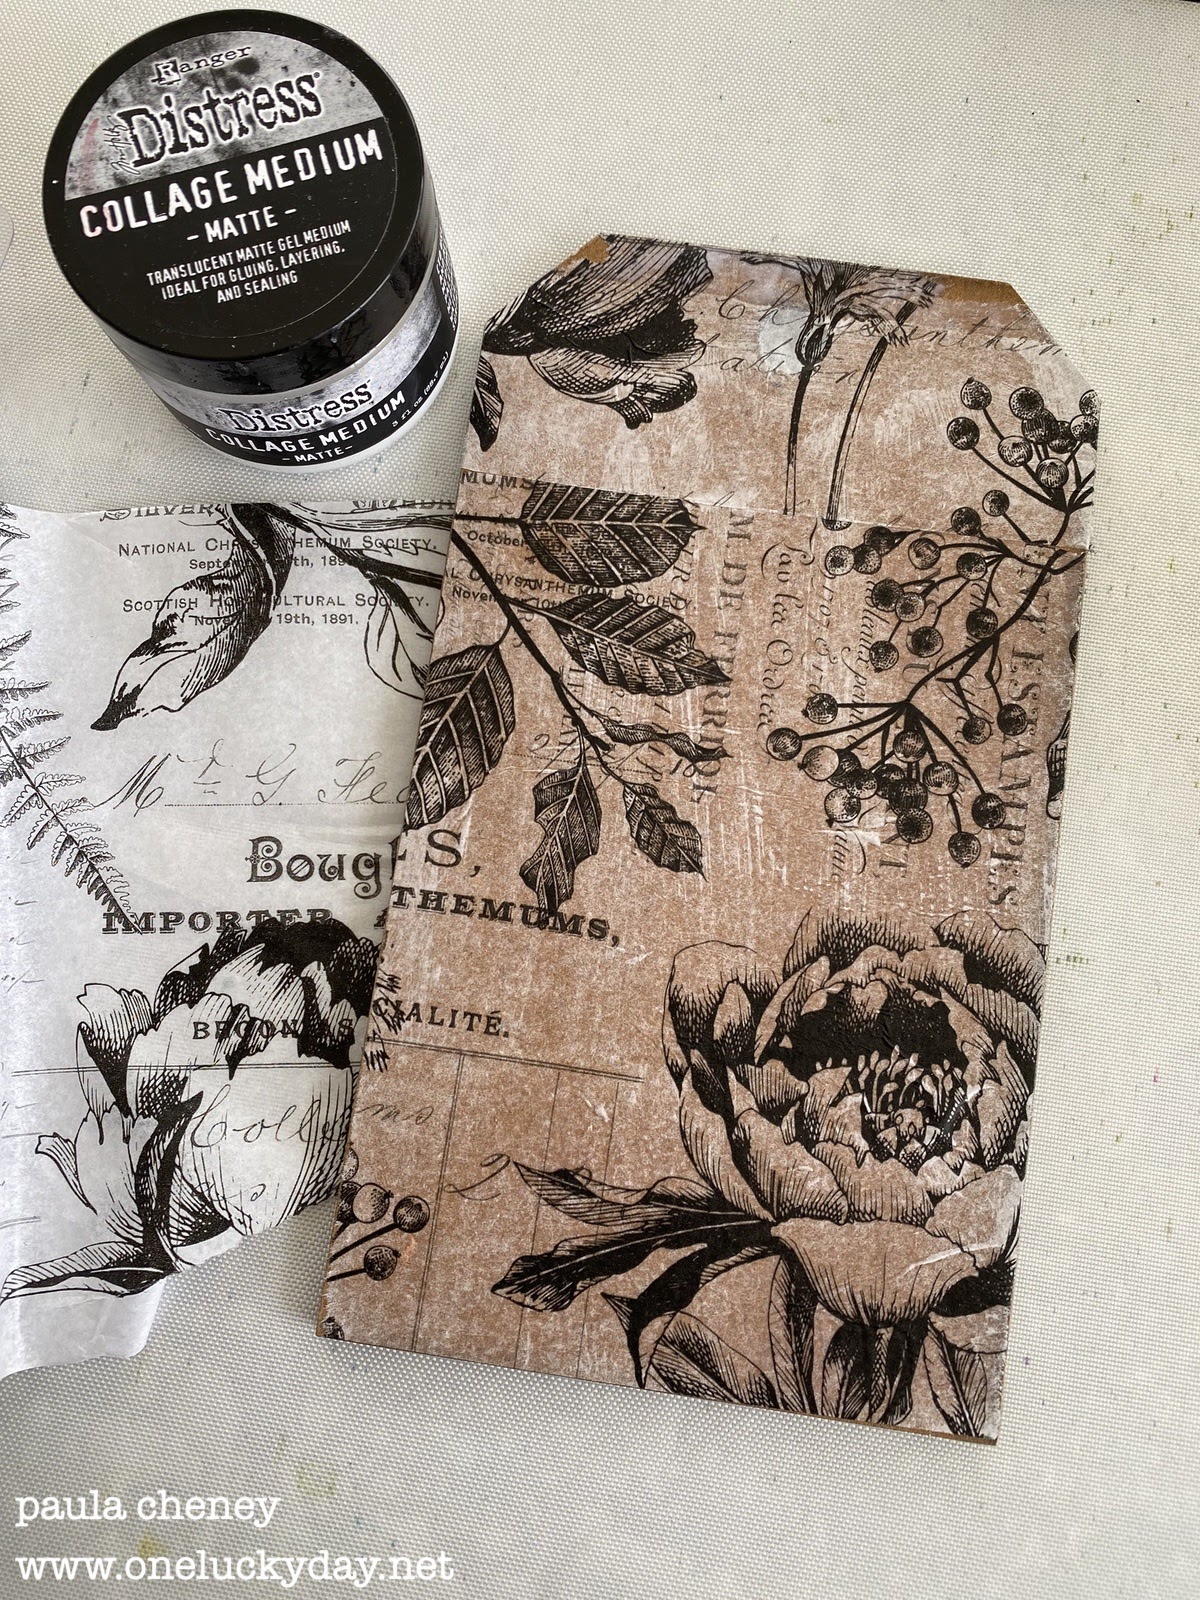
Again, I started with a Mini Etcetera Tag.  Using Collage Medium and a Collage Brush, add Botanical Collage Paper over the surface of the tag.  You need to work fast because the glue easily soaks into the surface and dries quickly.  I suggest having the paper pieces ready to go before you add the glue.  Then once the Collage Medium goes on, lay the Collage Paper over the top and press into the glue (you need clean hands to do this).
Add a second layer of Collage Medium over the top of the Collage Paper until the paper is almost sheer.  Do not cut out the hole at the top, just leave the paper in place.  Dry with a Ranger Heat Tool.  Once dry, sand away any excess paper on the edges with a sanding block for a clean edge.
Add a layer of Antique Linen Distress Paint over the surface.  Use a wet wipe to rub away the excess, making sure you can see the Botanical pattern through the painted surface.
Once the paint is dry, use a fine-grit sanding block to sand away some of the edges and the paint on the surface.
Use Archival Ink (Ground Espresso) to stamp randomly over the surface of the tag.  I did not use a block to stamp, just rolled the stamp over the surface.  I only wanted the text, not the butterfly.  So each time I inked the stamp, I made sure to wipe the ink away from any part of the butterfly. I also used 1st and 2nd generation stamping (inking once, stamping twice).  
* and you know me...no diagonal stamping!
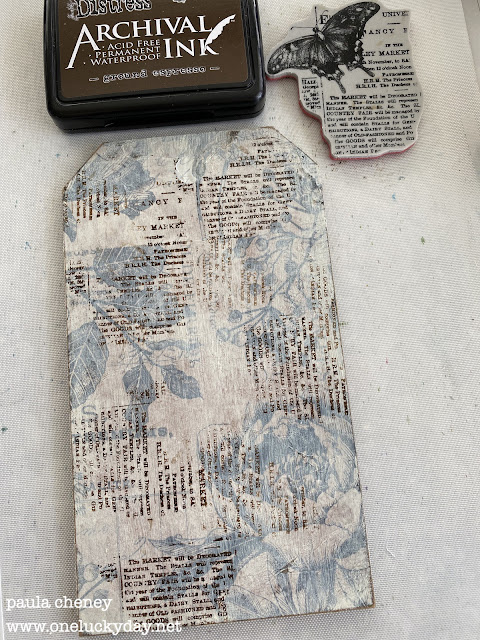
Stampers Anonymous Botanic Collage stamp set


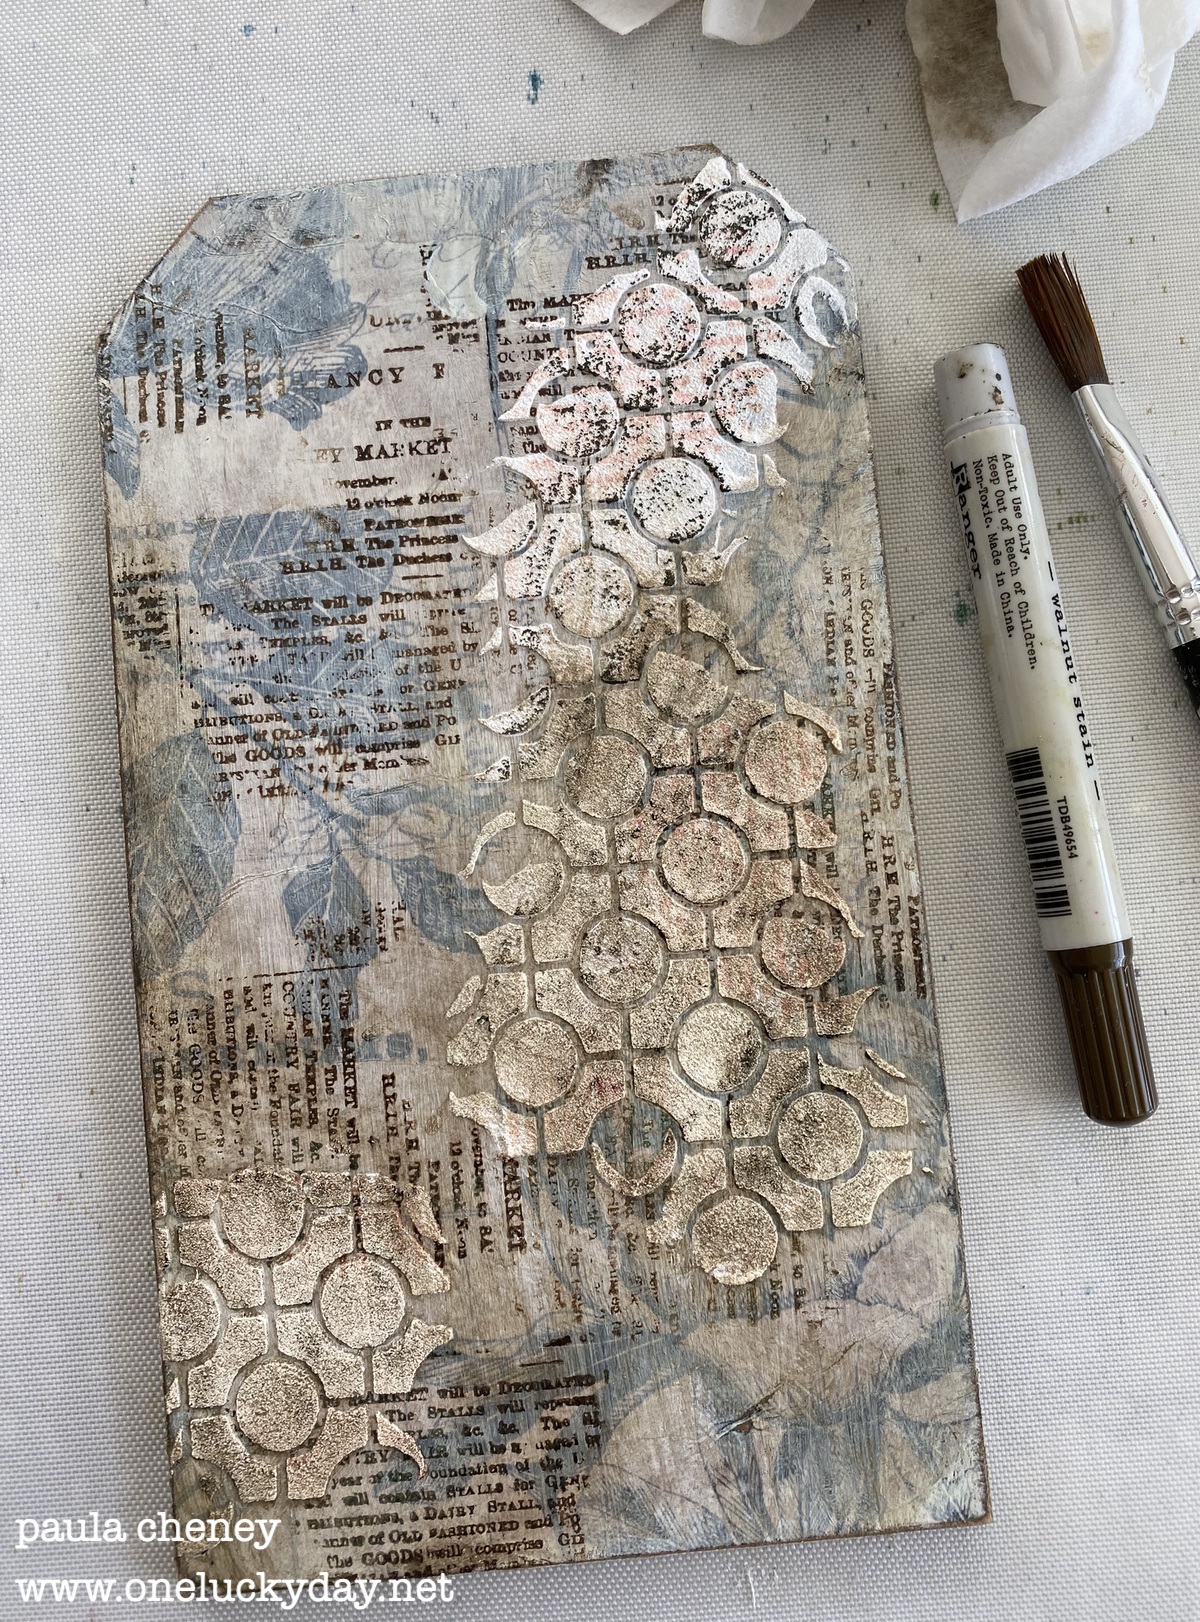
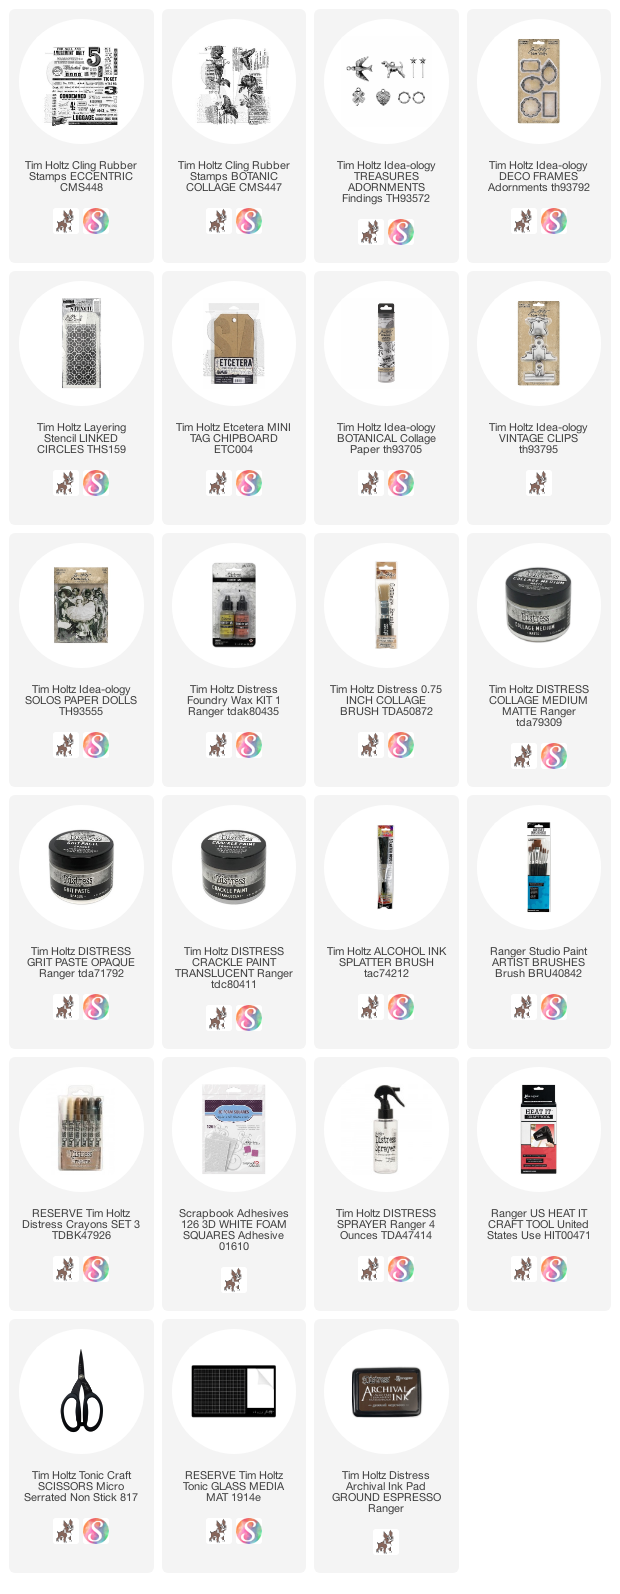
The new Linked Circles stencil and Distress Grit Paste worked perfectly to add a textured pattern to the surface of the tag.  NOTE: My focal point will be on the left so I added the majority of the Grit Paste pattern on the right side.
As you can see I added a bit more Grit Paste to the bottom left.  Now this is the hard part...set it aside to dry for at least 30 minute if not longer.  I usually need to leave the room so I don't touch it!
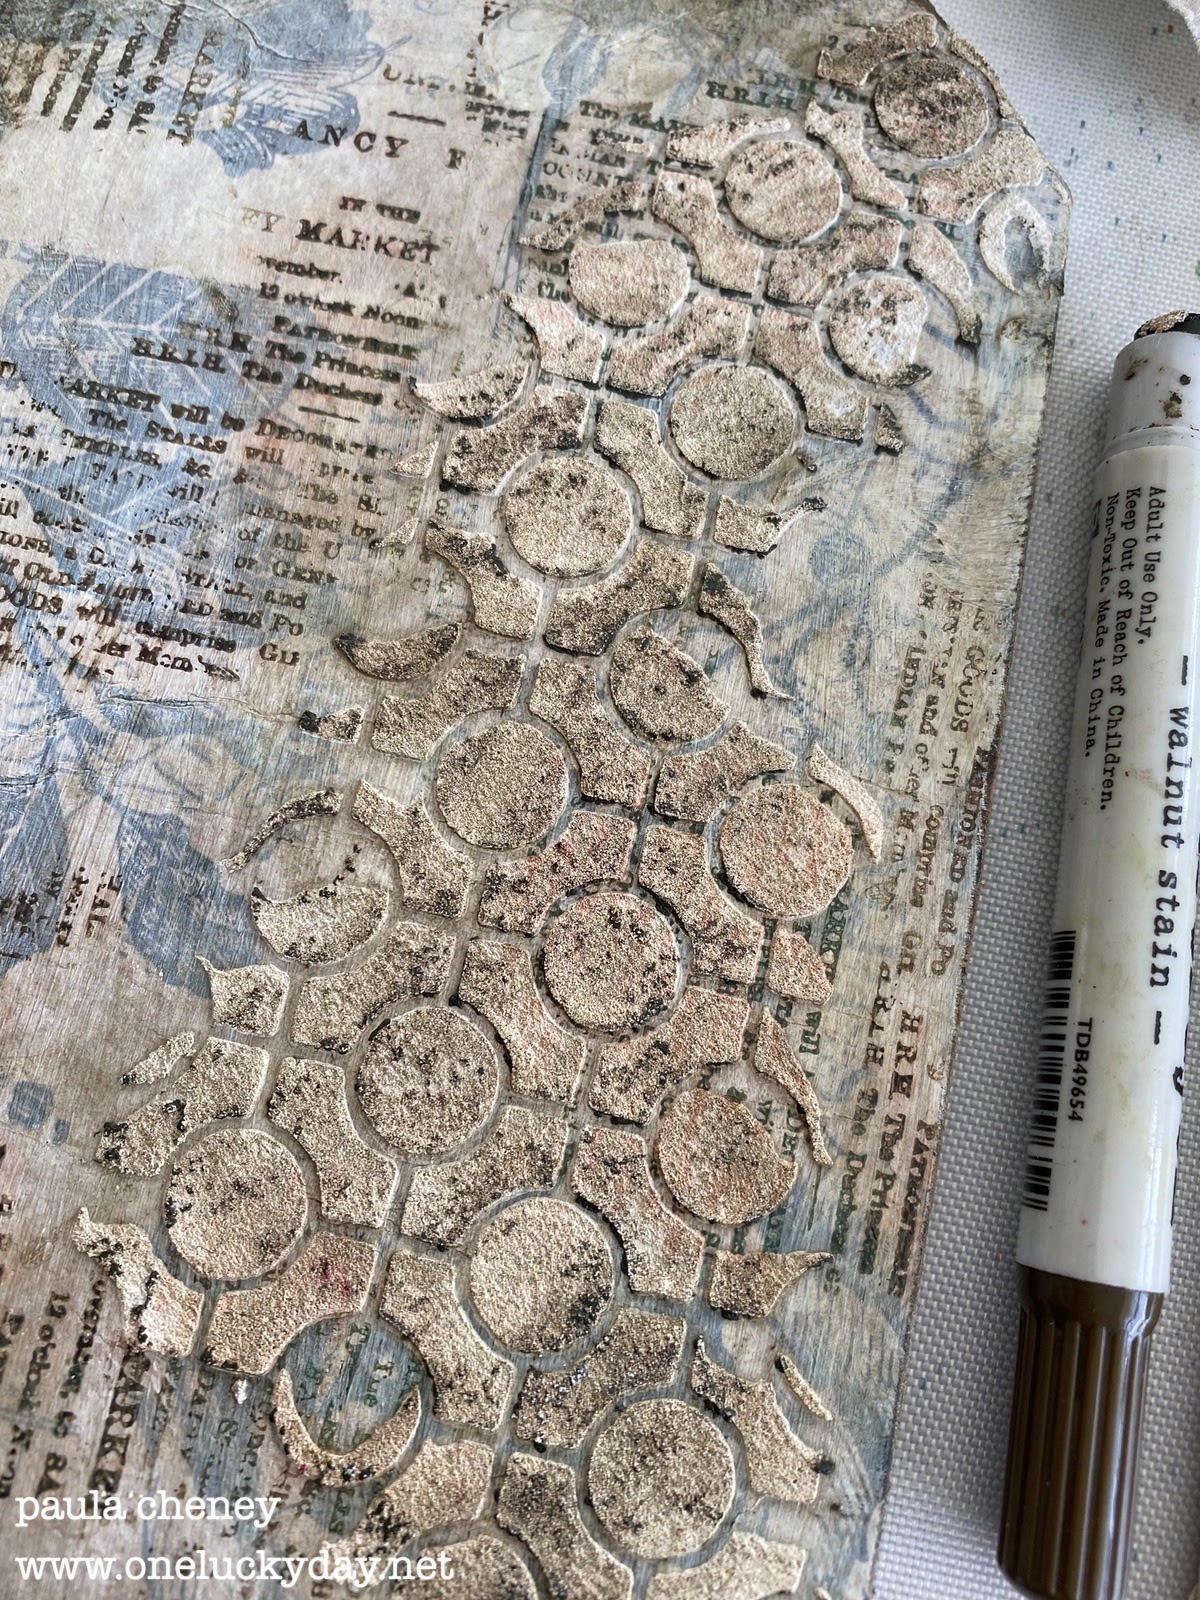
Once dry, scribble Walnut Stain Distress Crayon over the surface (top portion).  Use a damp paintbrush to move it around and get it in to all the texture of the Grit Paste (lower portion).  I also rubbed the crayon on the edges of the tag so it looked like the right side went with the left.
You can easily add more crayon if too much is wiped or brushed away. 
The Distress Splatter Brush was used to splatter Stormy Sky Distress Paint over the surface.  I think Picket Fence would also work well here.  This is subtle but it adds to the overall look.
Once the paint was dry I added Foundry Wax Statue over some of the raised textured surface (not all).  Remember to shake up the bottle till you hear the mixing ball.  Drip the wax out onto the craft mat in no more than dime sized circle.  I used my finger to pick up the creamy wax and lightly skipped my figer tip over the surface of the Grit Paste texture.  I suppose you could use a brush or a glove if you do not want to touch the wax but it does not bother my skin at all and easily wipes away with a wet wipe, leaving no stain or residue on your skin.
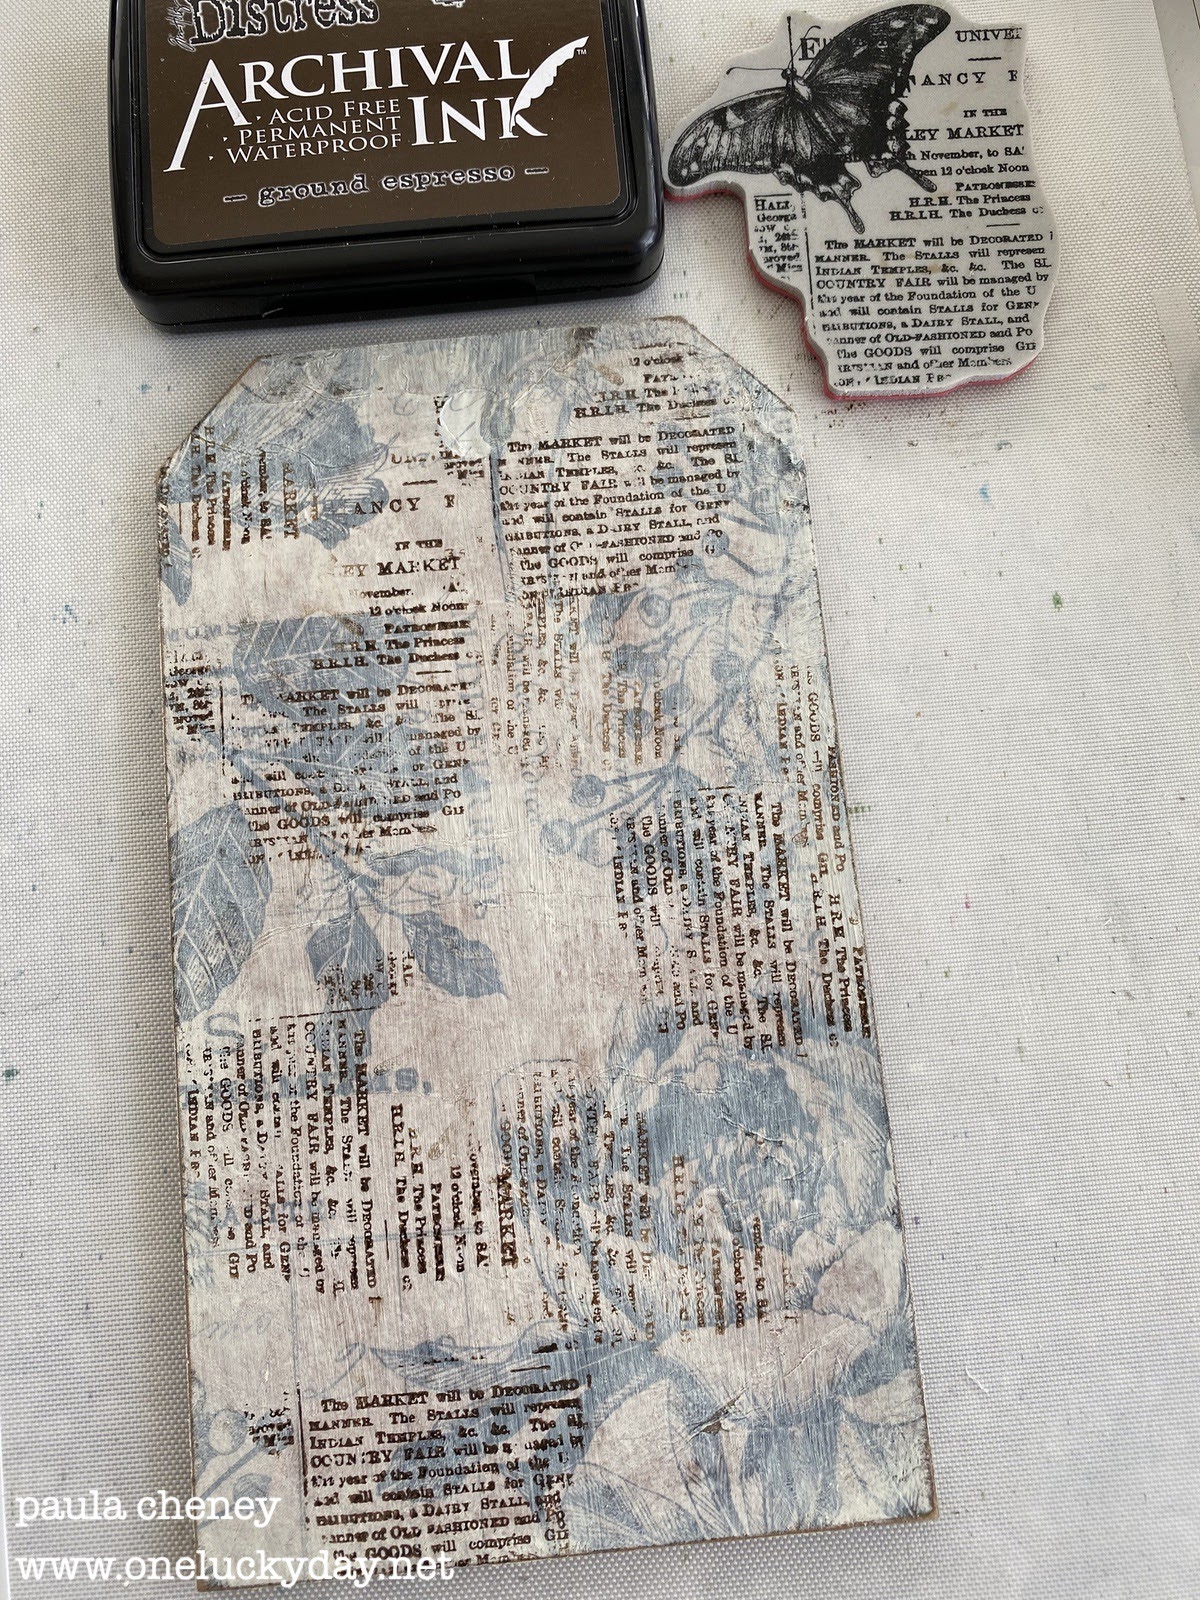
With wax is it hard to tell exactly how it will look until it is heated, so if anything, I would err on the side of caution because you could always add more in a second round.
Here s what it looks like once heated for just a few seconds with an embossing gun.  Again, hard to tell in the photo, but the wax a turned to a shiny gold.  I must admit, it looks amazing over the Grit Paste!
You have got to try this, if you haven't already!
ps) if you want to know more about Foundry Wax, you can take a look at my Foundry Wax blog post HERE.
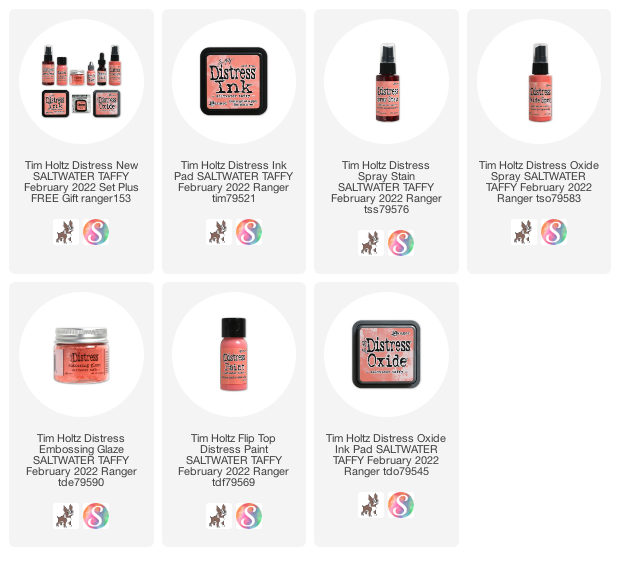
I stamped and colored the flower from the same set as the butterfly, then fussy cut it to use in the background.  I painted it it with Crackle Paint Translucent to give it a shiny surface and tiny little cracks over the surface.  The drying time depends on how thick the Crackle Paint is put on the surface.
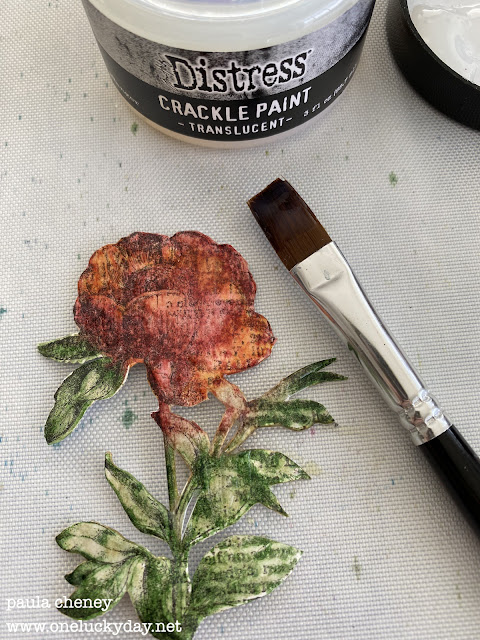
I don't have more step-out photos, but I can explain some of the other things I did to bring this all together.  

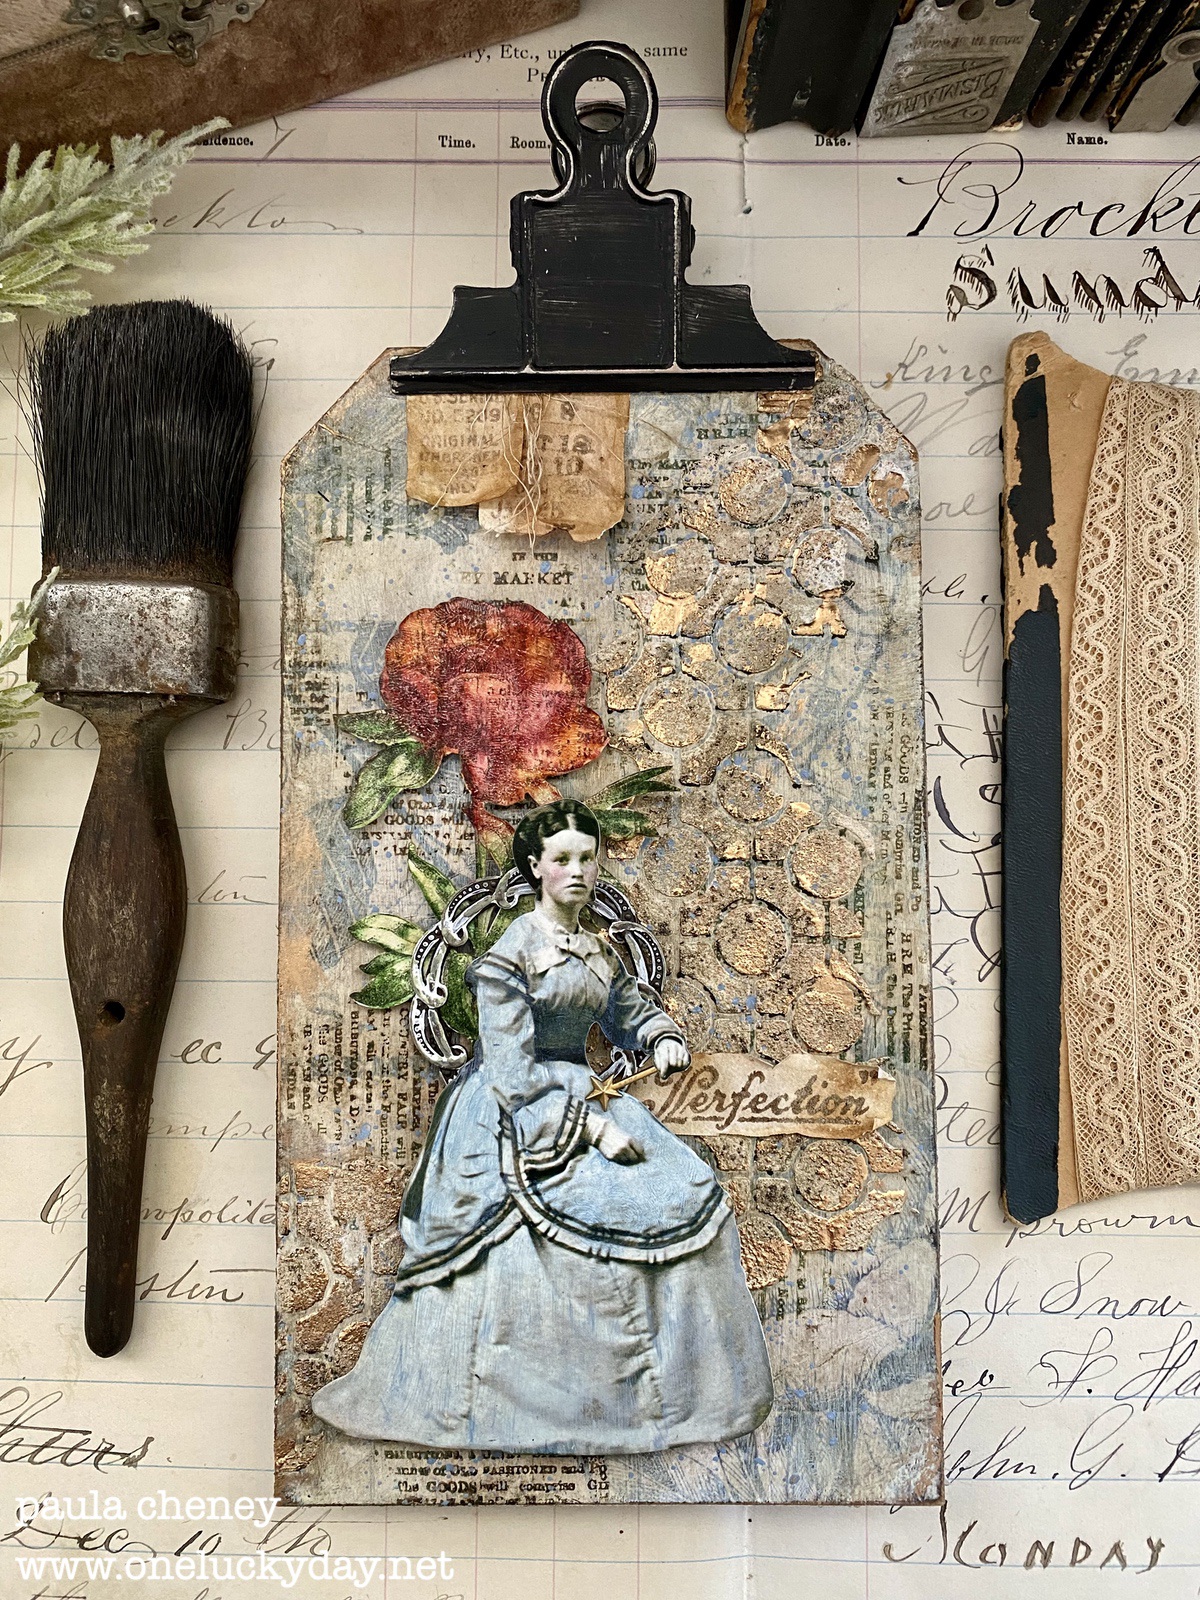
1.  Use foam squares to add the flower to the surface of the tag.

2. Use Distress Crayon to add color to the dress of a Paper Doll.  I love this sitting lady!
3. Color a wand from the Adornment Treasures pack with Foundry Wax or Gold Mixative - both will work. Add it to the Paper Dolls hand with Collage Medium and let dry.

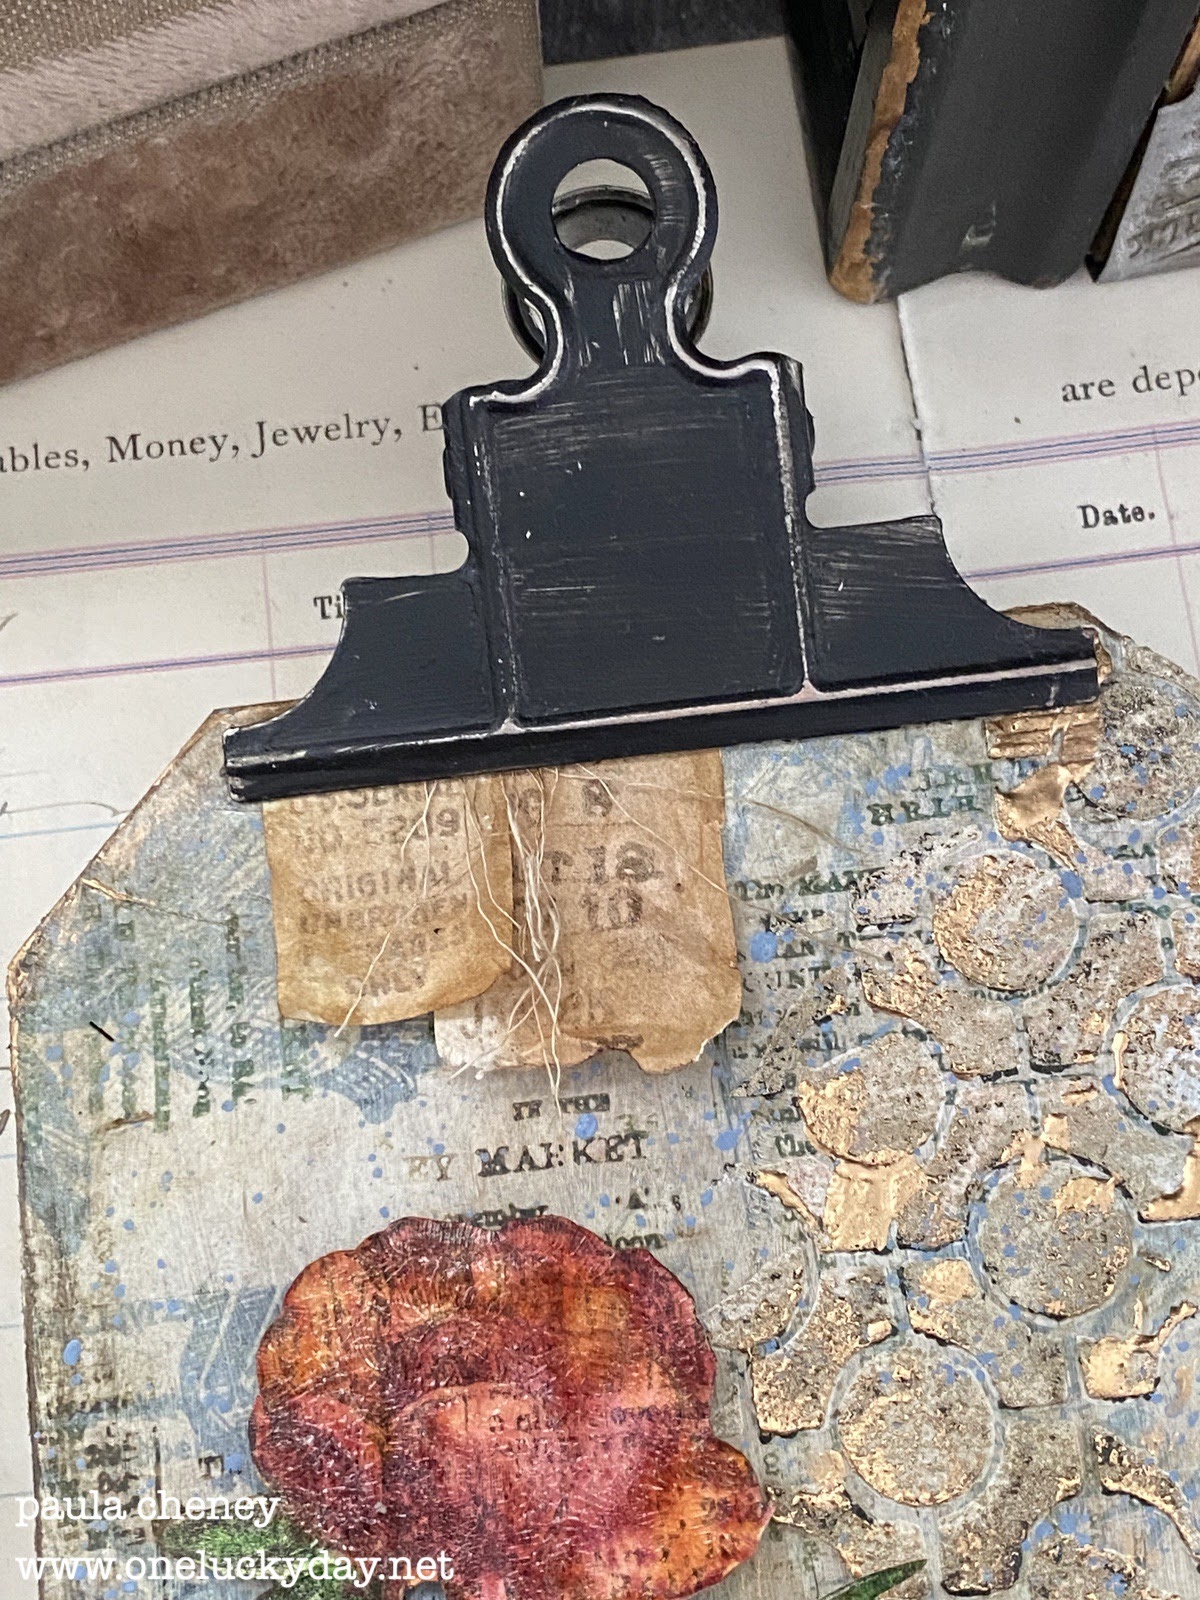
4.  Rub Picket Fence Distress Paint over a round idea-ology Deco Frame.  Once dry, add over the flower with Collage Medium.  NOTE: I placed the frame in a position so it looked like the back of a chair.  Can you see it?

5. Add the Paper Doll to the surface with either stacked foam square or wood bingo chips (like I did) so she is sitting above the silver Deco frame, not directly on it (also helps with the "chair" illusion).
6.  Use Ground Espresso Archival Ink to stamp three pieces of vintage typing paper (what I would call onion skin paper).  NOTE: Once stamped and cut out, I smooshed the papers into watery Distress Ink to age the paper.  After you dry it with the heat tool, it is nice and crunchy so it's easy to rip and crumple.

All three stamps are from the Eccentric stamp set.  I can already tell this will be a best seller - it's amazing!
7.  Paint an idea-ology Vintage Clip with Black Soot paint. Then clip the two small stamped papers under the Vintage Clip.  Notice that you really can't see the hole at the top anymore?
Oh gosh, the Grit Paste + Foundry Wax is delicious.


One of my favorite project I've done this year. The layered background is what makes it!

Now carry on,
paula

Thursday, March 10, 2022

Focus on the Good

 Hello Friends,

I am over on the Ranger Projects Page today with a project featuring the new Distress color, Saltwater Taffy.  I hope you will pop by to see the steps to create this piece!  


Now carry on,
paula

Monday, November 30, 2020

Season of Giving Kit

 Hello friends!

I have one last limited release Christmas kit for 2020. 
I hope that it might make this season of hope a little cheerier!

Click on the link below if you want to purchase.  
The link will take you directly to PayPal.  
If you would like to purchase more than one kit, this is also where you can change the quantity. 
If you wish to pay with debit or credit card, click on the box at the bottom of the PayPal log in page (you do not need a PP account). 
If you have any questions, please email me at paula@oneluckyday.net


Season of Giving Kit
$89 includes U.S. domestic shipping
The 7” x 10” wood box, with a custom base, is the perfect size for this festival winter scene.  Not only does it have colored Tiny Lights in the tall tree, but Rock Candy glitter and Mica Flakes to make it truly sparkly!  A hole for lights has been pre-drilled, paper has been pre-cut.  This kit comes delightfully packaged and includes a supply list, detailed written instructions and three pages of color step-out photos.


thank you!
paula

Monday, October 7, 2019

Holiday Class Schedule

Hi friends,

It's that time of year for holiday classes.  I will be teaching at three great places, starting with The Crafty Scrapper in Waxahachie, TX.  There are only 1-2 spots in each of the classes so if you are interested, please act quickly.  I have added the direct link for each class to sign up.
For the classes in LA (out by Magic Mountain) you will need to contact the super nice Ginger Nelson who owns and runs the event at gingbugg@cs.com   She will be happy to help!
And last but not least Whim So Doodle, class registration is not open yet but you can find the dates for the Holiday Open House and classes below.
I know some people will be interested in kits.  Each of the stores sells class kits so you can contact the store nearest you or contact me at paula@timholtz.com and I can direct you.
now carry on,
paula

The Crafty Scrapper
Waxahachie, TX
October 18-19th

Friday, October 18th - Spellbound
Friday, October 18th - Dear Santa... 
Saturday, October 19th - Christmas Fabric Journal 

Down To Details 
Stevenson Ranch, CA
November 2nd

Saturday, November 2nd - Dear Santa...
Saturday, November 2nd - Winter Wonderland 
to register contact Ginger Nelson - gingbugg@cs.com

Whim So Doodle
Christmas Open House - Thursday, December 5th
free make and takes, snacks & someone will win a 30 second shopping spree!

Classes Friday and Saturday, December 6 & 7 (registration not yet open)
Dear Santa...
Winter Wonderland 
Christmas Fabric Journal


Spellbound
It’s that time of year to create something spooky to add to your Halloween decor!  This year it’s two boys who have made their way to the local Haunted house. This piece is 6.5 x 12” and heavy layered with baseboards, etcetera trims, Mirrored, and mica sheets as well as new Halloween products from the Tim Holtz line.  Most exciting will be creating the realistic woodgrain background from scratch.  You will also be able to personalize your piece with a variety of choices of background papers from the new Abandoned paper line.
Christmas Fabric Journal
Join me for a Christmas Fabric Journal Workshop! Each hand cut journal starts with a basic 8 x 5” cover and two sewn signatures made from heavyweight canvas.  We will be adding multiple Christmas fabrics and laces, as well as ephemera, paper dolls, and more bling inside.  Do you need to know how to sew?  Nope, just be willing to go for it.  This book is all about messy stitching!  You will be working at your own pace, spending time on the details that make this book so special.  
*All materials will be provided for you but if want to add something of personal meaning, you are welcome to bring fabric, lace or photos from home.

NOTE: You will need a sewing machine for this class or to be part of a group with a sewing machine.  Two to three people can share one machine.  If you are the one bringing the machine - please know how to thread it and run a bobbin.  You will need cream thread to sew the journal.  It might be helpful if you have a zipper foot for close stitching but not a deal breaker.  


Dear Santa...
Tic-tock…what time does the clock say?  It’s Christmas time!  The 7 x 10” wood box is the perfect size for this magical (and musical) scene of Christmas past.  In addition to tiny colored lights in the tree and a sweet little snow globe, there is a hidden music box that plays a Christmas tune.  Combined, they make for an unforgettable keepsake.  As always, the holiday kit comes delightfully packaged.  NOTE: Paper Dolls will be provided however, you are welcome to use a family photo in place of the Paper Doll if you wish.
Winter Wonderland
A glass glitter star hovers over your own whimsical winter wonderland.  The woodland cottage is set on a 8” wood pedestal base with miniature deer in a forest of baby pink trees and golden glitter.  A little wreath on the door made from vintage French metal fringe adds to the charm of the project.  As night falls, the glitter becomes more pronounced creating a magical scene.  A flickering, battery-operated, tea light is also included to give an added dimension at night.  As always, the kit is thoughtfully packaged. NOTE: I will have multiple colors of Spray Stain to color the trees if pink is not your passion.


Monday, February 17, 2014

Lucky day No. 127

A week ago Saturday, the DH and I took a drive up the coast to do a little junk shopping.  We made a stop in at the Arroyo Grande Historical Society Annual antique show (very, very small but a nice mix of dealers).  I picked up a few items - a little black book from my friend Connie (Green Vase Antiques), a huge roll of vintage crepe paper from another friend, Bonnie (Birds of a Feather) and a darling tin type frame.  I have been obsessed with these frames since creating the piece, Alice meets Downton for CHA.  This one is much smaller than the one in the piece, just a smidge over 2" tall. 

We left Arroyo Grande and made our way to Paso Robles for a stop in at the Vineyard Antique Mall.  One of my favorite places to dig around in.  Big, but not too big, if you know what I mean.  Next up, Atascadero and another favorite shop, Time Since Remembered.  Every time I go to this shop, I find something great...today was no exception.  Tin types and a beautiful shoe buckle...a few vintage bulldog clips...
and then there was this...A little vintage cabinet.
Oh my, do I love it.
Right away, my thought was to use it for my Idea-ology trinkets.  So after a little negotiation on the price, it was mine.  So, so happy.
(this was taken the night I brought it home)

I had to figure out how to store the metal pieces inside.  My husband offered to make inserts for the drawers but then we remembered what I had in the garage.  LOTS of little Configuration boxes leftover from Inspiration Unlimited Event last September.  Three boxes had been removed from each configurations book when we did the kit prep, so I had plenty to do the entire drawer unit. 
I used the catalog to organize the trinkets by findings, fasteners, etc
I ended up using 5 1/2 drawers.  Drawer 6 is currently being used for discontinued items that I still use all the time.
 Here are a few more shots...
(oh, how I love photo booth pictures!)


Oh happy day!...I have not found a piece I have loved this much since this one back in 2011.  Now they can sit side by side!

now carry on!
paula