Thursday, February 29, 2024

Colorblock Etcetera Tag

Hello Friends,

Lots of behind the scenes stuff going on around here but I wanted to share another fabric make here on the blog. This one is a simple one!

For the base of this project, I used:
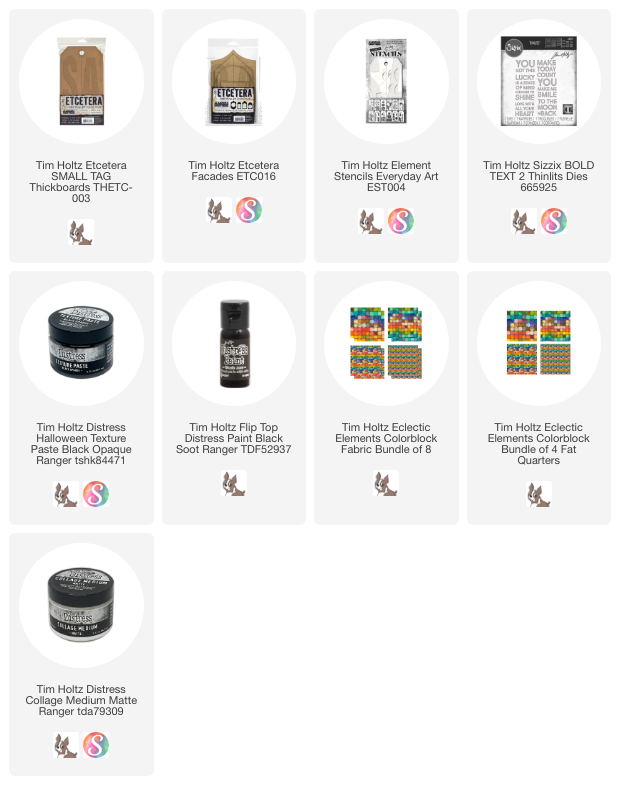
Etcetera Tag - small 
Etcetera Facade - both pieces of the "house" shape.
Element Stencils - Everyday Art
Texture Paste - Black Opaque
Distress Palette Knife
Black Paint (either Distress Black Soot or black acrylic)
I used the palette knife to spread black Texture Paste over the three hearts on the Stencil. Once the background (that would show) was covered in hearts, I set it aside to dry completely. I like that the heart stencil has three different sizes of hearts so you can add three at a time to the surface.
Once dry to the touch, I painted the entire background with black paint, then let that dry. To finish, I painted a layer of Collage Medium over the top to give it a more 'finished' look.
I always use a heavyweight interfacing ironed on the back of the fabric for stability. Interfacing also helps when you go to glue it to the surface, the glue does not seep through the cotton fabric. Heat n' Bond is a brand I like, you can find it in a package at Hobby Lobby and Walmart if you are interested.
Decide on what scale you want to use. I picked Tiled for the house and Mosaic for the roof. Once your interfacing is ironed on, you can cut the fabric to fit your shapes. If I am going to stitch (like I did on the roof) I sew the piece BEFORE I cut the shape. If any of the threads lift on the edges, I just dot them with Collage Medium.
The letters were cut from cardstock using Sizzix Bold Text 2. I cut the text twice and sandwiched them together to get thicker letters.
The heart at the top of the house was also cut from cardstock. I used the small heart on the Everyday Art stencil to trace the shape.
This is a great project for a winter afternoon. The sentiment is a great reminder to MAKE TODAY COUNT!
now carry on,
paula

Sunday, February 18, 2024

Colorblock Vignette Panel

Hello Friends!
What a fun weekend it has been, reading all the comments on the Colorblock projects! Clearly you like this colorful fabric line! Today I'm sharing the colorful Vignette Panel I created.

I painted the wood panel black and set it aside to dry while I worked on the fabric portion.
I used Colorblock 'Tiled' for the panel. The squares are about 1 x 1". I sewed the fabric to a piece of Warm and Natural, just stitching right down the lines between the squares.  Super easy to follow the lines!
The netting is vintage and I just laid it on the quilted fabric and stitched it with black thread (so the stitches would show). Then I added the Photomatic image, ephemera and the vintage hat pin (which was stuck right through the fabric). 
*I stitched and glued all the embellishments before I nailed the quilted fabric to the Vignette Panel. 
I also added a paper flag to the top of the pin that says, "to keep".

This was such a fun project and an easy one too. I love hand stitching so this really made me happy. Although now I wish I would have added some French Knots flowers!

If you missed the LIVE - be sure to watch to see ALL the Colorblock samples. Here is the link to Tim's blog where you can easily access the video.
now carry on,
paula

Saturday, February 17, 2024

Eclectic Elements COLORBLOCK fabric

Hello friends,

Colorblock fabric has been out since last fall, but we still wanted to celebrate the release of such cool fabric in the Eclectic Elements line from Freespirit. 
Today I am sharing a few images of the projects my sister, Patty and I made for the Live. Also included is some basic information about each project and if a pattern was used. I will be showcasing each project in the coming days, so you can see it up close and have more information on how it was made. Of course the best way to "see" each project is to watch the LIVE on YouTube with Tim. Once the LIVE is over, Tim will post the link on his blog so you can watch any time that works for you!

Projects by Patty
2. Slide-down Pencil Case - Tamara's Joy Sewing Channel on YouTube 
3. Faux-patchwork Pillow - 16 x 16" pillow form
Projects by Paula
1. idea-ology vignette panel (9 x 9")
2. Cards w/ fabric
3. Apron - I used an old apron I had on hand as my pattern.
4. Etcetera Tag w/ Etcetera Facades.
Colorblock comes in 4 scales
Canvas - largest scale 
Quilting Cotton - in three scales called Patchwork, Tiled, and Mosaic.
*Just for reference, the apron was made with Tiled w/ a front pocket made of Mosaic

I know Simon Says Stamp has a limited supply of Colorblock cut pieces. You can currently buy it in two cut forms:
1. Four Fat quarters (one of each print). Each Fat Quarter is18 x 21" 
2. Bundle of eight 10 x 10" squares (2 squares of each print)

If you are looking for cut yardage - just do a google search and multiple Etsy sellers will pop up, as well as Fat Quarter Shop (online retailer).

So there you have it. 
Like I said, I will be back shortly to share all the project shown here today.

now carry on,
paula

Friday, February 16, 2024

Nature Inspired Folio

Hello friends,

I'm grateful to be here today sharing the nature filled journal I made using the newest and last Distress color, Scorched Timber! I didn't want to make a completely brown journal cover so I started with what you might guess was a peach color (but you would be wrong)...I started with Kitsch Flamingo, spraying then wiping away the spray pattern. I dried it, then added added Antique Linen.  Back and forth I went, until the cover was covered.  NOTE: Because the Accordion Folio is made with Mixed Media paper, it has a bit of yellow in it, so the pink turns a bit peach. 
Once the cover was dry, I used a stamp set that was intended for Halloween called, The Obscure. I loved the sorta of weedy plant that is part of that set. I used the Scorched Timber Oxide pad to ink the stamp, then lightly spritzed the stamp with water before stamping the cover.  I repeated the stamping process until the cover was covered with the image.

The Obscure
*I did not use the root end of the stamp, just the weedy branches
Here you can see the Folio flipped over (cover is on the right in this photo) so you can see all the stamping. When I stamped the flap, I masked off the center portion of the book so the image did not go onto the back cover.  *Remember the flap flips up into the book, so you have to stamp up-side down.
The wrap/closure was made with a piece of vintage lace - it just ties closed and you can slip it up and off the Folio without untying it, if you don't want to.
When you open the Folio, there is a pocket on the left side with three cards.
To create the three cards to go in the pocket, cut three Distress Mixed Media Heavystock pieces (3.25 x 5.5").  I chose a background stamp from the set, 'Tiny Prints', to stamp the ditsy print with Scorched Timber Oxide ink. 
Once the ink was dry, I added the sayings I created on my computer. I printed the sayings on vintage typing paper (onion skin) so you can see the print behind the words. As you can see, I stitched the paper to secure it to each card so no glue was needed.
Little snippets of ephemera were added to each with a staple, glue or a Mini Paper Clip.
I used paper from Backdrops 4 (the neutral pack) to cover the inside of the Folio. It a challenge to decide each time the best way to cover the 'gusset' - the narrow portion on either side of the center.  This time I decided to use 'Sticky Back Canvas' tape from Dina Wakley.  The tape comes in a solid white, so sprayed it with Antique Linen Distress Spray, dried it with a heat tool, then stamped it with the Tiny Prints image (Scorched Timber Oxide ink). I believe the tape is 1 1/2" wide on the roll, so I just cut it to size to fit the gussets. Worked like a charm.
The center of the Folio has a flip up portion. I kept it very simple with more stamping and a little bit of ephemera stapled on. 
I like that from this view you are given just a glimpse of whats to unfold before you. It shows a little bit of everything.

The faux stitching on the card at the bottom (meaning I stitched only the card, then glued it to the flap) balances out the ephemera on the left. I left the strings long because that just makes me happy.

All the inking on ephemera has been done by pressing Gathered Twigs Distress ink onto my glass mat, then spritzing the ink with water to create a puddle. I wipe a thin layer of collage medium over the ephemera then dip the ephemera into the ink. I go back and forth between the ink puddle and drying with the heat tool until I am satisfied.  
The ephemera used in the Folio is from the Organic Layers pack. So many great flowers, birds, and leaves to choose from!
Stamping was done using Scorched Timber Oxide ink + the stamps, Distress Damask on the right and Media Marks 1 on the left and backside (don't you just love that loop-d-loop? It was a stamp image I had never used before).
Label from Field Notes Ephemera Pack and the Snippets pack Curator, that has about a million darling little labels like this blue one here.
The circle was drawn with a Stabilo pencil and then tapped with water to make the pencil lines wick out.
The palette background paper is from the Backdrops 4 pack.  Combined with the dragonfly from the Organic Layers pack, some vintage netting, Clipping Stickers and some stitching...well. thats just magical.

And the last section of the accordion is the bird and nest.  Repeating themes, but with similar elements makes for a cohesive message throughout. I love how the bold stamping in the background really adds to the overall look.  Layers, layers, layers...thats the key.
The last pocket I created on the right side has more of the palette paper from the Backdrops 4 pack. It fit perfectly so I had to use it! Stitching added.
I added some vintage lace that you can see when the cards are pulled.
And a few more elements to add to the pocket.
I dyed the string with Scorched Timber too!
Well, I hope you enjoyed the walk-through of my Folio. I love the nature theme of the folio which came together so easily because of the Organic Layers pack.

Thanks for stopping by today!
Now carry on,
paula