Hi Everyone!
This month is almost over (
can you believe that?) and so is STAMPtember over at
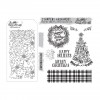
Simon Says Stamp! I made a card using the exclusive Tim Holtz stamp/stencil set created for SSS STAMPtember celebration! The stamp has 8 images and an exclusive stencil which works perfectly with the stamps. Follow along and I'll show you what I made...
I started with a piece of Distress Watercolor Cardstock. I stamped the tree image with Distress Embossing Ink and heat set it with white Embossing Powder (
hard to show that step since it's all white!)
Once the image was cooled, I used a Detailer Waterbrush to color the over the image with Distress Ink and water. I used Fossilized Amber for the star and Bundled Sage, Mowed Lawn and Pine Needles for the tree.
Again, this step may be hard to see, but I masked the tree image and used Texture Paste Transparent Gloss through the exclusive SSS stencil to add snow to the top portion of the card.
A light layer of Tumbled Glass Distress Ink and the snow starts to show up.
It took a couple washes of color to create the look of snow I wanted. Just a perfect winter background.
I added the tree image to the inside of a folding card by stitching around the edge.
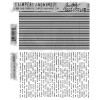
For the outside, I picked a few colors of green to pounce over the plaid image, then lightly spritzed it with water.
This allowed me to create a "watercolor" plaid band for the front of the fold up card.
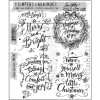
I thought the Merry Christmas phrase would work here (its the perfect size) but it wasn't until I identified a Sizzix shape for a foundation that I knew what to do.
I cut one of the Stitched Ovals from Watercolor Cardstock then embossed the Merry Christmas with gold embossing powder.
So the finished card front looks like this...
Then you open it up to my favorite tree image!
Hope you like the card - I love the ease of water coloring over the embossed image.
Tim has a post up on his blog comparing Christmas stamp images and he shows
MANY more samples using this stamp/stencil set (
click here).
Definitely worth your time just for the holiday inspiration!
now carry on,
paula