Tuesday, February 23, 2016

Tissue Wrap Experimentation

Hi everyone!  I'm here sharing a fun project today based on one I did previously.  I wanted to translate the basic idea of first project to a smaller format, that being the new Framed Panel. 

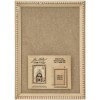
I used Collage Medium to adhere Correspondence paper to the back of the panel (remember the Framed Panel comes in two pieces) and let it dry. Collage Medium has a very short drying window - perfect for small collages like this one. 

When glancing at this piece you might think that I stamped all the black images, like the map at the top or the word airmail.  Well, the answer is yes, I did stamp all the images.  But what you probably wouldn’t have figured out is that I stamped the images on the new blank Tissue Wrap.  It is a translucent paper that can be adhered to a surface using Collage Medium or Multi Medium.
So why would I want to do that when I could have just stamped the images directly?  Let me explain.
  
When I’m working on a mixed media piece, I’m usually using some kind of glue like Collage Medium or Multi Medium.  If you have ever tried stamping directly on the surface it can be challenge to get a good image in one try compounded by the dry time even when you have chosen the right ink.  Using the Tissue Wrap gives piece of mind because you know whether or not the image is good before you adhere it.  I have found that using it over a light printed background works best to give the illusion that it is a stamped image.  I added all the images using Collage Medium (over and under each image) rubbing with my fingertip to, for lack of a better term, “embed” the image.

As a little experiment, I decided to try printing directly on the Tissue Wrap.  I have always wanted to be able to add personal quotes to art pieces.
Here is how I did it...Use a word processing program to type and ultimately print your chosen words (must be a laser copy not an ink jet).   My quote for this piece was, “we are all in this together”.  Once you have your printed document, use washi tape or blue painters tape to adhere the Tissue Wrap over the words.  It does not have to be straight as you will eventually cut the words out.  Now just send the document back through the printer so it prints in the same place as the first time.  Just that easy.
 
The rest of the piece was finished with Photobooth pictures, Remnant Rubs and Vial Labels.   The Photobooth photos were chosen because they represent a child, a teenager, and a woman.  All stages of life.  I tried my best to match the words found on each picture with each stage of life shown.

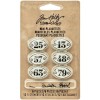
The last step was to hammer in the tacks and add the red string.  I have always loved the idea of the red string, first using it in a journal project back in 2007.  It continues to appear in my work as I love the idea of connecting images or thoughts the way past, present and future work together to create our life. 
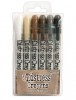
I also used the Walnut Stain Distress Crayon to distress around each photo.  I found it very easy to smudge the crayon since the paper was coated with Collage Medium. 

It was nice to share my thoughts about this piece.  I hope you try the new Tissue Wrap.  It was one of my favorite products of the 2016 idea-ology release, hope you can see why!
now carry on,
paula 


Tuesday, February 9, 2016

Yours Always

Hi Everyone! Just a quick post today sharing a card I made for the upcoming holiday (I admit I have a wedding to go to on Saturday and this card would fit that occasion too!)

I cut a piece of Ranger Mixed Media cardstock for the card front.  I suppose it might have been a bit easier to color the roses if I had used Watercolor paper but I'm still amazed at the depth of color you can get on the Mixed Media paper.
I used a Mini Stencil from set #6 and Antique Linen Distress ink for the background.  The smaller size of the Mini Stencils makes the scale of the "love" words just perfect for a card front.
I stamped the image of the rose with Archival Jet Black over the the inked background.  I think this new set CMS255 Lady Rose is spectacular!  The roses are perfect for coloring!

Tuesday, February 2, 2016

KEEP

Hi again.
I'm here today with a project using Fragments + a few new products from the CHA release.  My goal was to show how you can incorporate personal information into a project.  Now I know I have talked about Fragments before so I won't go into the how-to details I just hope you'll bear with me while I talk about some of the nuances of this piece.  (oh and there is a link below for the, "I need a Fragment refresh").
 I stated with the new Framed Panel.
If you are a follower of this blog, you know I use flat panels all the time for artwork.  But they never quite looked finished because there is no frame....and much to my dismay, there are no elves in my garage making me frames (or even cleaning my garage for that matter).

Problem solved.

The Framed Panel comes with a frame so when you're done with your artwork you can simple add the frame over the top.  EASY as that.
I started by adding linen from the Textile Surfaces pack onto the panel.  It does take more than one piece of linen to cover the background, although you can barely see the seam.  The Textile Surfaces are self-adhesive so there is no worry that glue might seep through the fabric.
I used a photo from the Photobooth strips but you could use a copy of a family photo if you want to make this more personal.