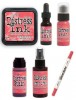
Abandoned Coral arrived at my doorstep today.
I was supposed to be working on a different project.
A project with a deadline.
Ah, maybe the word
"abandoned" is appropriate since that what I did once I cut the box open and saw what was inside.
Grab the apron, turn up the music and go. No thinking, just go.
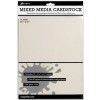
I also wanted to test out Rangers new Mixed Media Cardstock for the project I have in mind. Thinner than the Ranger Cardstock I usually use for projects, but still sturdy for multiple layers of wet mediums. Right off the bat, I like that it is a neutral color, rather than the more yellow cardstock.
I cut a piece of Mixed Media cardstock 8 1/2 x 7 1/2".
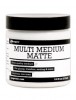
Then I spread Multi Medium in a thin layer over the cardstock (
the best way to get the Multi Medium really thin is to use your hands).
I cut off a piece of Tissue Wrap and covered the cardstock, pressing it into place. I did not use a brayer or bone folder but your could.
I rolled the excess Tissue Wrap onto the back side.
Then added a few pieces to cover the rest of the paper. Tissue Wrap is very forgiving and in the end you will never see the seams.
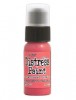
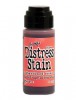
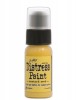
Once my cover was dry, I used three colors of Distress Paint over the surface: Cracked Pistachio, Abandoned Coral and Mustard Seed. Abandoned Coral is the new Distress color for February and it just can't get any better than this. Seriously one of my favorite colors of the Distress line.
Once I added water and worked the colors around, it looked like this...see what I mean? Abandoned Coral is stunning.
Still in testing mode - I cut a couple more pieces of cardstock. One I
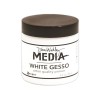
left plain, the other I covered in my favorite White Gesso. I wanted to see how this new surface would hold up to paint and stain, both with and without Gesso.
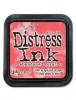
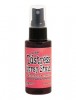
First up, Distress Stain in Mustard Seed and Abandoned Coral. The stain reacts just the same on the Mixed Media cardstock as it does on the heavier weight. I had no problem with color soaking through and I found it dried quickly with the Heat It tool and with very little warping.
As for the paper I added the coat of Gesso to, the color is just as bright but it takes on a different look and feel. It almost has a slick feel (because of the gesso) and the colors seem more opaque. I was surprised with the brush marks, but I think that comes from how I first added the Gesso to the paper under the color. Either way, I think I will do more experimentation because I love the way the paper with the Gesso feels to the touch.
I gathered the test papers together (and a few extra plain pieces) for assembly.
I layered them over the cover and held them in place for sewing with binder clips. I also used a ruler and pencil to mark the center fold before going to the machine.
I increased the stitch size so the paper would not be cut in the sewing process.
Gently fold all the layers to the right.
Once the pages were secure, I ripped the edge off each page so they fit inside the cover (
don't throw away the extra pieces).
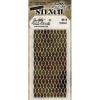
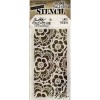
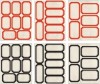
Using Layering Stencils and Distress Ink in Abandoned Coral, Cracked Pistachio and Mustard Seed I added some pattern to the blank pages.
Now the little pieces I ripped off?
Well, I just sewed them back on (
in different places of course). And yes, I did just fold the book pages back while sewing each page.
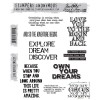
Next up, rubber stamps.
I went with the set called Life Quotes. The set has nine quotes in different fonts. I wanted to show that they can all work together in one book.
So I chose little Instagrams of places I've been (
and not even recently) and put them together with the great quotes.
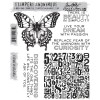
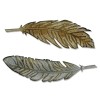
I also stamped the big butterfly from the Perspective set (
stamped on Watercolor paper).
Then colored it with Distress Ink using my Detail Waterbrush. Once it was dry, I cut it out to go into the book.
Like this.
I needed a good word for the cover. I thought Journey was appropriate since all the Instagrams are travel pictures (
I admit I do have a love/hate relationship with this particular word- WAY overused), but I'm over that now...okay, at least for today I am! I think it was this Thinlits die that convinced me, lol. I love it.
Added to the cover along with a Small Talk sticker. One of my very favorite (
and most used) CHA products.
How so I keep it all together?
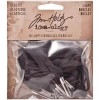
An Elastic Loop. Just punch a hole at the back and slip it in.
Boom.
Just like that, your done.
Yes, I could have spent more time adding more embellishments but the light of day is almost gone so I will be satisfied for today. For the record, I need some numbers on the inside...always need numbers.
Here's a look at the inside...
I left two pages blank for a trip I am taking in April. I'm calling it, "being prepared". And I figure once those are in, I can add the numbers.
Can I tell you how much I love Abandoned Coral? or that new Ranger Mixed Media paper? I only have one package but I can tell you right now, I'll be ordering more!
now carry on (
even if you don't have any Abandoned Coral),
paula
(
and if anyone was wondering, the featured nail polish today is Essie - Chinchilly)