Hello friends,
I would call the project I am sharing today, experimental! At one point in the process something out of the ordinary happened and I just decided to just keep going. Nearing the end, a few ideas popped into my head that made everything come together (
that made me happy) and made me feel like I had made the right decision to move forward. I hope you enjoy the process of my Perspective Butterfly Panel!
I thought I'd start by showing the ingredients to the background since they are not pictured in the step-out photos. Distress Paint and Distress Embossing Powder are the key ingredients to the transformation of the Embossed Watercolor Cardstock. I used the 3D embossing folder Entangled, that was released earlier this year, to make the impression. These A5 folders are large and fit perfectly on a small rectangle Etcetera Panel. With that being said, lets get started!
Paint the Watercolor Cardstock with Distress Paint. I painted in bands of color, but you can paint however you wish.
Once the paint was dry, I randomly pressed Distress Embossing Ink over the raised pattern (as best I could). I sprinkled Embossing Glaze over the pattern with my fingers, then used an embossing tool to melt the glaze (it melts fast so watch it carefully).
Now a bit of crazy. I painted over the entire surface with Black Soot Distress Paint. You can see how some of the embossed portions resisted the black paint.
Then I laid a paper towel over the surface and pressed down to remove some of the paint.
And this is the result (
that is wasn't expecting).
The paper towel pattern transferred to the surface. I have had that happen before, but the pattern usually disappears with ink...but with paint, it stayed. Hummm. Do I spray it with water? Wipe it all away and start over? What to do when things go awry...that's always the question!
Well, I decided to go with the flow and finish cleaning up the black paint from the edges then setting it aside. What you can't really distinguish in the photo is how much the Embossing Glaze added to the overall look. I'm glad I added that step so I could get more variance to the individual colors of paint.
Once dry, I sanded the edges of the panel and added a layer of Collage Medium to give it a finished look before moving on.
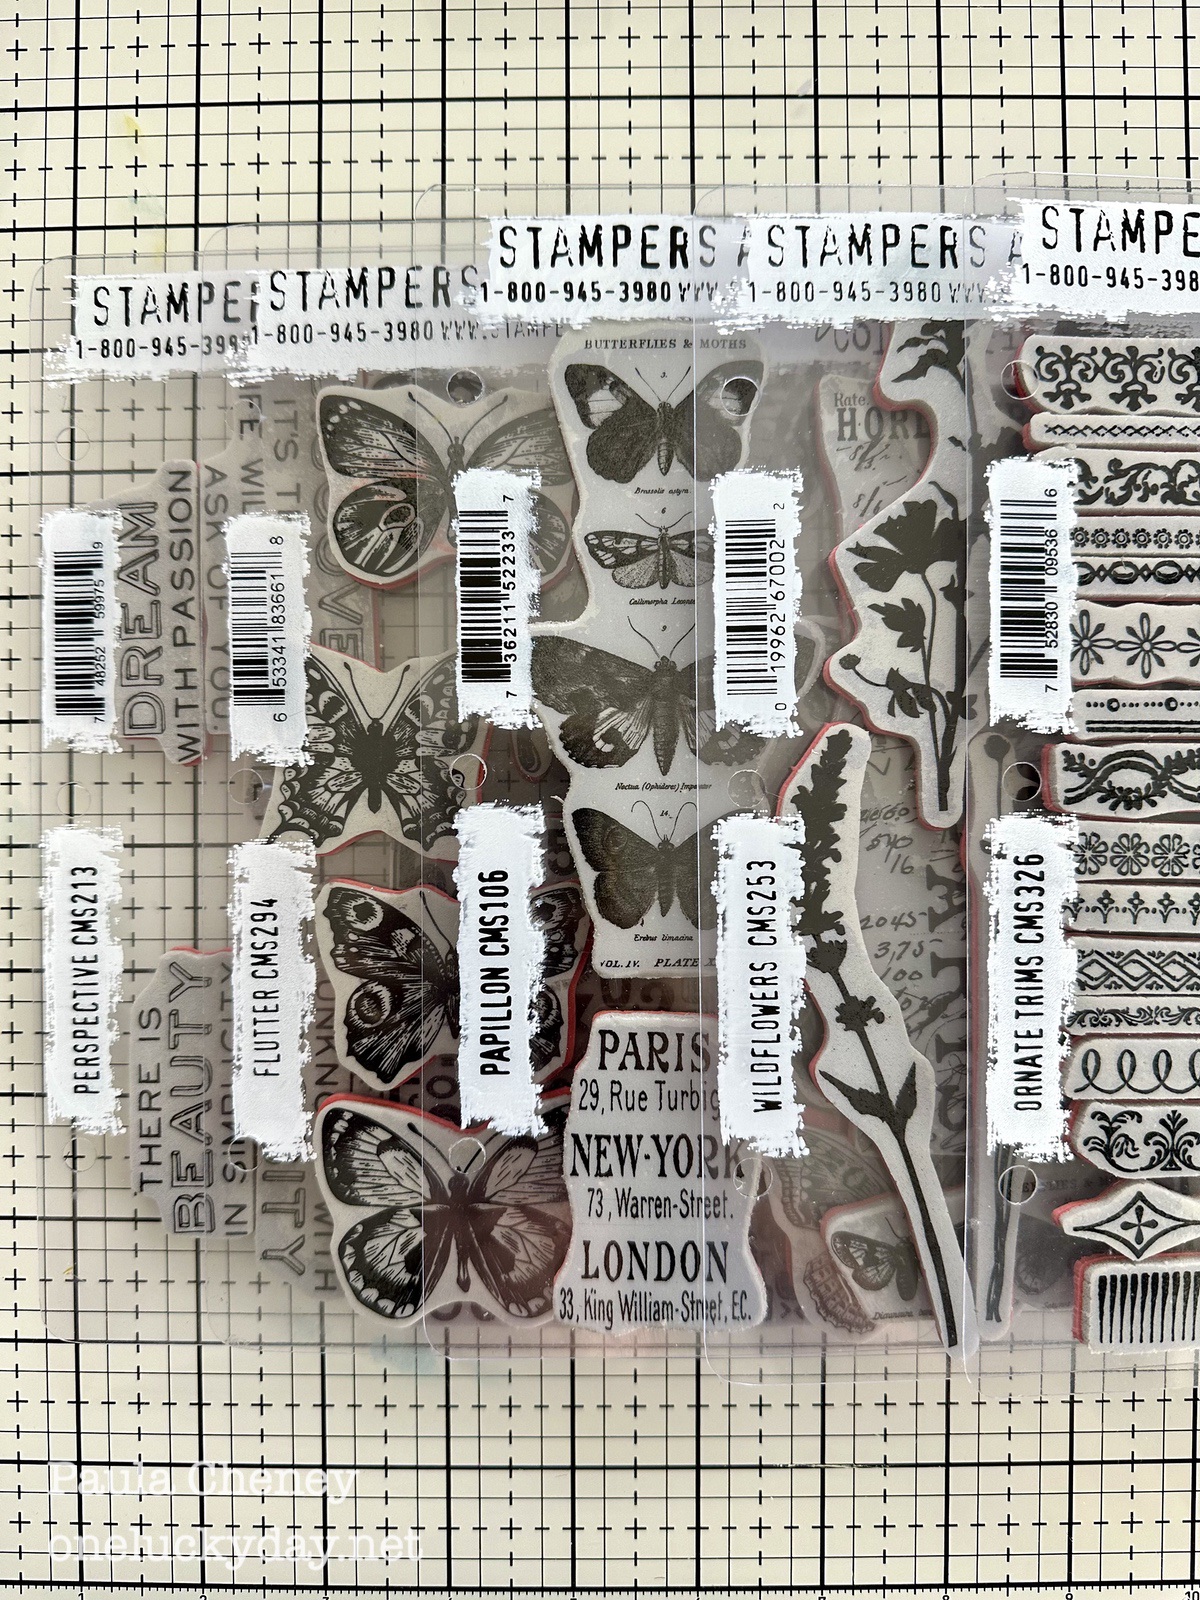
I'm using Perspective Butterfly CMS213 stamp and the matching wafer die from Simon. The Perspective die set is so good because not only does it cut out the big butterfly, it also cuts the four sentiments. Truth be told, I could possibly cut out a butterfly, but I would never, ever attempt the sentiments. The dies really make this stamp set even more valuable to me.
I colored the butterfly with a Detailer Water Brush and Distress Inks. Then put it in a Splat Box and sprayed the butterfly with Resist Spray which gives it a beautifully shiny surface (
photos do not show how good it looks in person).
Another thing that is hard to see in last photo is the die cut center of the butterfly. If you stamp the butterfly a second time, you can use the "body" die to cut out a second body and add it over the first. I used a THIN 3D foam square so it is raised for dimension.
Okay, the butterfly is done so lets work on the backing. Stay with me...this is a layering process!
I used two round transparencies from the Transparent Layers pack. The top transparency has been spun around so the flowers are at the top. You will also need about 10 standard 3D foam squares for the next steps.
Add five squares to the transparency (
notice they are in a butterfly configuration?).
Now add the transparency with the daisies to the one with the flowers (
now you have flowers all the way around the circle). Don't worry, the foam squares in between the transparencies will be covered up by the butterfly.
Add more 3D foam squares to the back of the butterfly, then adhere to the transparency sandwich.
So here is what it should look like from the side...
butterfly
3D foam squares
transparency
3D foam squares
transparency
Now cut a circle (
I used a circle die I have had forever) from metallic cardstock. This time I used THIN foam squares to add the gold metallic circle.
The metallic gives off a great glow under the transparent layers.
I used my clear Tonic Media ruler to find the center of the Etcetera Panel and placed my sentiment 1" from the bottom of the panel. This clear ruler comes in very handy!
I covered the sentiment with a post it note, then splattered white paint over the surface. That added a pop of bright color that I really like. Even though I was late to think to do this, it was worth it. Post it notes come in very handy in the craft room!
Now add the layered circle to the center. Again, the white splatter of paint helped to tie everything together!
I am happy I kept going on this piece because I love how it turned out in the end. But look, it took all the way to the splatter part to make it work for me. And the transparency idea didn't come till I finished the butterfly and then let it sit for about 3 days. I don't know what made me think of it, but I love that layered transparent look! I hope you do too!
Now carry on!
paula