Hello Friends,
We were introduced today to new packaging for the Distress Textures. I have been waiting for label on the top of the lids for years!! I cannot tell you how happy this makes me!
There are 11 products in total that have been repackaged for continuity. Tim did an in depth YouTube Live on all the products, new and old. You can watch the replay, or just take a look at
his blog for all the still photos of the things he created during the live.
Grit Paste Opaque
Grit Paste Translucent
Texture Paste Opaque
Texture Paste Translucent
Crackle Paste Opaque
Crackle Paste Translucent
Rock Candy (clear glitter)
Mica Flakes
Collage Medium Matt
Frosted Crystal
Crackle Paint Translucent
Today, my focus is on the Texture Past Translucent. I created a project using Texture Paste Translucent, because it was a product I had not used before. It can be used in a variety of ways and it can be tinted (Tim shows how to do this in the YouTube video), but I used it straight out of the jar. Follow along and I'll show you what I did to get this vintage effect in the background of this Mini Etcetera Tag.
1. Cover your substrate with paper (
I used Backdrops) using Collage Medium to adhere the paper to the tag as well as seal the surface. Dry with heat tool.
2. Lay one or more stencils over the surface and drag Texture Paste Translucent over the top using a small palette knife. The paste is nice and thick so it will not seep under the stencil.
3. Wash the stencils and palette knife right away (
or place in a water bath) or the paste will adhere to your tools. Set tag aside to dry for at least 30 minutes.
4. Once paste is dry it will be clear and solid.
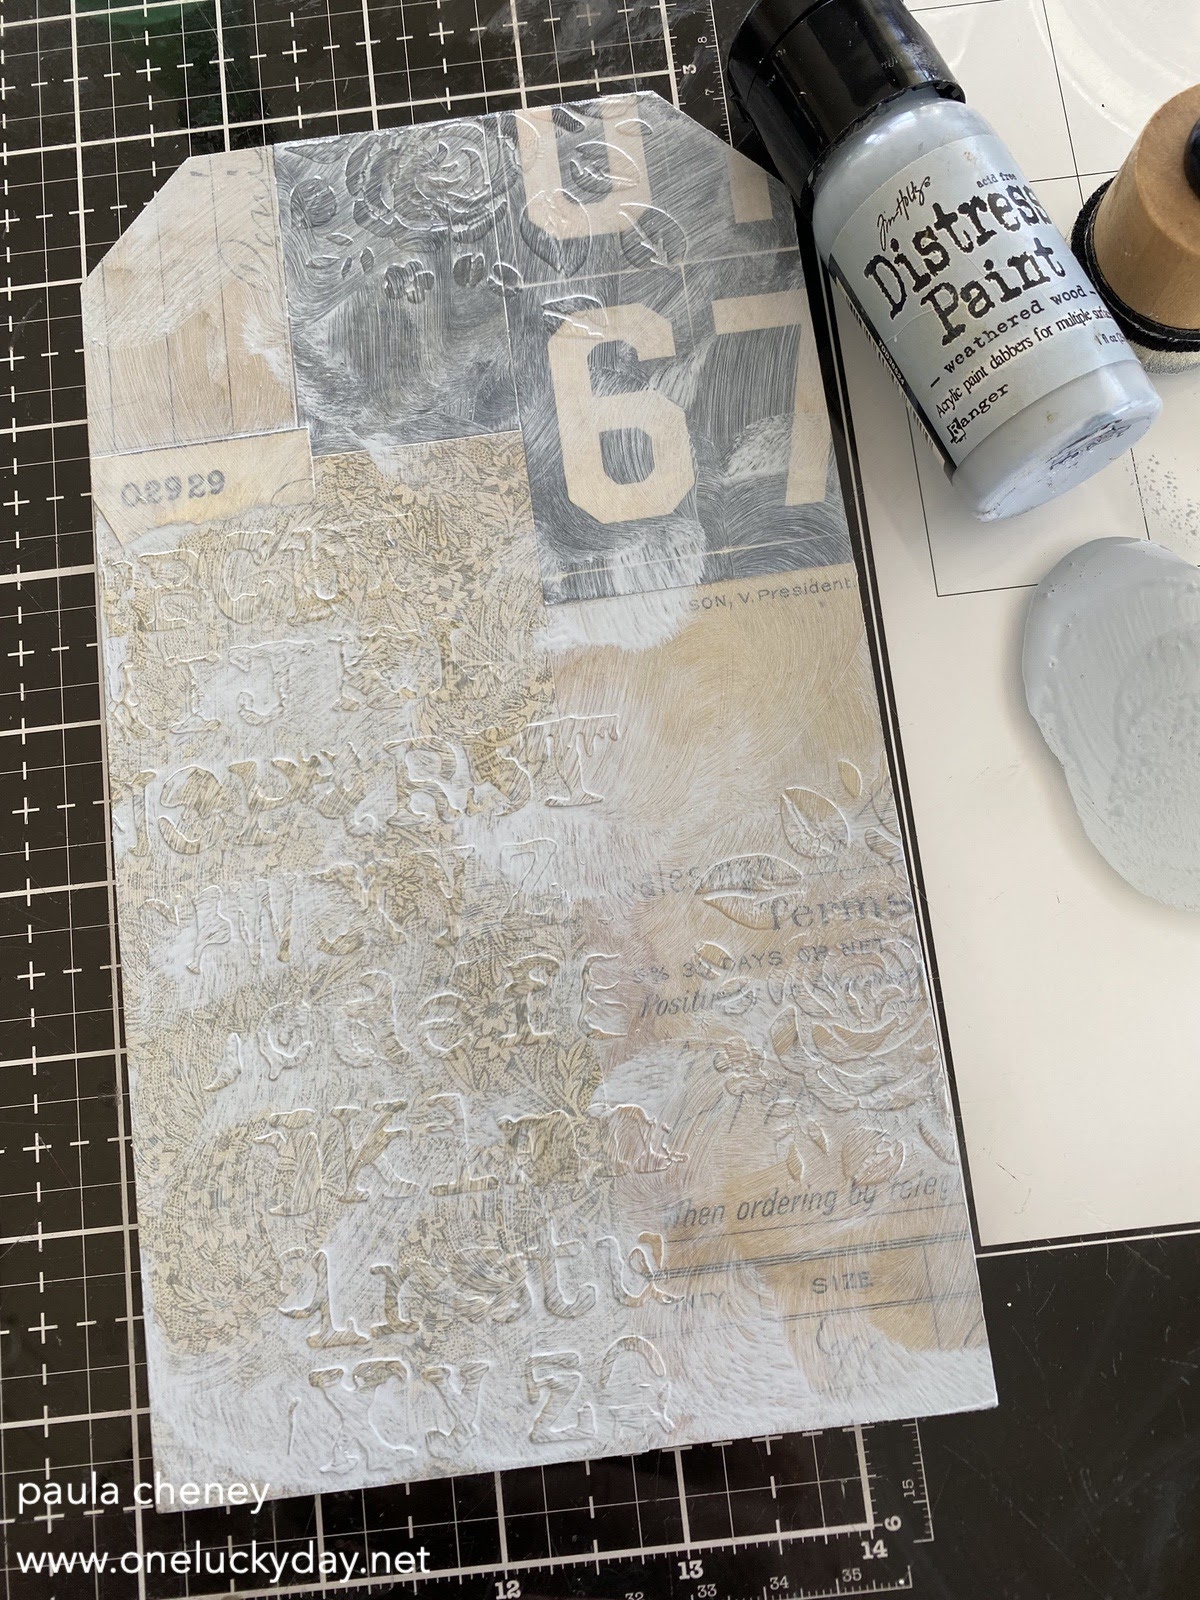
5. Working quickly, use a Blending Tool with a clean foam pad to add Distress Paint to the surface. I put the paint on the glass mat and picked it up with the tool so it was a nice thin coat.
6. You could leave as is or wipe away some of the open space with a wet wipe (but not the part where the translucent paste is). I did this to reveal some of the paper below. Set aside to dry.
PLEASE NOTE:
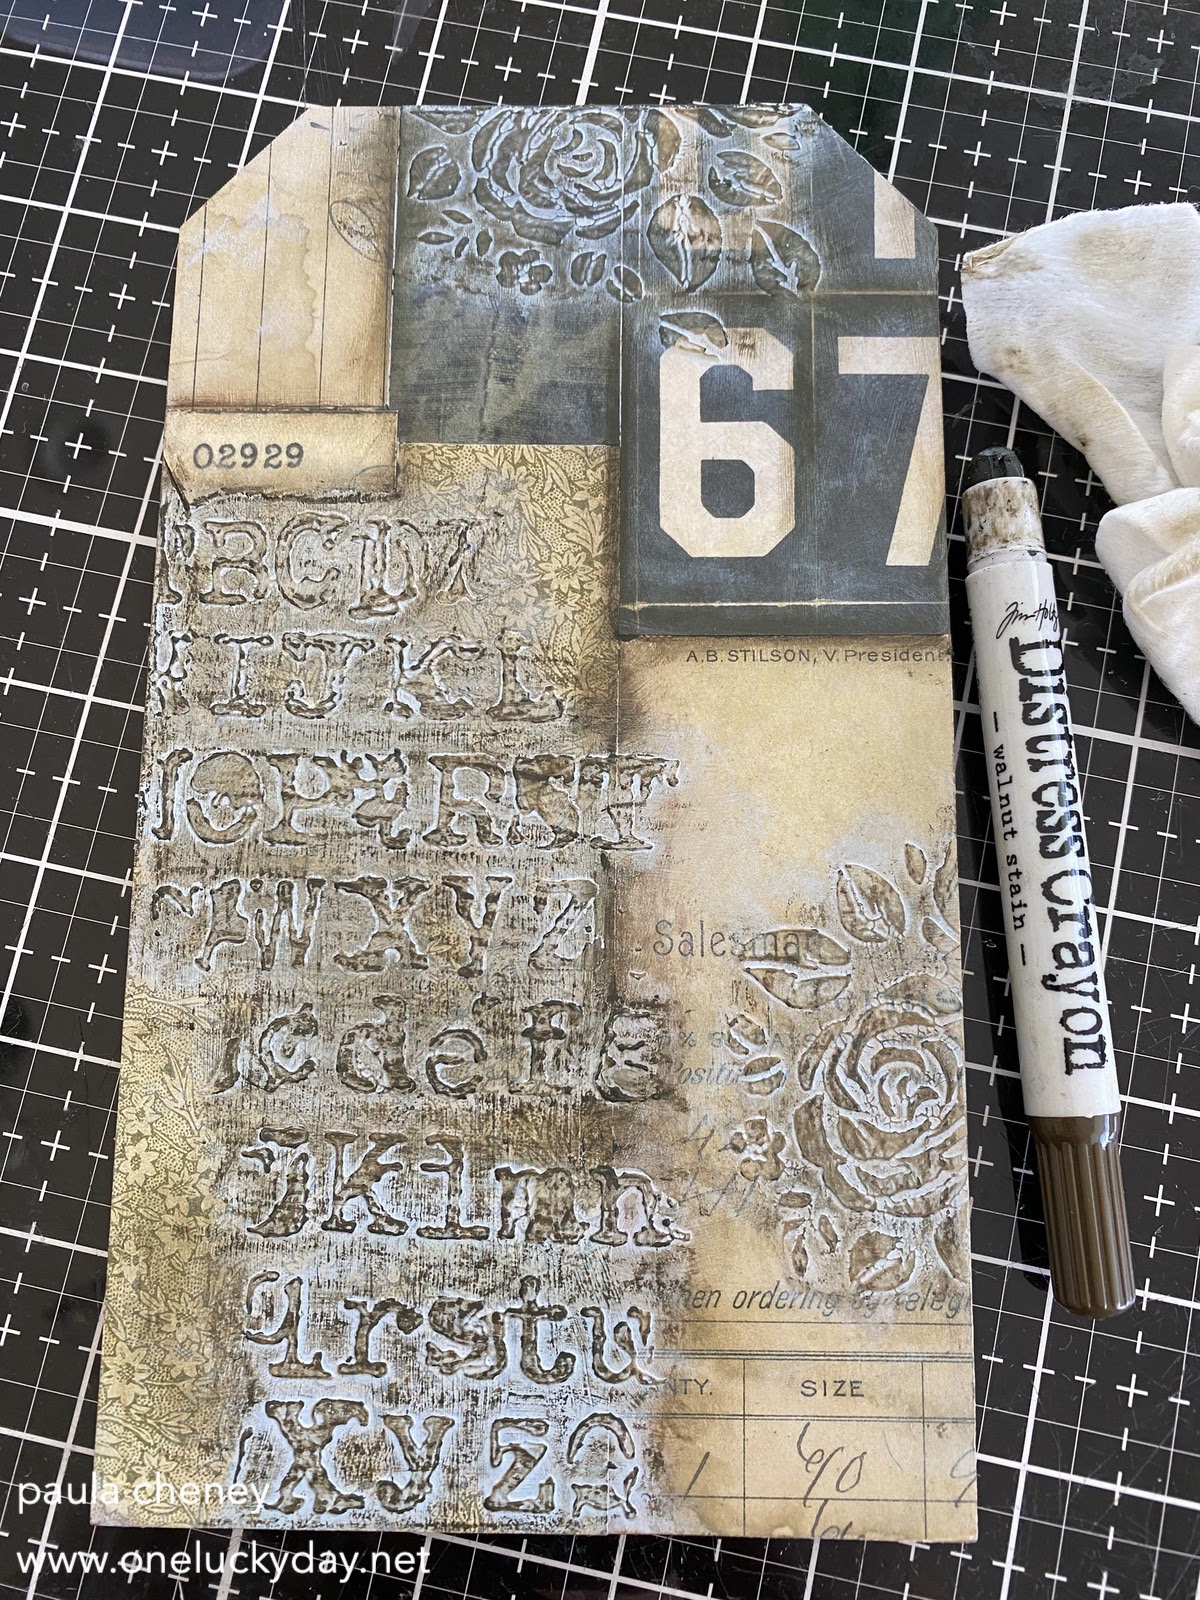
because I used Collage Medium to seal the surface below, Distress Ink will never dry over the surface. Distress Paint is the one Distress product that dries permanently so it was the best solution to adding the layers of depth that I wanted.7. Next, use a Distress Crayon to color the raised Translucent areas. I scribbled right over the raised images, then rubbed with my finger tip just around the outside edges.
8. I also used Distress Crayons to add color to the floral images. Again, very easy, just scribble it directly on the raised texture.
9. Use a Distress Splatter Brush to splatter Picket Fence Distress Paint over the tag...something about the white over the brown makes this my favorite part. Set aside to dry.
11. Color a piece of watercolor cardstock with Stormy Sky and Speckled Egg Spray Stain. I made more just for later use, you only need one for this project.
11. I used the Sizzix 3D 'Woven' folder to create the texture on the watercolor cardstock. Love the heavy woven texture!
12. Rub any brown Distress Ink directly over the surface texture.
13. Spritz it with water and let is wick out. Dry with a heat tool.
14. Die cut words to use as a sentiment. I actually die cut the sentiment twice and layered together to get a thicker letter that would stand out. I love how the texture ends up looking like rust spots.
15. The words and other simple embellishments were added to the tag with Collage Medium and foam squares (photobooth). The red 605 strip came from the new idea-ology Snippets.
I just loved the background and didn't want to cover too much of it up!
It will be interesting to see what others do with the Transparent Texture Paste. I love my grungy look but maybe tinting the paste a color is more your jam. I know I will be trying that technique out very soon.
now carry on,
paula