
Hello Friends,
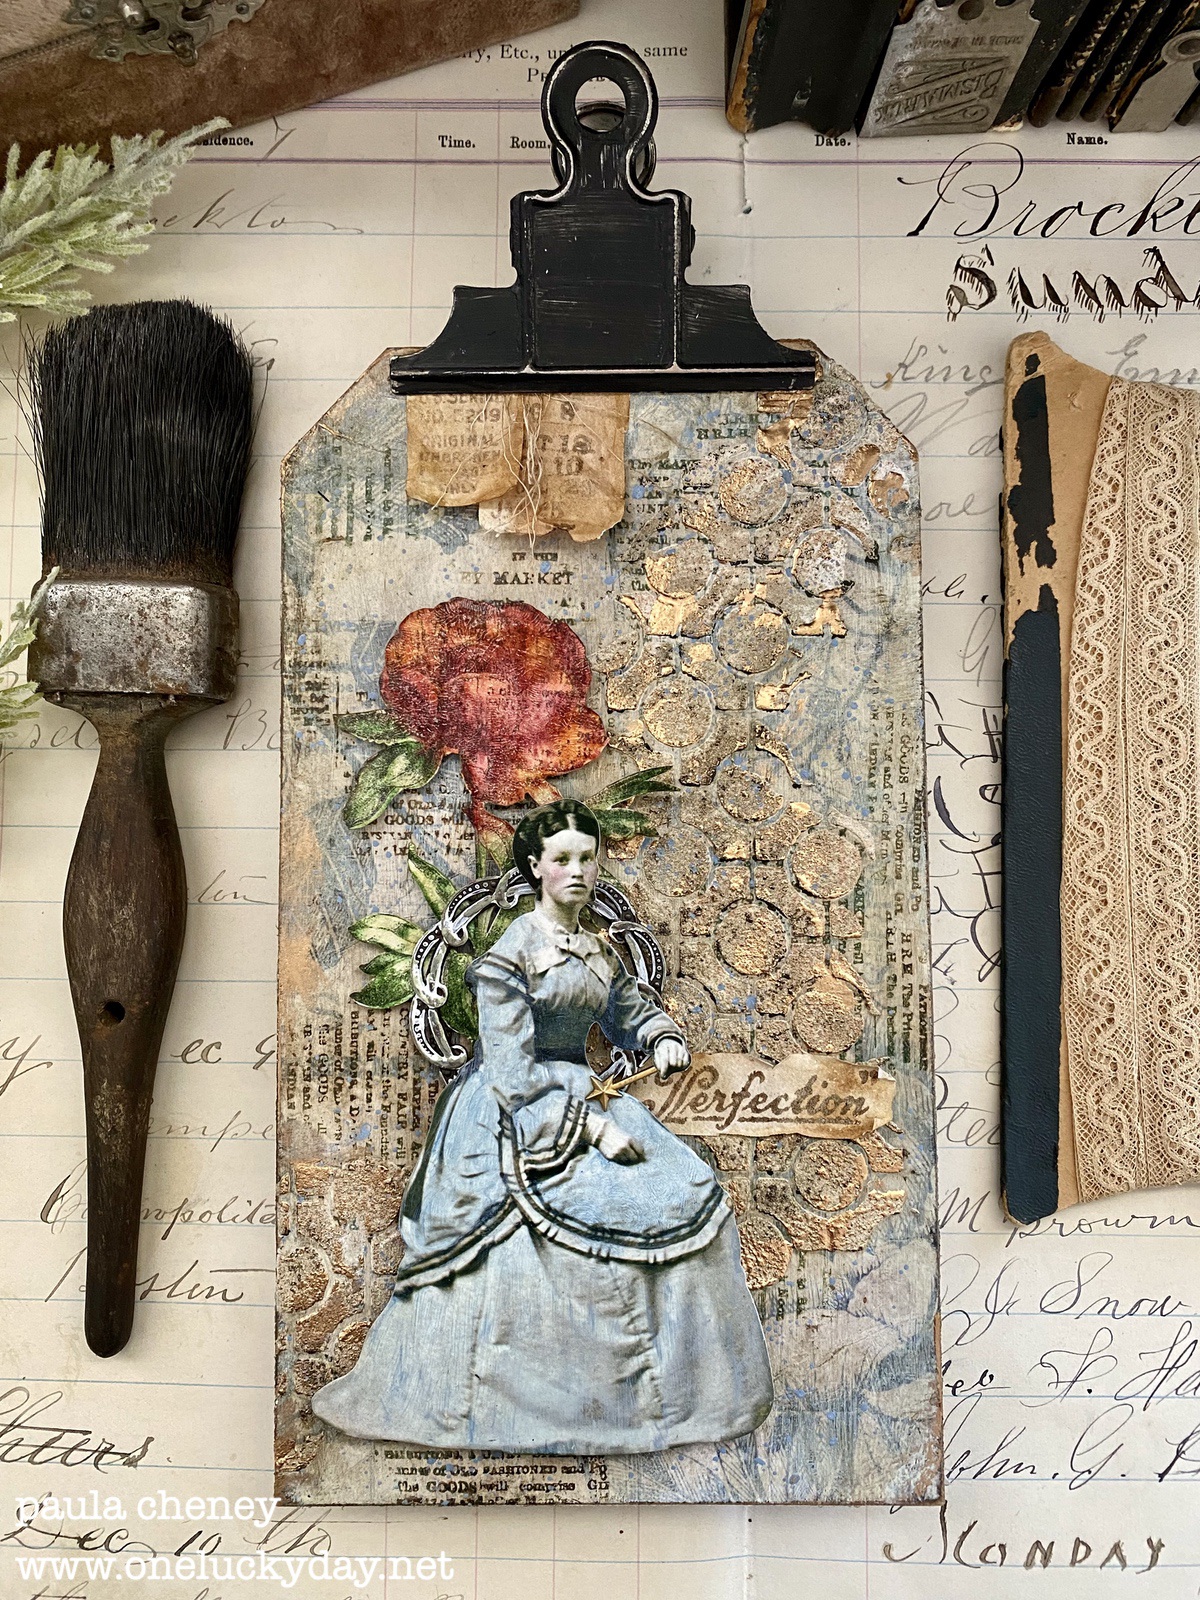
I'm excited to share this Mini Etcetera Tag I created for the Stampers Anonymous Live. The new stamps and stencils from Tim and Stampers Anonymous worked so well to create this vintage look. Let me show you exactly how I created that good grungy layered background.


* and you know me...no diagonal stamping!

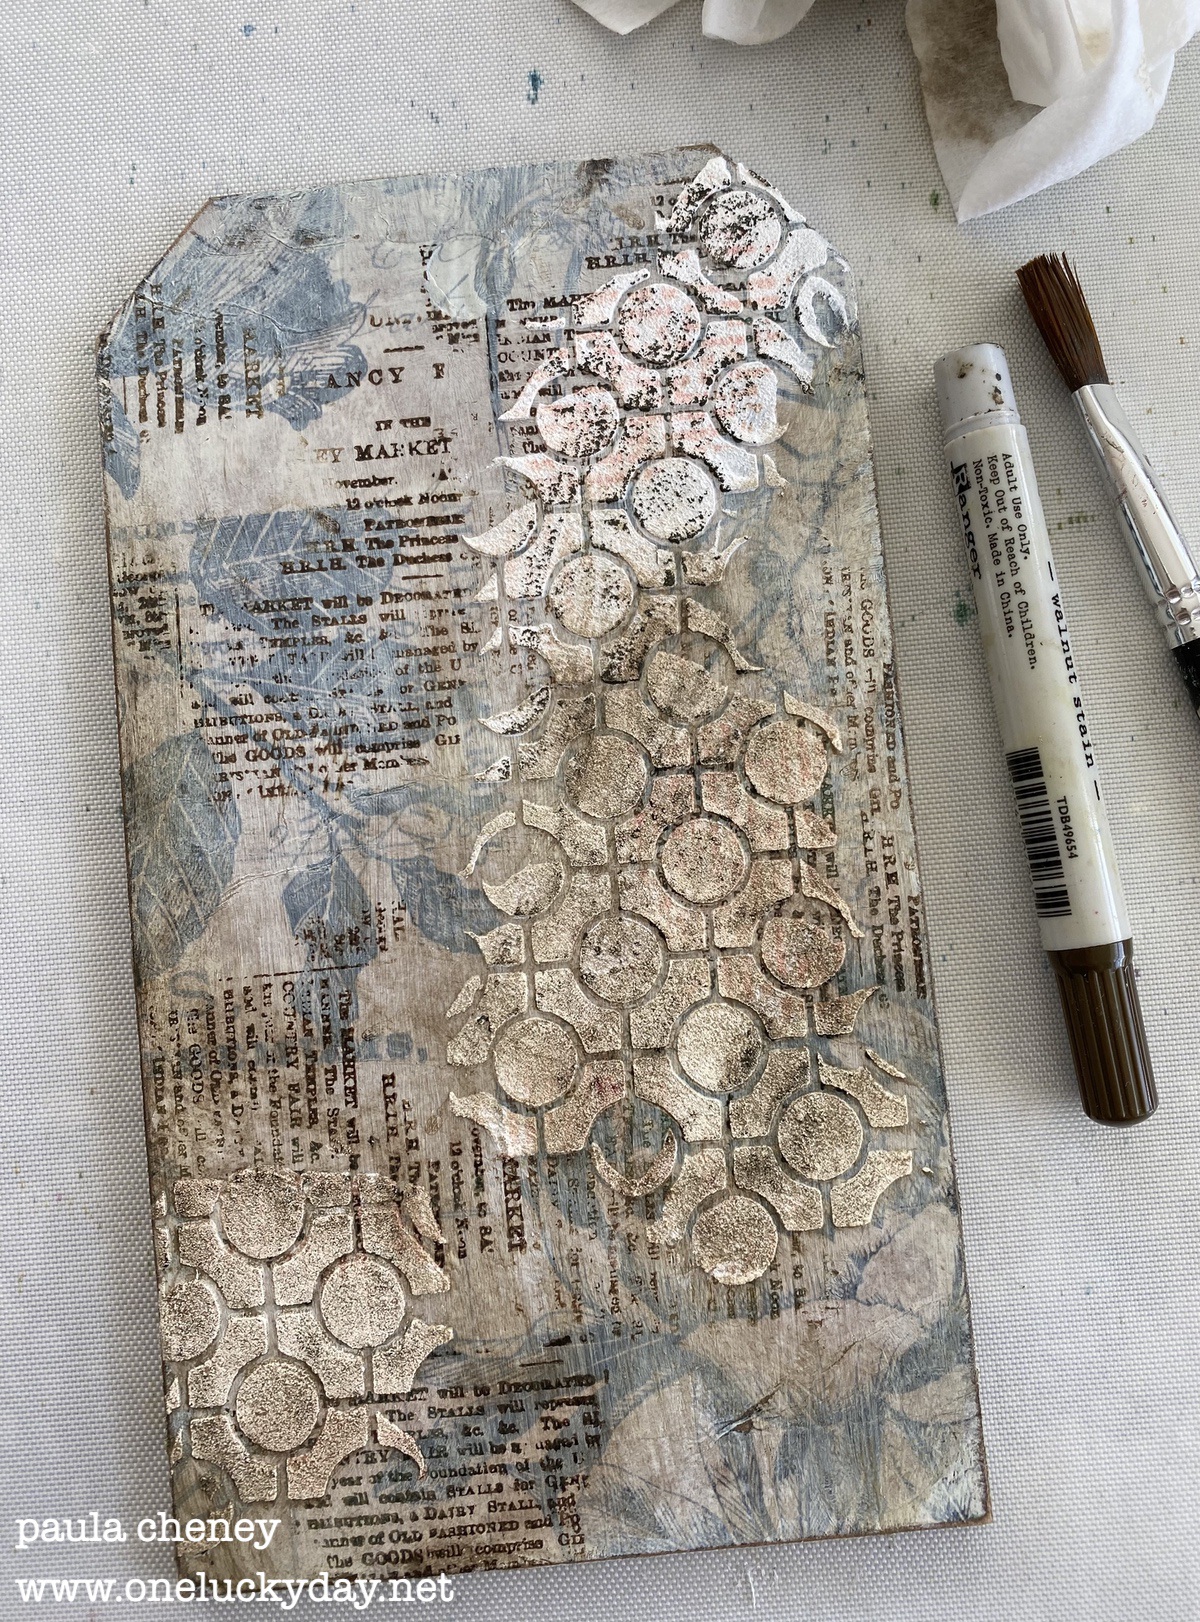
The new Linked Circles stencil and Distress Grit Paste worked perfectly to add a textured pattern to the surface of the tag. NOTE: My focal point will be on the left so I added the majority of the Grit Paste pattern on the right side.
 As you can see I added a bit more Grit Paste to the bottom left. Now this is the hard part...set it aside to dry for at least 30 minute if not longer. I usually need to leave the room so I don't touch it!
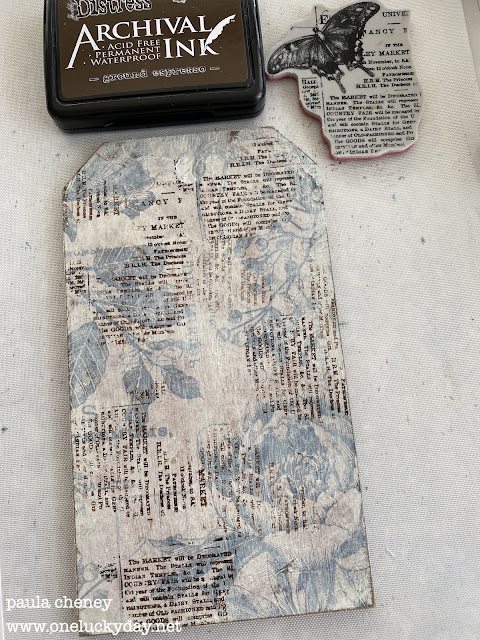
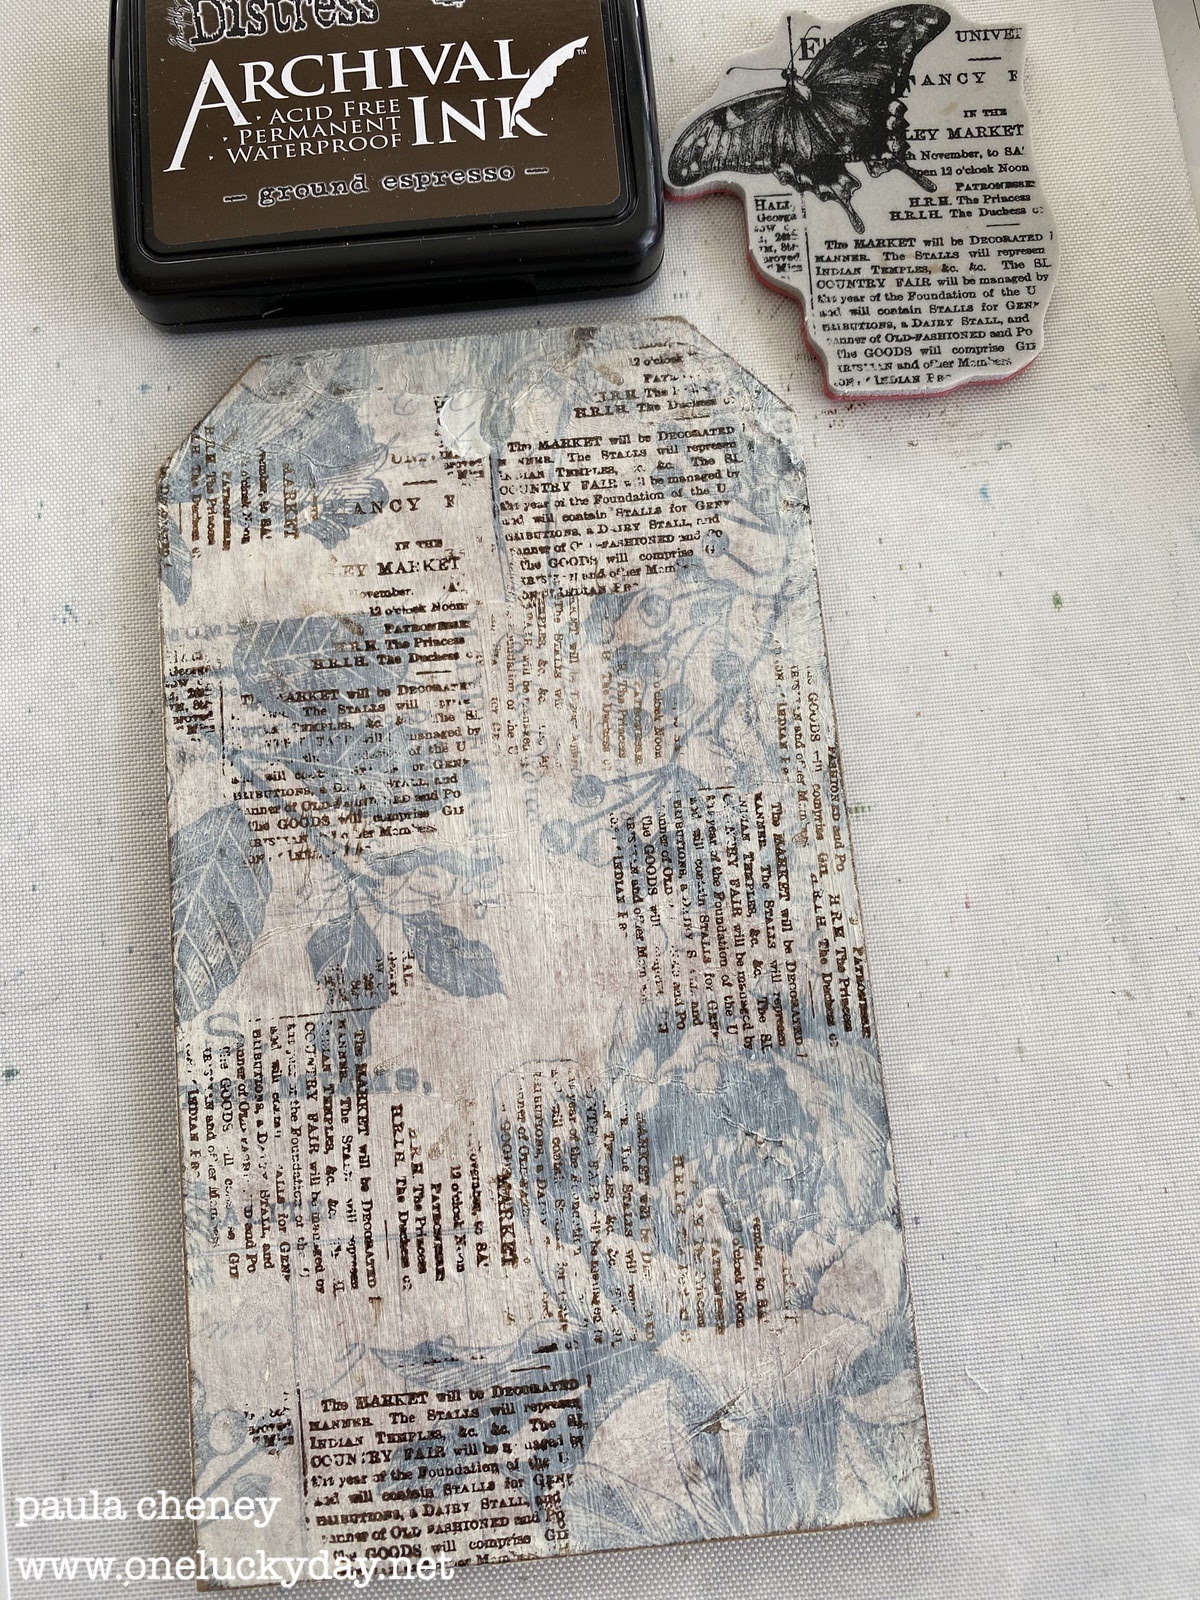
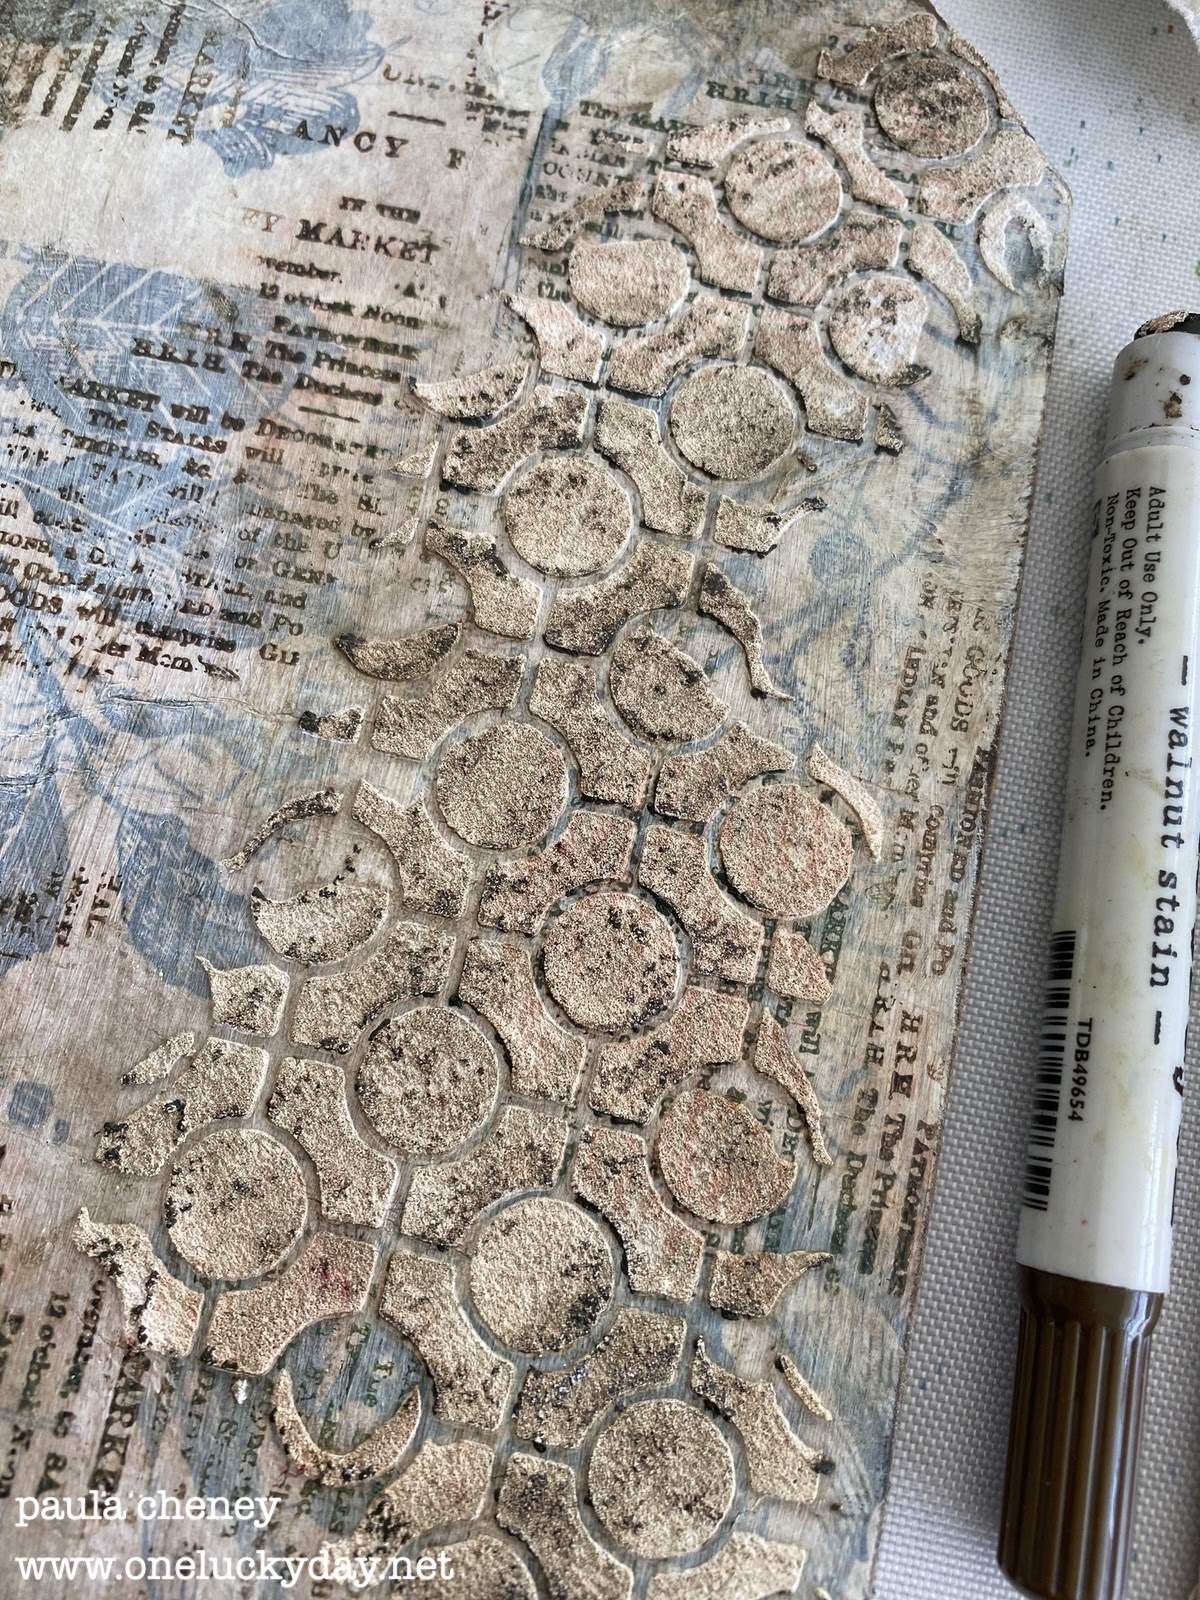
 Once dry, scribble Walnut Stain Distress Crayon over the surface (top portion). Use a damp paintbrush to move it around and get it in to all the texture of the Grit Paste (lower portion). I also rubbed the crayon on the edges of the tag so it looked like the right side went with the left.
 You can easily add more crayon if too much is wiped or brushed away.
 The Distress Splatter Brush was used to splatter Stormy Sky Distress Paint over the surface. I think Picket Fence would also work well here. This is subtle but it adds to the overall look.
 Once the paint was dry I added Foundry Wax Statue over some of the raised textured surface (not all). Remember to shake up the bottle till you hear the mixing ball. Drip the wax out onto the craft mat in no more than dime sized circle. I used my finger to pick up the creamy wax and lightly skipped my figer tip over the surface of the Grit Paste texture. I suppose you could use a brush or a glove if you do not want to touch the wax but it does not bother my skin at all and easily wipes away with a wet wipe, leaving no stain or residue on your skin.
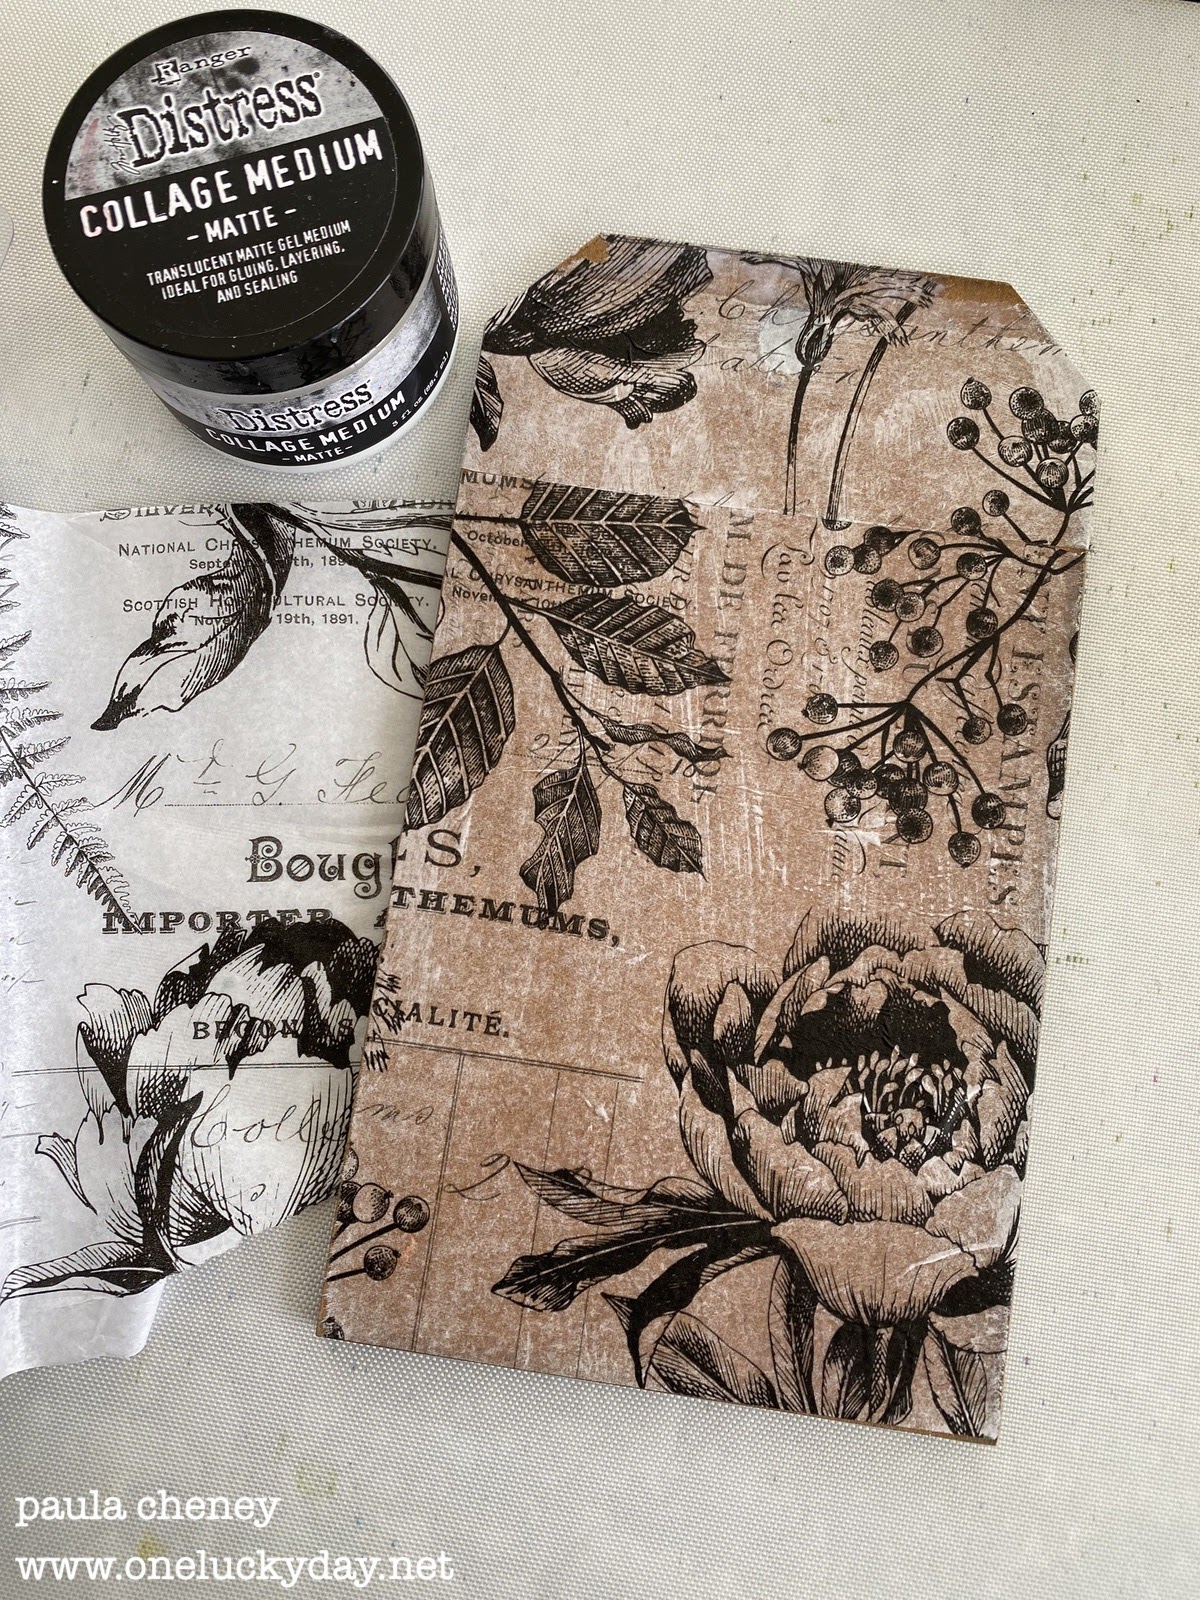
Stampers Anonymous Botanic Collage stamp set


With wax is it hard to tell exactly how it will look until it is heated, so if anything, I would err on the side of caution because you could always add more in a second round.


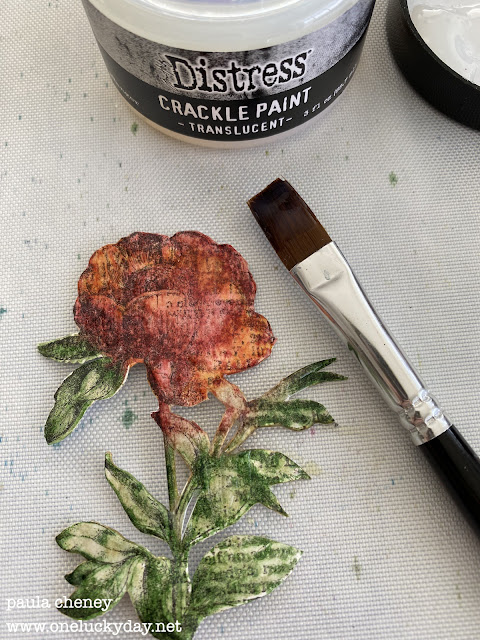
 I stamped and colored the flower from the same set as the butterfly, then fussy cut it to use in the background. I painted it it with Crackle Paint Translucent to give it a shiny surface and tiny little cracks over the surface. The drying time depends on how thick the Crackle Paint is put on the surface.
 I don't have more step-out photos, but I can explain some of the other things I did to bring this all together.

Here s what it looks like once heated for just a few seconds with an embossing gun. Again, hard to tell in the photo, but the wax a turned to a shiny gold. I must admit, it looks amazing over the Grit Paste!

You have got to try this, if you haven't already!
ps) if you want to know more about Foundry Wax, you can take a look at my Foundry Wax blog post HERE.


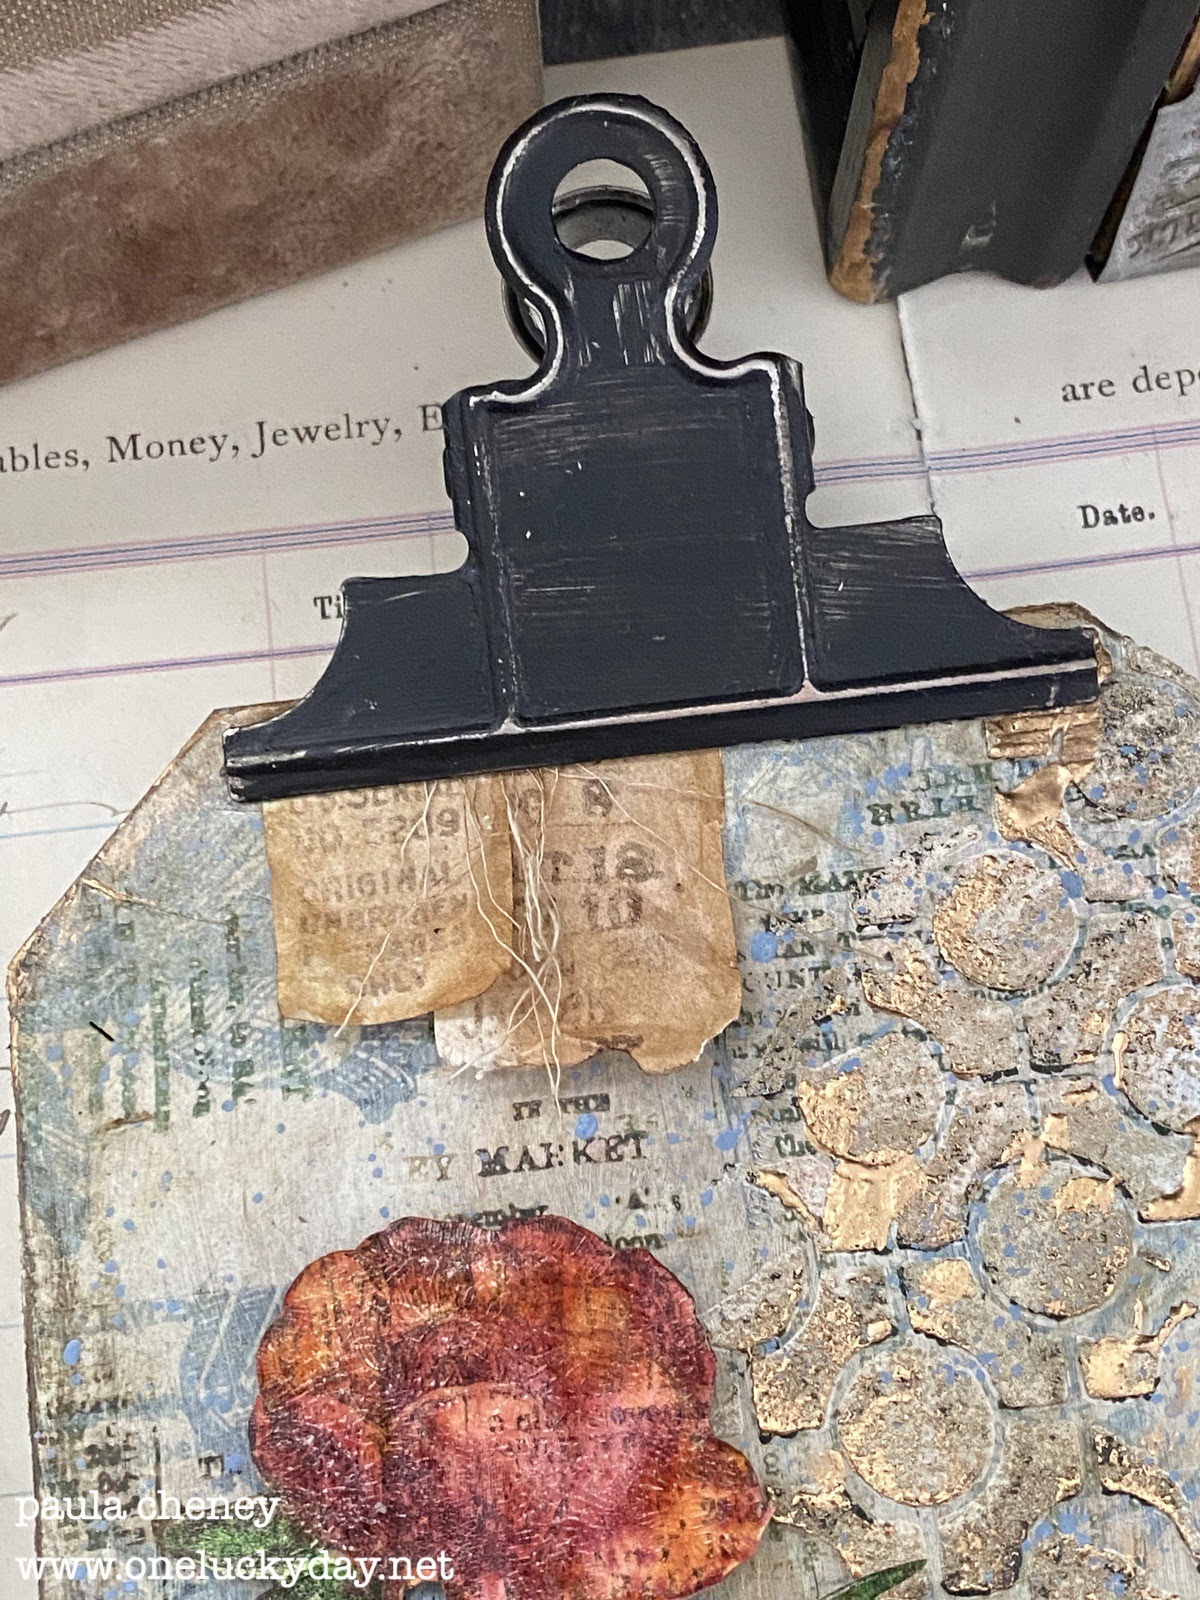
1. Use foam squares to add the flower to the surface of the tag.
2. Use Distress Crayon to add color to the dress of a Paper Doll. I love this sitting lady!


 7. Paint an idea-ology Vintage Clip with Black Soot paint. Then clip the two small stamped papers under the Vintage Clip. Notice that you really can't see the hole at the top anymore?
 Oh gosh, the Grit Paste + Foundry Wax is delicious.


One of my favorite project I've done this year. The layered background is what makes it!
Now carry on,
paula

3. Color a wand from the Adornment Treasures pack with Foundry Wax or Gold Mixative - both will work. Add it to the Paper Dolls hand with Collage Medium and let dry.
4. Rub Picket Fence Distress Paint over a round idea-ology Deco Frame. Once dry, add over the flower with Collage Medium. NOTE: I placed the frame in a position so it looked like the back of a chair. Can you see it?
5. Add the Paper Doll to the surface with either stacked foam square or wood bingo chips (like I did) so she is sitting above the silver Deco frame, not directly on it (also helps with the "chair" illusion).

6. Use Ground Espresso Archival Ink to stamp three pieces of vintage typing paper (what I would call onion skin paper). NOTE: Once stamped and cut out, I smooshed the papers into watery Distress Ink to age the paper. After you dry it with the heat tool, it is nice and crunchy so it's easy to rip and crumple.

All three stamps are from the Eccentric stamp set. I can already tell this will be a best seller - it's amazing!


One of my favorite project I've done this year. The layered background is what makes it!
Now carry on,
paula
Amazing! I love this!❤️
ReplyDeleteThank you so much for the tutorial,Paula. Now I need the stamp set,lol.
ReplyDeleteI love this tag, Paula. Your layers of detail and texture are, well, perfection!
ReplyDeleteThis is gorgeous, Paula! Your attention to every detail is what makes you, you!
ReplyDelete