Showing posts with label Christmas crafts. Show all posts

Monday, December 18, 2023

The Bauble Tree goes Modern

Hello Friends!

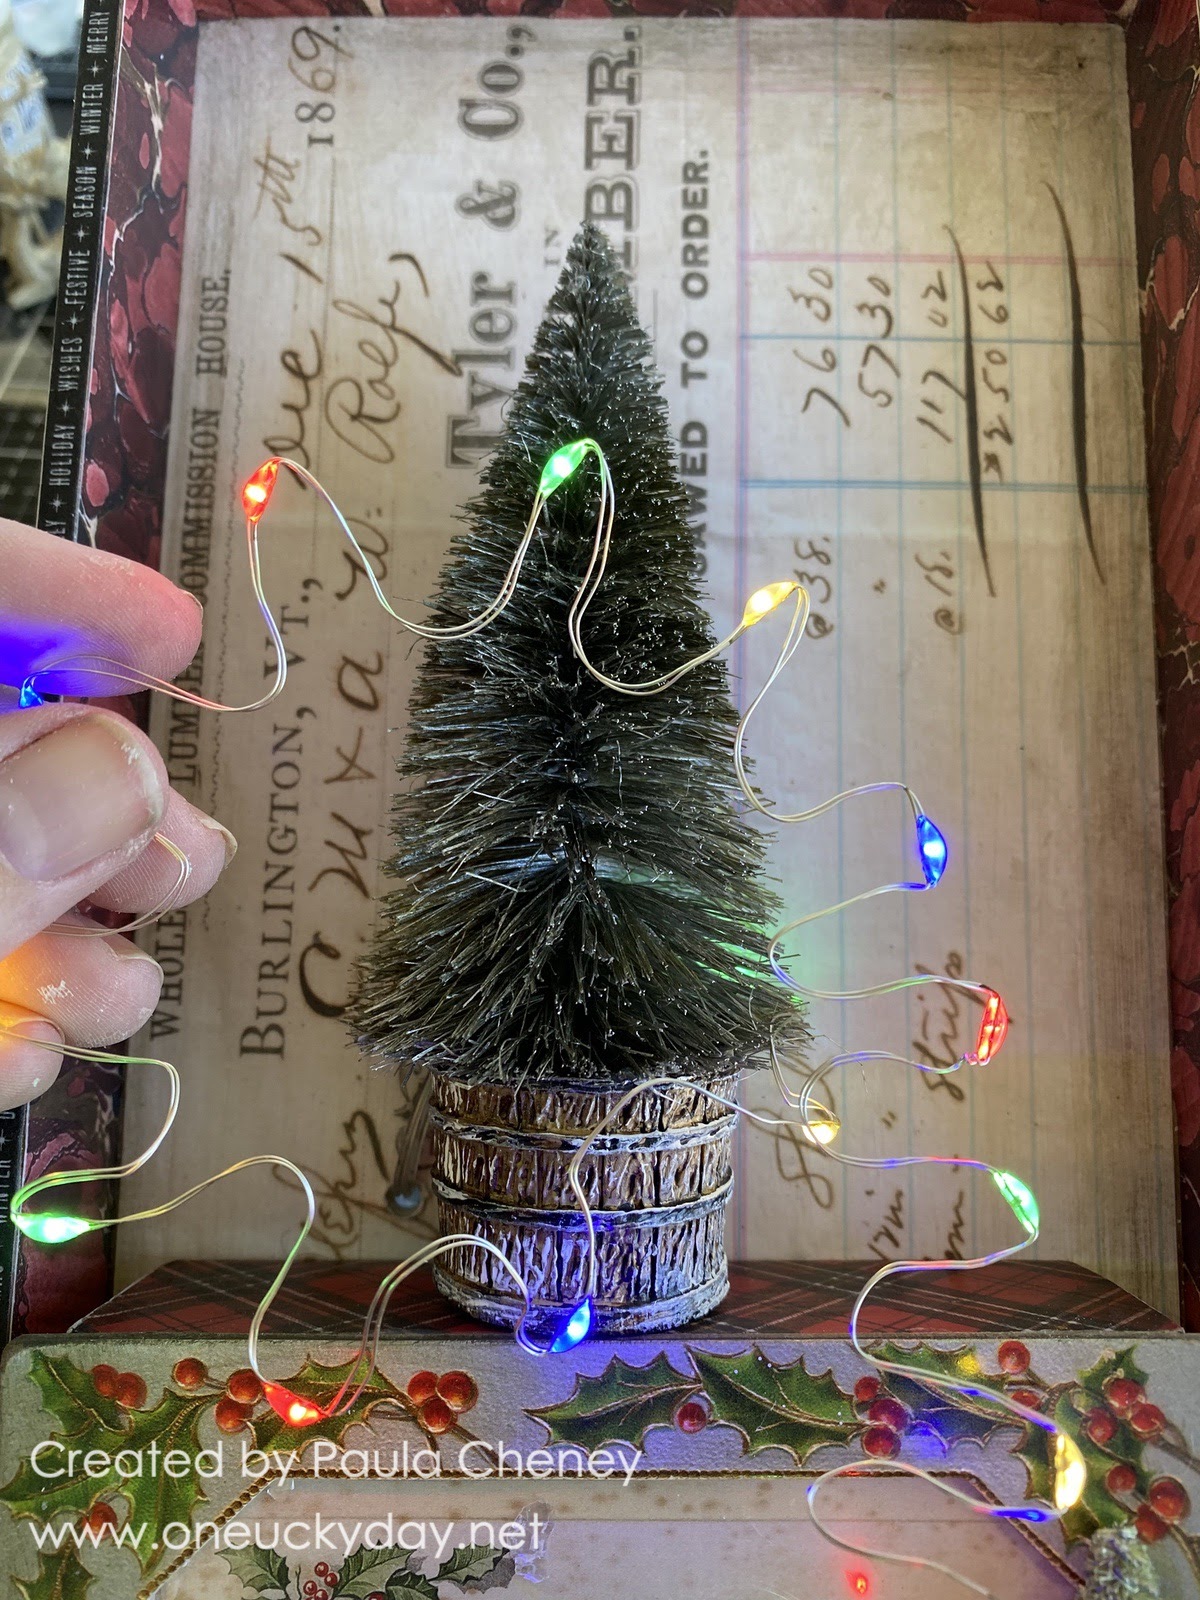
Can you believe it is only one week till Christmas? The month has flown by and I am kinda sad about it! I wish the Christmas season was two months long because I enjoy it so much. I love the decorations and preparing the house for any guest that might arrive. However my guest room is currently being used as a staging ground for Christmas decoration tubs, rolls of wrapping paper and presents waiting to be wrapped. There is "no room in the inn" sorta speak!
Today I am revisiting an old project I created back in 2017.  This time with a modern twist that even my friend Cherion would be proud of! I am sure many of you will remember the original "traditional" version of the project (I will link it late in the post).  I made this one a little more simple than the last, but both ways of creating it work. This one uses a pencil line instead of the template, but admittedly the template from the original made adding the glue much easier and faster.  That being said, check out both tutorials and see which one you want to go with before starting.

I chose 4 colors of Alcohol Ink to color the Baubles + Mushroom for aging, Moss, Pink Sherbet, Cranberry and Citrus.  I also have added some 97% Isopropyl Alcohol to a Mister to even out the Alcohol Ink after is added to the Baubles. This is totally optional, as the technique works fine without it.
I use 2oz portion cups (I buy these in bulk at Smart 'n Final for $3.69 for 125 count) to sort and then color the Baubles.  Just a few drops of a color works.

PLEASE NOTE:
I used 2 packages of Baubles for this project.  I removed the largest size from the package and set aside. I did end up using one of these for the "trunk" of the tree. The rest of the package I split into 4 portion cups. This photo shows ONE PACKAGE of Baubles. When these were done, I did a second round with the second package. I find is much easier to do two smaller amounts.
1. Separate the Baubles into portion cups.
2. Drip Alcohol Ink into cups (maybe 3-4 drops)
3. Put another portion cup on top to enclose, then shake the cups to coat the Baubles.
4. Mist with Isopropyl Alcohol, then dry Baubles for 15 seconds with heat tool.
6. Drip 2-3 drops of Mushroom Alcohol Ink into cup.
7. Put the top back on and shake to coat Baubles.
8.  Mist with Isopropyl Alcohol then dry Baubles for 15 seconds with heat tool.
(tip - when the cups are empty, the Alcohol Ink can easily be removed with Isopropyl and a paper towel)
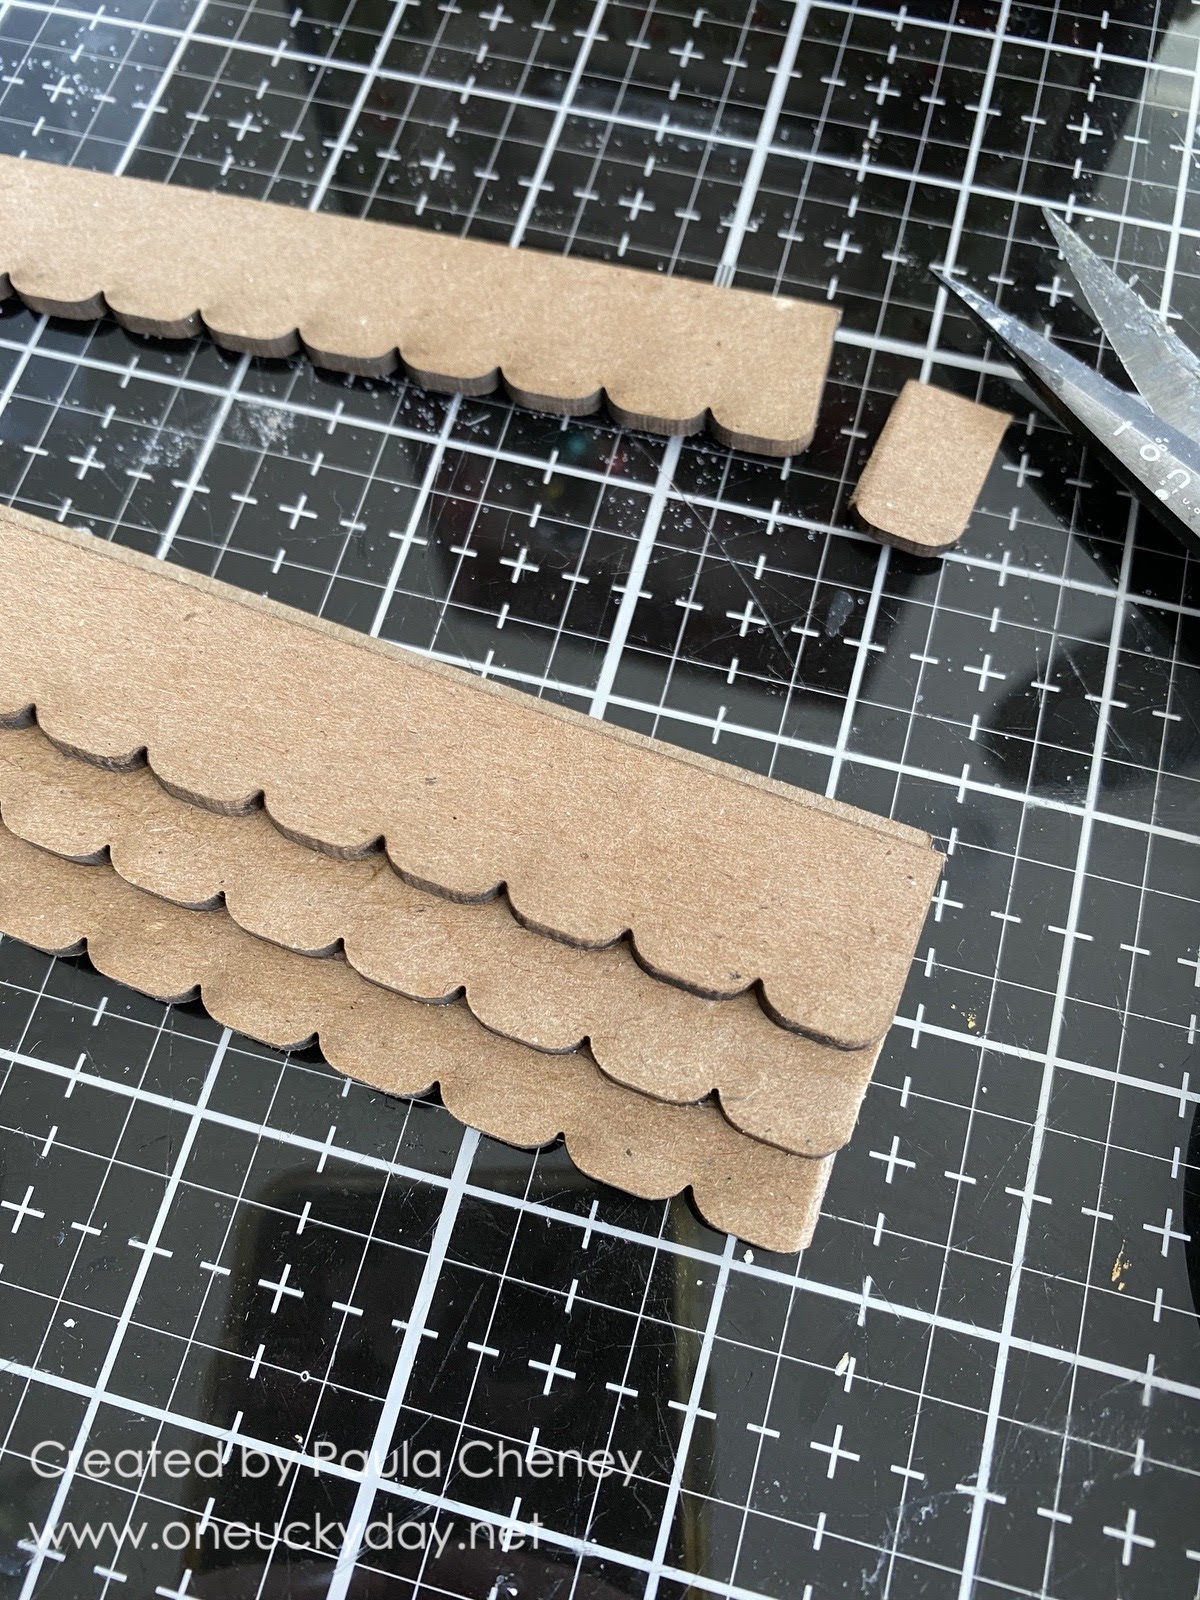
I cut three pieces of thick chipboard: two at 6" and one at 4 1/2"
Then taped them together to create the tree shape.
Next is the Framed Panel.  This is a discontinued item that is hard to find except on Ebay these days. So if you don't have one in your stash, Ebay is your best bet. An alternative is to use a Panel from the Etcetera line - really anything that will give you a flat surface to work on!
I added Scor-tape to the back, but you could also use Collage Medium.

Next I painted the entire surface with black paint and let it dry.
I used my chipboard triangle I made as a template to draw the tree shape. Be sure to leave enough room at the top for your words.
Working quickly, add a thick layer of Collage Medium. This is the part when a tree template would come in handy (see original post here for that idea).
Add the chipboard triangle back to the panel, then start adding the Baubles (you must work quickly so your glue does not dry up).
I added as many Baubles as I could fit in the triangle without moving it. It is interesting how just by pouring them from your hand, a little at a time, they come out very random!
So compare the next two photos.  Here I have lifted the chipboard.  The top is fine, but...
I removed the pink Bauble at the top to add a slightly larger one that was in Cranberry. on my original tree I added a tree topper but we don't have that metal element anymore so I went with just the larger red Bauble.
There is still glue showing so I sprinkled Rock Candy in the open areas. I did go over the entire surface with a heat tool.
For words, I used the sizzix set, BOLD TEXT CHRISTMAS - one of my favorite dies sets. 
Solving a problem:
So I wanted my words to go across the top, but after I cut them I realized the Merry and Bright were two different size fonts (on purpose).  That looked weird when the letters ran across the panel (stacked on top of each other it makes perfect sense). 
My solution was to mix up the letters so the two sizes would look like the were meant to be that way.  To do this, I switched the R's, then cut Winter Wishes to get a small I, H, and T.  I used my Favorite Alcohol Ink Black Cardstock because of the velvety black finish. I also added a Sizzix Adhesive Sheet to the back before cutting, so it was easy to peel and stick the letters to the panel.
To get a straight line at the top of the panel, I cut a skinny piece of chipboard and adhered it to the panel with repositionable dot tape, so it can be easily removed once my letters are in place. I spaced out the letters to get the right placement side to side.
Then just peeled off the protective paper before permanently added them to the panel.

I also colored and added one of the large Baubles I had saved at the beginning to create a trunk for my tree - totally different idea than the traditional trunk from the original Bauble Tree. I thought it was perfect for a modern tree!
You can also go back and add any small Baubles you have left. I added a few that sit in some of the small holes.  Collage Medium will allow you to move things as long as you do it right away.  Once 24 hours has past, they aren't going anywhere.
I am beyond happy with my modern tree! I hope you will give this a go. The entire project can be done in just a few hours with such great results!

Now carry on,
paula

Wednesday, December 13, 2023

Christmas Greetings

Hello Friends,

Hope you have been getting ready for Christmas like I have! I finally have the house decorated the way I wanted and have stored away all the bins in the garage. I sure am enjoying the decorations and the lights each night.

Today I have an fun project for you, using a 9 x 9" Vignette Panel and the Etcetera Mosaic Tiles. So lets get started!
I covered the Vignette Panel with paper from the idea-ology Christmas Backdrops. I have more than one pack of paper so I was able to use two of the same paper to cover the inside. The seam where the paper meets will mostly be covered up so no worries about that.
I also covered the sides and back with more paper, then added the green Design Tape Trim on the lip edge. Now we are ready to start the inside of the Panel.
Using Collage Medium, I covered Etcetera Mosaic Tiles with paper and ephemera. I did lay out a basic design before I started covered the tiles.  I always add a layer of Collage Medium over paper, so I did that before drying the tiles and moving on to the next step.
Time to PAINT!
I love our Christmas adornments this year so I decided to just paint them all up and use what I need, then save anything that is left for another project. 
Next is the large toy soldier from the Salvaged Figures pack. I used Foundry Wax on his chest for a great shine!
I rubbed him with steel wool to age the paint, then used a damp paint brush to add Walnut Stain Distress Crayon.
I thought he need a little extra for the holidays so I added Scor-tape to his shoulders...
Added a bit of metallic trim I found in a drawer. I cut twice the size of the tape and doubled it on the shoulder so the two cut ends are at his neck. I also added a plume to his hat. I used my heat tool (on purpose) to melt a bit of the plume, so it is not as tall as in this photo.
Okay, time to add the Mosaic Tiles and an Etcetera trim piece (two pieces from the 'Pinked' package). 
To make sure the trim is straight - I cut a piece of chipboard 1 1/8 x 8". I added the Collage Medium to the back of the Etcetera Trim piece I had previously painted black and set it above the chipboard. Once it was secure I could remove the chipboard then add the tiles above.
You can see here that five of the tiles are doubled to give dimension to the project.
Before I stared add my embellishments, I needed to color a Christmas tree. I used the small tree from the Alpine pack. After spraying it with Rustic Wilderness and drying it with the heat tool, I sprayed it with water and squeezed it to remove a bit of the green, but keeping the rich color. After drying it again, I wiped Opaque Texture Paste over the tree to mimic snow. You can dry the Texture Paste with a heat tool to quicken the process.
So I started adding the embellishments with Collage Medium. First my toy solider the the tree with a big dollop of Texture Paste underneath.
*The Alpine tree was the only thing I used my hot glue gun on. I find it is much easier to get it to stay in place with hot glue, rather than the CM. I always hold it in place till the hot glue cools.
I added Texture Paste to the trim shelf...
Then just added a bunch of things to the paste. The pine pieces are plastic. They are the very tip of a longer pieces from a wreath I bought at Hobby Lobby. The snowballs also came from Hobby Lobby and the candy and bells are from idea-ology.
Lots of ephemera pieces and more the metals I painted. The star seal is from the Word Plaques and Tags set.  I covered it with Foundry Wax, then added a bit of Mushroom Alcohol Ink and Rock Candy.

Well, I hope you have enjoyed this project.  It is always fun to make stuff using the Etcetera Tiles because anything within arms reach is up for grabs.  This make is no exception!  Now back to the making table!
Now carry on,
paula

Saturday, October 15, 2022

Welcome Home

Hello friends,

Today is exciting as it is the start of the Christmas making season! idea-ology Christmas Live was so inspiring - I love hearing Tim talk about all the makes and the inspiration behind them!  He just makes everything seem so amazing.

I'm sharing my Welcome Home Tray today.  Follow along and I'll show you how I created it!

I started with a large size Vignette Tray and lined up Collage Tiles on the back. They fit the 6 x 12" tray perfectly with tiles four across and eight down.

I also used the tiles on the sides of the tray.  You can pre-cut these to fit the sides and then glue them on.
For the front of the tray I use the red marble Backdrop on the sides and the bottom.  I filled in the center top with a different Backdrop paper.  All the Christmas Backdrop papers are good, so there are plenty to choose from to cover the tray.
The Christmas Tape comes with 4 skinny tapes (+ 2 wide) to use on the edges of any Vignette Tray. I am using the black one with Christmas words.  I think that one looks best against the red marble paper.

To make the bottom display shelf, I used a Vignette Box I covered in more Baseboard paper. 
Then I created a "sandwich" of: a card from the Layers Christmas Pack, a piece of acetate and a Baseboard Frame.  Once I had these three pieces together, I adhered it to the Vignette Box I had already put paper on.  This particular frame has the words 'Merry Christmas' at the bottom (its really a vertical frame) and I needed to cover that up (since the words are running on their side).  I decided to shave off the back of a small tree and adhere it to the frame with hot glue.  I also chopped a wood slice in half and added it to the tree to finish it off.
I added Collage Medium to the back of the Vignette Box and placed it into the Vignette Tray.  Then left it to dry overnight and came back to it the next day.
TIP 1: Something that I use whenever I make Vignettes is a rubber phone holder. I had it on my desk for my phone, but found I was using it to prop up my projects more than using it for the phone.  
For most Vignettes, they fit right in the space to work in a standing position (shown below). It also works if you are working with the Vignette laying down (testing things before gluing for example), it can be used to prop up the Vignette at two different levels depending on how much you want to lift it. I usually go for the higher position and if stuff keep sliding down, then I drop to the lower level.  The rubber helps to keep it from sliding away.  
I bought this one back in 2020 called Phoneprop  but I am sure there are many that could be used.
Okay, now back to the task at hand...
I hot glued a Woodland Tree in the idea-ology Barrel. I decided where I wanted to place the tree and then made a hole in the Tray with a hammer and awl.  It would be best to make the hole just up from where the Barrel and tree meet.
I ran the lights from the back of the tray to the front, then did my secret wire bend.  TIP 2: By bending the lights this way, it's easier to hide the wire in the tree.  So I bend, then start to wrap the tree.
I wanted to add a lantern which needs just one light so I made sure I wound the lights around the tree until I had one left for the lantern (it took me two tries to get it right). 
TIP 3: use putty (like you might use to put up posters with - this one comes from Hobby Lobby, they always have it by the check stand).  I like to use it to keep the Tiny Light in position till I can get it glued securely into place.
Use Hot Glue to glue the tree into place.
Then adhere the Lantern with Collage Medium.
While the lantern is drying, color various sized of Baubles with Alcohol Ink and push them into the tree, using hot glue to secure.  I like the largest Baubles at the bottom and work my way upward using progressively smaller Baubles.
Brush tree with Collage Medium and shower it with Mica Flakes.
Do not press the Mica into the glue, just let them fall where the may.  It makes it much more organic looking!
Lets talk about the roof.  
I created the roof using a piece of heavy chipboard + 3 of the wider 6" Etcetera Trims - Scallop. There are 5 pieces in the package so you only need 1 package to have all the pieces you will need.
Punch out the three wide 6" scalloped trims.  
Cut ONE scallop off the end of each strip so the entire piece fits into the large Vignette Tray.  The Tonic scissors cut easily through the Etcetera material.  Then stack them on top of the heavy chipboard piece.  You can see the chipboard sticking out just a bit at the top.
Use Collage Medium to glue the three trims pieces to the thick chipboard.  Only the bottom trim is glued directly to the chipboard.  The rest are just layered on and cantilever out from the bottom.  Once secure, I trimmed the excess chipboard away. You might think you need to add something under the top trim to hold it up, but you don't. The piece is so sturdy after the Collage Medium dries that there was no need.
I painted the trims with Ground Espresso Distress Paint and let that dry.
I also used a small amount a white paint and dry brushed it over the brown and let that dry.
Then I used my finger to wipe Grit-Paste Snowfall over the trims.
It's thicker in some places and thinner in others (I like the more organic look).  Set aside to dry before adhering the roof into the tray.
This photo shows how the roof fits into the Tray at an angle (totally up to you how much of an angle you want).  I added a decent amount of Collage Medium to the top edge of the chipboard trim and pushed the whole piece up and into the tray.  I let it sit for at least 30 minutes before I moved the tray to a standing position to continue.
Create a wreath with wired Pine Twine (I love this stuff). I actually made two wreaths, one slightly smaller than the other, and hot glued them together at the top to get a bulkier wreath. I added the bell from the Tiny Bells pack, red and white twine and a bit of Stickles, rubbed on with my finger. Just darling!
Adhere the wreath to the red door.  Baubles are optional of course but I figured, what the heck! It's Christmas!
The house number was made with a Label Frame (I love these because they come with the "rivets" already in the side holes...no need to add something extra).
The numbers are from the Numeric pack and have been colored with Foundry Wax - Gilded.
I added a painted red handle to the top of the tray and once secure, Tinsel and a tag from the ephemera pack.
Added snowballs made from Baubles and Snowfall Grit-Paste.

Stickles on the tiny tree and a Word Plaque painted with white paint.


This was a fun project.  I loved figuring out how to build the roof out of trims.  It looks way harder than it is! And the Snowfall Grit-paste was perfect to add the snowy charm!

Now carry on,
paula