Showing posts with label woodland trees. Show all posts

Thursday, November 14, 2024

Making Spirits Bright

Hello friends,

Great to be here today sharing a fun project. Yesterday I posted a tag on Instagram using Distress Grit Paste Opaque and Distress Lumberjack Plaid Spritz, using water to push the Spritz into the background. It worked so beautifully that I wanted another try with a different color and on a larger scale. However this time there is no Grit Paste involved, just idea-ology Typography letters.
So lets get started!
I chose a small Etcetera Panel (7.25 x 5.25") as the substrate, then used Collage Medium to cover the panel with Christmas Backdrop paper. Once secure, add a layer of Collage Medium over the top of the paper, then let it dry. Do not skip the layer over the top, it will become important in a following step.

Once the Backdrop is dry, use Collage Medium to add the sentiment to the right side of the Panel. I used my Tonic Media ruler + Glass Studio Mat to keep the line straight when adding each letter. This sentiment is an easy one because each line is about the same length.
Here is the finished sentiment. I let this dry overnight because I was at the end of my work day. But in most climates, it would be secure enough to in about 30-45 minutes. You also might notice that I rubbed Walnut stain Distress Crayon over the edges of the panel. The crayon will show up in the end to give the paper an subtle edge.
The next step might seem a bit crazy, but I sprayed the entire panel with Antique Linen Spritz. You can see that I sprayed it quite heavy, going over the panel multiple times.
Immediately, I sprayed the surface with water which will cause the Spritz to pool up rather than just being speckled across the surface. If we had not added the Collage Medium over the paper to seal it earlier, you could not get this pooling effect.
Use a paper towel or soft cloth to wipe off the letters. It's not as hard as it sounds.
Then SLOWLY dried it with a heat tool. I say slowly because it takes a while for the Spritz to dry over the Collage Medium surface. I kept the heat tool further away and just let it dry little by little.
I also used a small bit of paper towel to dab up any puddles, then finished the drying.
The shine is so awesome! The Spritz made the Backdrop paper look like vintage wrapping paper. I just love the effect.

Set the panel aside and lets work on the tree. You could make the Woodland Trees any color you wish. I decided to do a multi-color effect using Evergreen Bough and Bundled Sage. But before I got started I cut off the back of the tree so it would lay flat against the panel. Once the cutting was done, I sprayed the entire tree with Evergreen Bough.
Before drying, I went to the kitchen sink and ran water over the top of the tree, then squeezed out most of the Spray Stain.
Back at the table, I sprayed Bundled Sage in the middle section to get the triple tone effect.
I added Collage Medium to add Mica Flakes over the front of the tree. I like to add the glue, then sprinkle mica Flakes from above. I know some people like to roll the tree in the Mica Flakes but I'm a sprinkler! Mica flakes are heat stable so you can dry them with a heat tool or let them dry on their own.
After the flakes were dry, I decided to cut notches into the tree shape. I know what you are saying, "why didn't you do that BEFORE you added the Mica Flakes?" Well yes, you are right I could have, but this way, the Mica was way more random and vintage looking. Like when you buy an old tree in an antique shop, most times the mica is missing in some spots and heavy in others. 
NOTE: I painted the base of the tree with gold paint.
I love the way it looks with the three colors of green. By the way, the Mini Re-Coil scissors are sharp to the tip and made the cutting a breeze.
Time to break out the "big gun" to glue the tree to the panel. I needed a lot of hot glue and my tiny precision glue gun is no match for my old school glue gun. Be sure to press the tree down while the glue is drying.
I decide to add a bit of variegated metallic floss to my tree. I wanted to add something without it looking heavy!
The metallic threads some apart just like embroidery floss. I tied a knot in one end and just pushed it into the tree, then ran it back a forth a few times till I got to the top. You could used hot glue to keep it in place or a dot of Collage Medium. I found tweezers were very helpful with the fine threads!
To fill in the space beside the tree, I opted for a simple solution that tied in the gold in the background, Mini Stencil Chips. I grabbed the numbers two and five, taping them together with Cello Tape Stickers, then using my Tiny Attacher to add staples at the top. I added four thin foam squares to the back and placed it on the panel. I also slipped a piece of Backdrop paper under the numbers to give them visual texture different from the poinsettia background.
The last thing to do was to add a star to the tree. I have some mirrored stars in my stash from years past and was able to find a large enough one for the tree. I covered the star with Mushroom Alcohol Ink and dried it with a heat tool. Then I sprayed the star with Antique Linen Spritz and dried it again. I added Collage Medium to the back and slipped it behind the tree.
What fun experiment this was. I love the woodland trees since there are so many options. I fact, it's sometimes hard to choose...texture paste? Rock Candy? gold Stickles? Mica Flakes? Which to choose? 

This is an easy project that cold really be done in an afternoon. It would make a fun decoration for yourself or to give away as a gift at the beginning of the season. I'm looking forward to seeing how people adapt the concept to suit their taste!
Now carry on,
paula


Saturday, October 15, 2022

Welcome Home

Hello friends,

Today is exciting as it is the start of the Christmas making season! idea-ology Christmas Live was so inspiring - I love hearing Tim talk about all the makes and the inspiration behind them!  He just makes everything seem so amazing.

I'm sharing my Welcome Home Tray today.  Follow along and I'll show you how I created it!

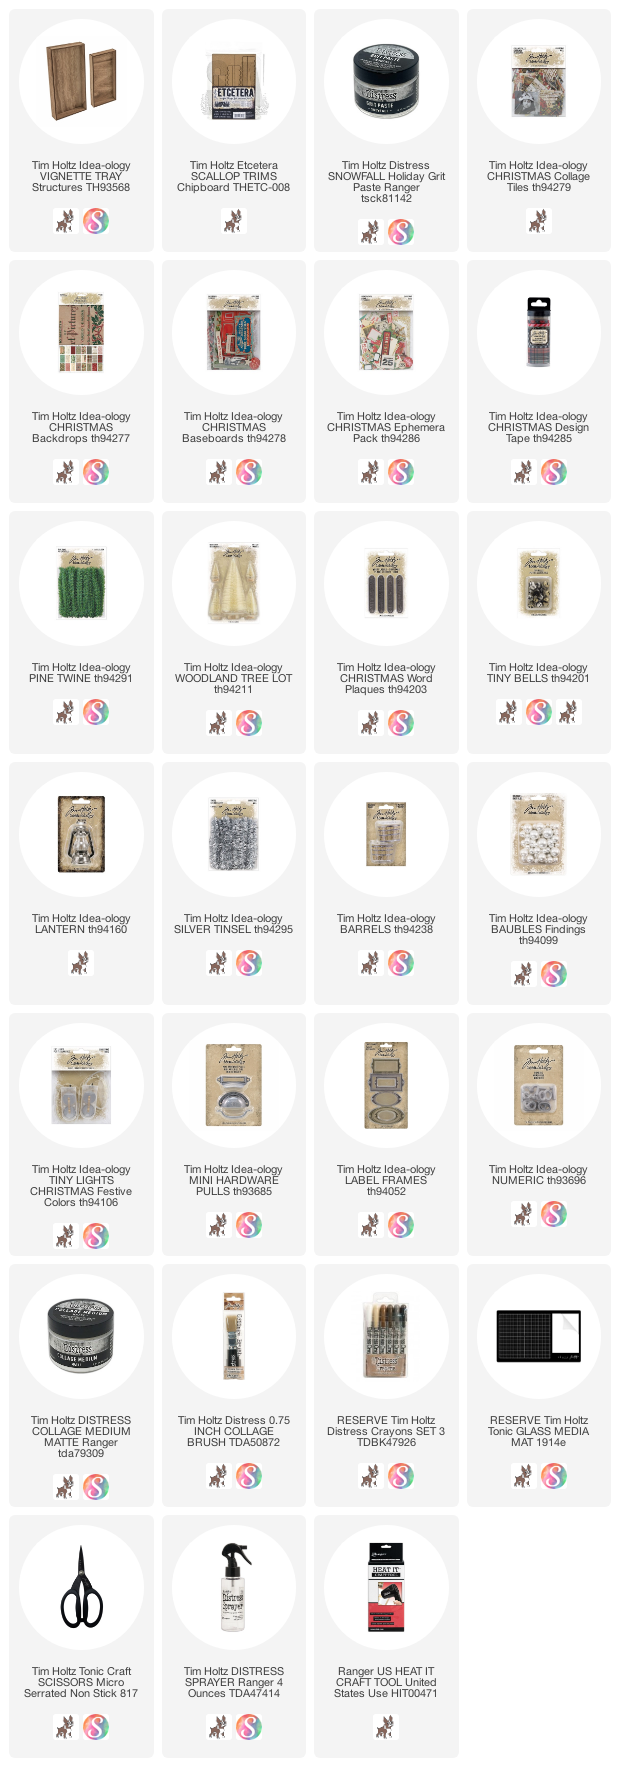
I started with a large size Vignette Tray and lined up Collage Tiles on the back. They fit the 6 x 12" tray perfectly with tiles four across and eight down.

I also used the tiles on the sides of the tray.  You can pre-cut these to fit the sides and then glue them on.
For the front of the tray I use the red marble Backdrop on the sides and the bottom.  I filled in the center top with a different Backdrop paper.  All the Christmas Backdrop papers are good, so there are plenty to choose from to cover the tray.
The Christmas Tape comes with 4 skinny tapes (+ 2 wide) to use on the edges of any Vignette Tray. I am using the black one with Christmas words.  I think that one looks best against the red marble paper.

To make the bottom display shelf, I used a Vignette Box I covered in more Baseboard paper. 
Then I created a "sandwich" of: a card from the Layers Christmas Pack, a piece of acetate and a Baseboard Frame.  Once I had these three pieces together, I adhered it to the Vignette Box I had already put paper on.  This particular frame has the words 'Merry Christmas' at the bottom (its really a vertical frame) and I needed to cover that up (since the words are running on their side).  I decided to shave off the back of a small tree and adhere it to the frame with hot glue.  I also chopped a wood slice in half and added it to the tree to finish it off.
I added Collage Medium to the back of the Vignette Box and placed it into the Vignette Tray.  Then left it to dry overnight and came back to it the next day.
TIP 1: Something that I use whenever I make Vignettes is a rubber phone holder. I had it on my desk for my phone, but found I was using it to prop up my projects more than using it for the phone.  
For most Vignettes, they fit right in the space to work in a standing position (shown below). It also works if you are working with the Vignette laying down (testing things before gluing for example), it can be used to prop up the Vignette at two different levels depending on how much you want to lift it. I usually go for the higher position and if stuff keep sliding down, then I drop to the lower level.  The rubber helps to keep it from sliding away.  
I bought this one back in 2020 called Phoneprop  but I am sure there are many that could be used.
Okay, now back to the task at hand...
I hot glued a Woodland Tree in the idea-ology Barrel. I decided where I wanted to place the tree and then made a hole in the Tray with a hammer and awl.  It would be best to make the hole just up from where the Barrel and tree meet.
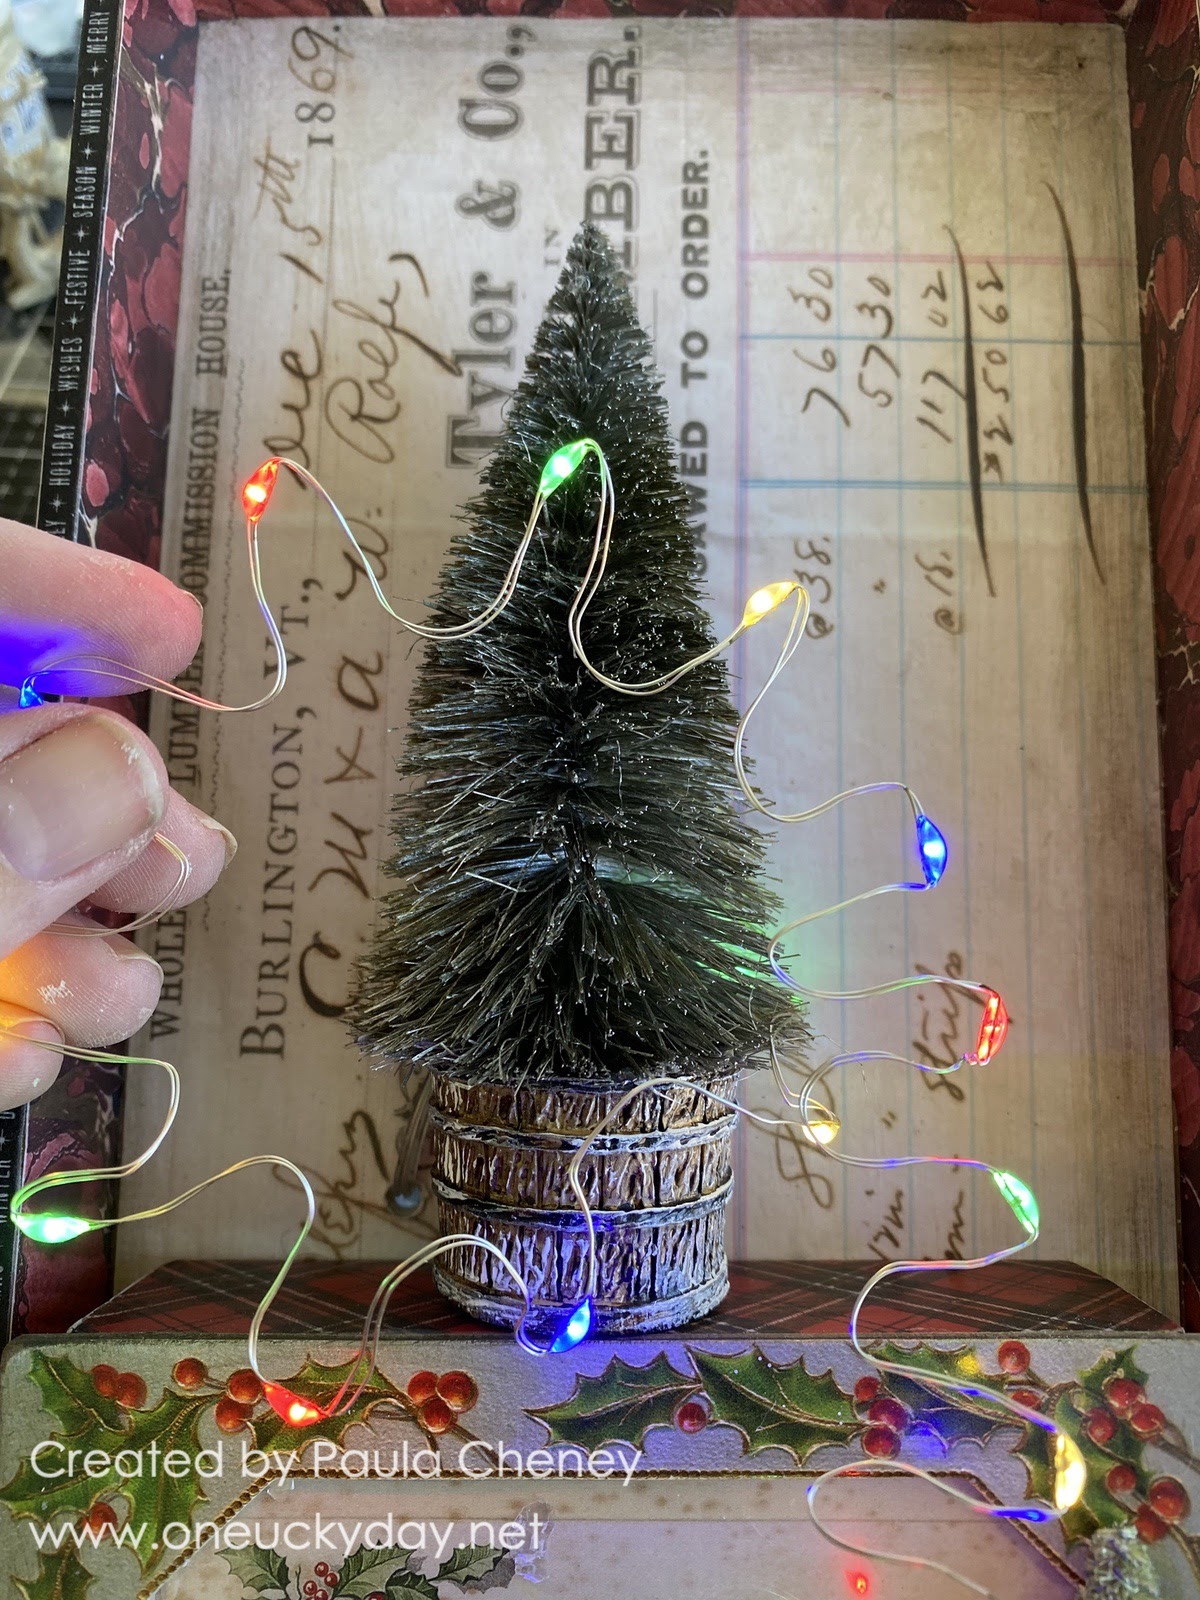
I ran the lights from the back of the tray to the front, then did my secret wire bend.  TIP 2: By bending the lights this way, it's easier to hide the wire in the tree.  So I bend, then start to wrap the tree.
I wanted to add a lantern which needs just one light so I made sure I wound the lights around the tree until I had one left for the lantern (it took me two tries to get it right). 
TIP 3: use putty (like you might use to put up posters with - this one comes from Hobby Lobby, they always have it by the check stand).  I like to use it to keep the Tiny Light in position till I can get it glued securely into place.
Use Hot Glue to glue the tree into place.
Then adhere the Lantern with Collage Medium.
While the lantern is drying, color various sized of Baubles with Alcohol Ink and push them into the tree, using hot glue to secure.  I like the largest Baubles at the bottom and work my way upward using progressively smaller Baubles.
Brush tree with Collage Medium and shower it with Mica Flakes.
Do not press the Mica into the glue, just let them fall where the may.  It makes it much more organic looking!
Lets talk about the roof.  
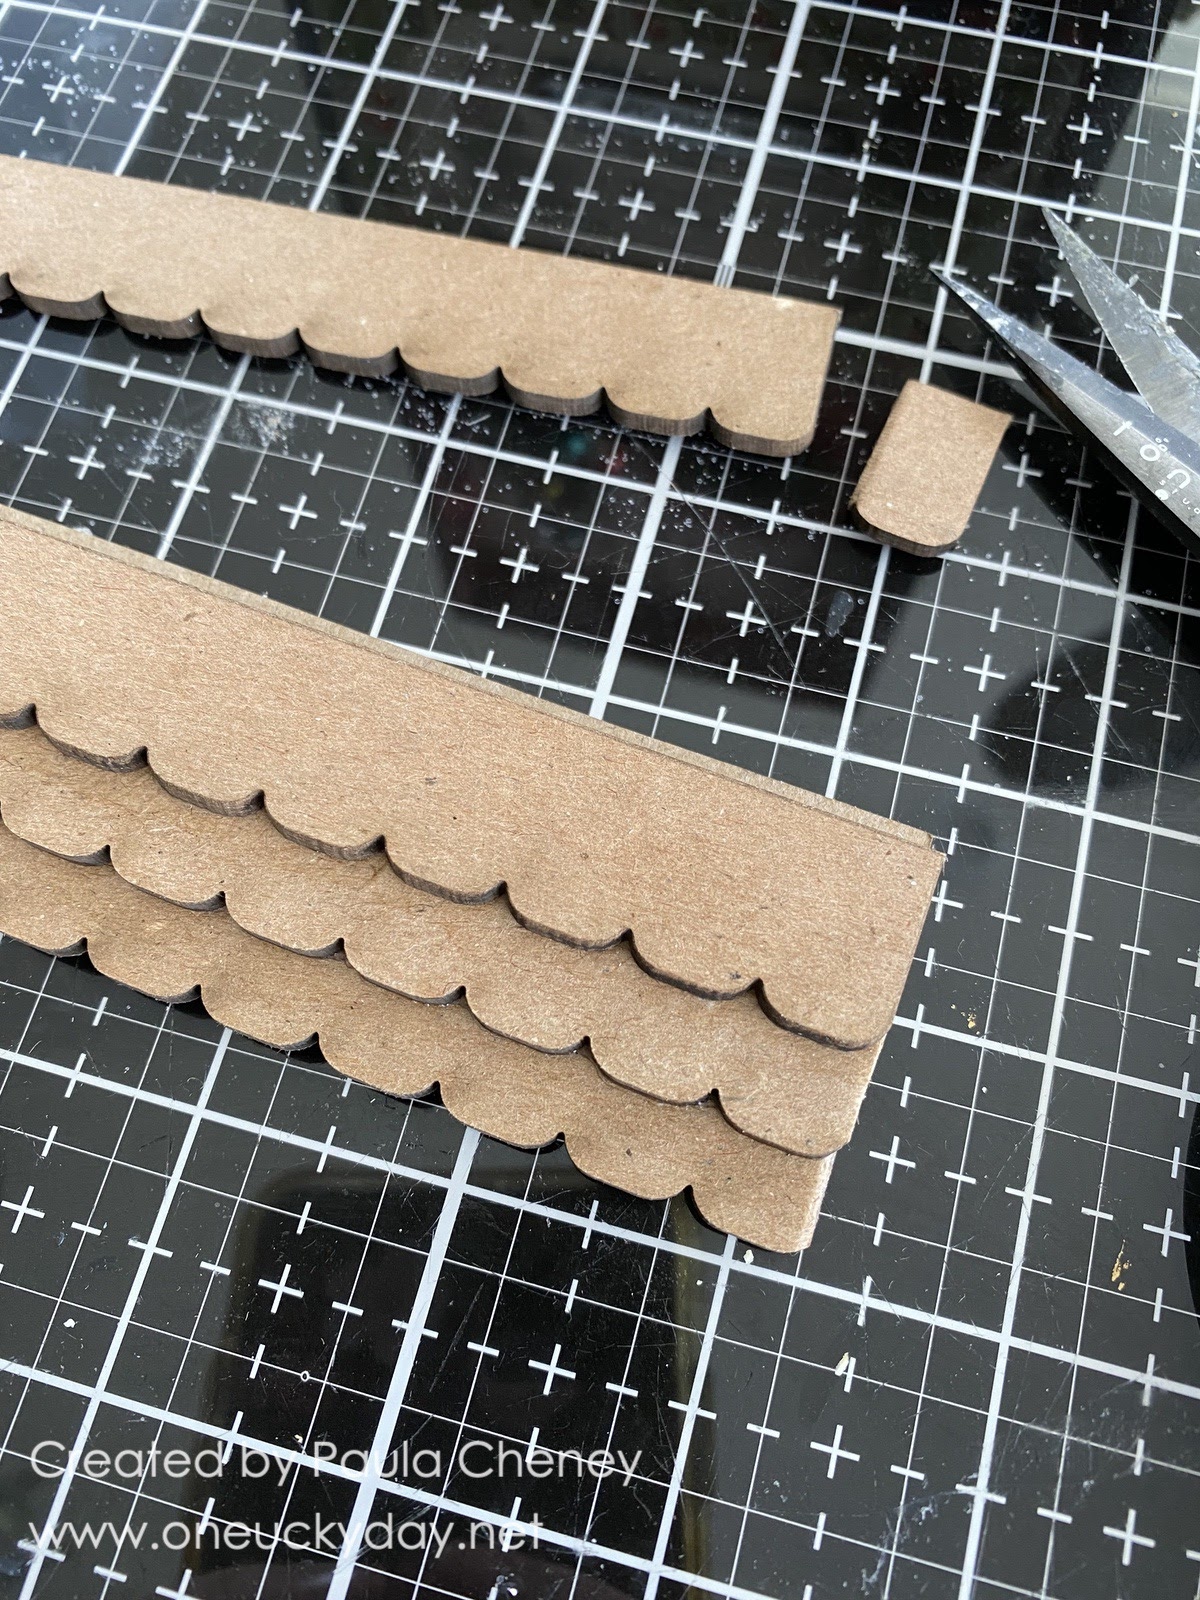
I created the roof using a piece of heavy chipboard + 3 of the wider 6" Etcetera Trims - Scallop. There are 5 pieces in the package so you only need 1 package to have all the pieces you will need.
Punch out the three wide 6" scalloped trims.  
Cut ONE scallop off the end of each strip so the entire piece fits into the large Vignette Tray.  The Tonic scissors cut easily through the Etcetera material.  Then stack them on top of the heavy chipboard piece.  You can see the chipboard sticking out just a bit at the top.
Use Collage Medium to glue the three trims pieces to the thick chipboard.  Only the bottom trim is glued directly to the chipboard.  The rest are just layered on and cantilever out from the bottom.  Once secure, I trimmed the excess chipboard away. You might think you need to add something under the top trim to hold it up, but you don't. The piece is so sturdy after the Collage Medium dries that there was no need.
I painted the trims with Ground Espresso Distress Paint and let that dry.
I also used a small amount a white paint and dry brushed it over the brown and let that dry.
Then I used my finger to wipe Grit-Paste Snowfall over the trims.
It's thicker in some places and thinner in others (I like the more organic look).  Set aside to dry before adhering the roof into the tray.
This photo shows how the roof fits into the Tray at an angle (totally up to you how much of an angle you want).  I added a decent amount of Collage Medium to the top edge of the chipboard trim and pushed the whole piece up and into the tray.  I let it sit for at least 30 minutes before I moved the tray to a standing position to continue.
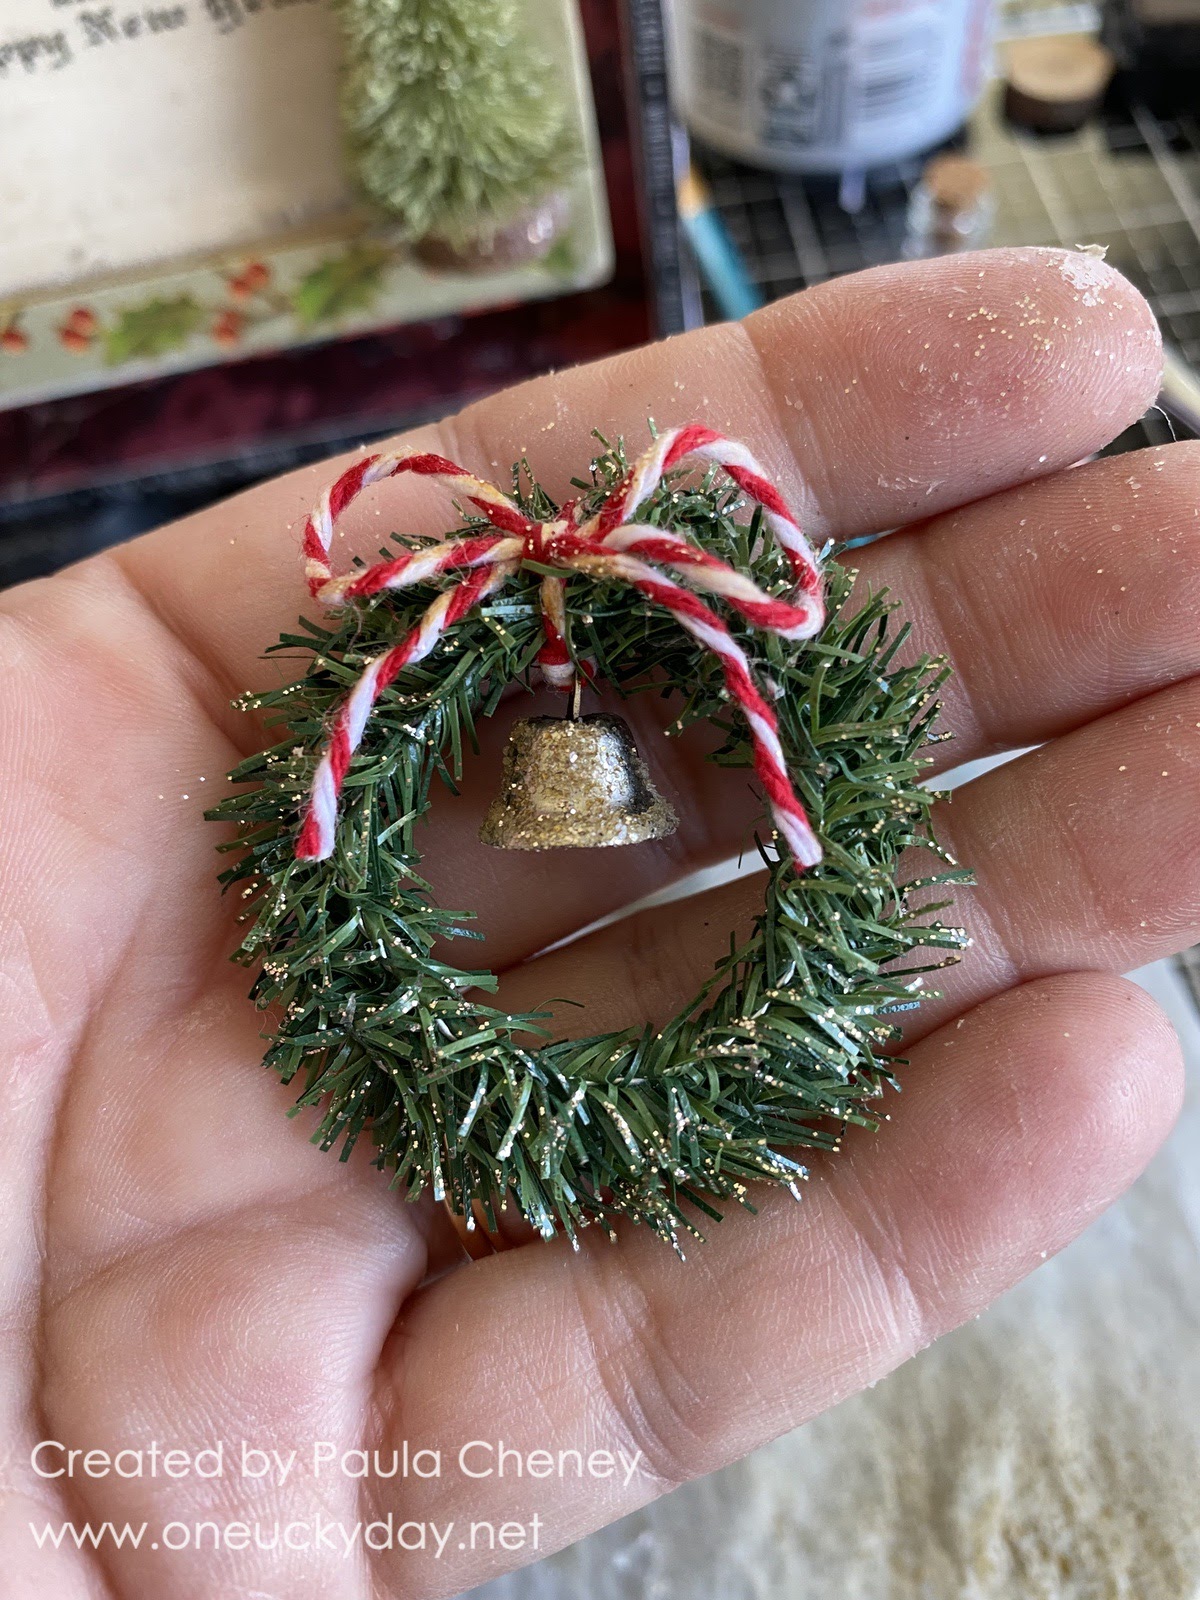
Create a wreath with wired Pine Twine (I love this stuff). I actually made two wreaths, one slightly smaller than the other, and hot glued them together at the top to get a bulkier wreath. I added the bell from the Tiny Bells pack, red and white twine and a bit of Stickles, rubbed on with my finger. Just darling!
Adhere the wreath to the red door.  Baubles are optional of course but I figured, what the heck! It's Christmas!
The house number was made with a Label Frame (I love these because they come with the "rivets" already in the side holes...no need to add something extra).
The numbers are from the Numeric pack and have been colored with Foundry Wax - Gilded.
I added a painted red handle to the top of the tray and once secure, Tinsel and a tag from the ephemera pack.
Added snowballs made from Baubles and Snowfall Grit-Paste.

Stickles on the tiny tree and a Word Plaque painted with white paint.


This was a fun project.  I loved figuring out how to build the roof out of trims.  It looks way harder than it is! And the Snowfall Grit-paste was perfect to add the snowy charm!

Now carry on,
paula