Wednesday, February 18, 2015

Little Things

I like little things.
Maybe it's that "gatherer" mentality I have (although some might call it hoarding).
And maybe that's really what drew me to the industry in the first place (all those little bits and bobs I could gather up and no one would ask why).
So today's post is all about little things.   Starting with these tins.
I have had these little tins for a while but have never found a use for them till now. 
I painted the inside of the lid with Weathered Wood Distress paint to give a bit of an aged look.  I also used Gathered Twigs Distress Ink to color a small piece of cheesecloth and added it to the lid with Multi Medium.

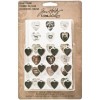
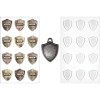
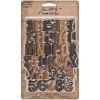
I chose two metal embellishments to alter.
Adornments - Nature: I painted the rose adornment with Weathered Wood Distress Paint.  Once dry, I added gold Alcohol ink over the top, leaving just enough of the blue coming through.
The Keyhole - I painted the metal keyhole with same Weathered Wood Distress Paint.  I let it dry for about 15-20 minutes until the paint was tacky, then burnished it with a soft cloth until I wore away the paint in the center.  I finished it off with a bit of Mushroom Alcohol Ink to darken it up.
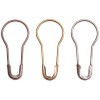
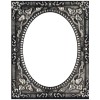
I also used Mini Fasteners to make it look like the Keyhole was screwed to the front of the tin.  In reality, the Mini Fasteners were placed into the holes and bent back, then the Keyhole was attached to the lid with Glossy Accents.
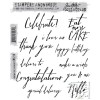
The numbers came from the Special Delivery Remnant Rub sheet (this new rub sheet has a huge amount of numbers, perfect for all my little projects).  The black word strip is from Small Talk, which is a booklet full of short sayings (3 sheets of black and 3 sheets of white).
I decided to add the smallest Clock Key at the top.  This time I did pierce the tin with an awl to permanently add the Clock Key in place.
And what is inside?
The little Salvaged Doll of course!  So cute!
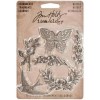
I used Mushroom Alcohol ink over her body and rubbed it around with a piece of felt (wear a rubber glove if you are worried about the alcohol ink getting on your skin).   I added a bit of vintage looped tatting (something I collect) to make a collar for her dress.  It looks a bit blue green because I pounced a bit of Pool Alcohol ink into the tatting to give it some color.  I adhered the collar to her dress with Multi Medium because it dries clear and it isn't shiny.  The tiny pearl in the center of the collar is from an old necklace.
The Typed Token was painted with gold Alcohol Ink and then Weathered Wood Distress Paint was added to the edges.  The No.84 is from the Remnant Rub sheet.
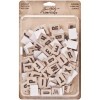
I tried a few different trinkets in the background of the tin.  Like these tiny buttons.
However, I ended up going with a Alpha Chip and a Heirloom Rose at her feet.  It just seemed to fill the space a little better.
 Love my little box.  So sweet with the pink cotton fabric in the background.  I guess my take away from today is, don't over look small things that might just make a big impact.
now carry on,
paula


Tuesday, February 10, 2015

Easy Valentines

I'm thinking about Valentines Day today!  It's coming up in just a few short days, so I thought I better get cracking on a few ideas that have been whirling around in my head since last week.  I had some fabric bags left over from another project and thought these would work like a charm for what I have in mind.
I'm using two stamp sets today -
Watercolor
 and 
Handwritten Sentiments
I am also testing out the new Dye Ink from Ranger that was released at CHA.  I used vibrant Classic Cherry and Black Tie to stamp the images on the fabric bags.  Super simple, just ink and stamp onto the bag.  The ink went on easily and had good solid coverage.  This ink is permanent and waterproof once dry.  Liking it so far!
The Watercolor stamp set also comes with a small hearts in a row stamp.  I stamped this image 4 times in Pink Gumball (it's a perfect shade of pink) then added the "you & me" sentiment above the hearts.
You can see here, that in just a few minutes you can create a couple pretty cute bags that can be used for candy or small gifts. 
You might notice I added a Loop Pin with a Heart Charm to embellish the bow.  I think the "Special Delivery" stamp would look great stamped onto a small tag, if you wanted to add one to the Loop Pin!
Now why not use the same idea to make a card?
This time I inked only 7 of the hearts to leave a space for the stamped sentiment.
I stamped the image onto a piece of Ranger Specialty Stamping Paper, which is a smooth matte coated paper, that is perfect for getting a nice crisp image.  You can see how vibrant the color is on the paper compared to the woven fabric.  Stunning.
This card could work for Valentines day or an anniversary.  Change the color of the hearts and it could even work for a best friend.
And if you are wondering, the Letterpress XO, was made using Multi Medium and Stickles Dry Fine Glitter - platinum.  Once again, quick and easy to do but what a super effect!
Well that's it for today.  I'm super happy with how these turned out.  I think both these stamp sets are great for a multitude of projects!  I hope you use some of the ideas I've shared with you today to make something special for a friend or loved one.
now carry on,
paula


Wednesday, February 4, 2015

Do Your Best

Many things going on in the house today.  I say "house" because I pretty much have a project going on in every room!
Currently, the kitchen table is set up for photography...and photography means pulling out props for "lifestyle" shots.  When you are photographing 20 + samples, that's a lot of different vintage pieces, backgrounds, and linens.  Just waiting for some afternoon natural light today and I will be done!
The CHA aftermath continues in the living room.  All samples have been organized into their respective boxes for shipment back to the designers on Friday.
And back in the craft room, my work desk is a mess - still working out some class ideas for my spring classes.  Gotta use a little Cracked Pistachio! 
Anyway, as you can see there is always a lot going on and that is GOOD.  Keeps me busy and lucky for me, I'm married to someone who does not give a care if there is a photography studio set up on the kitchen table or a pile of boxes in the middle of the living room.  If fact it probably bothers me more than it bothers him.  No worry though, it's all in a days work!

So on to the project for today...
I'm sharing one of my CHA projects - "Do your Best" cigar box.
I use a vintage cigar box I picked up in TX last fall to house a assemblage of letterpress, thread, a thimble, a new trophy cup and a Salvaged Doll. 
 
please click on photo to enlarge

I did not change the front of the box because the graphic was just too good to cover up.
On the inside, I used burlap from the new Textured Surfaces and Emporium Ephemera for the background.  And yes, you are seeing that right...I used tack nails to secure the burlap to the wood box.  The Foundry Frame has been painted with Weathered Wood and Brushed Corduroy Distress Paint and Alcohol Inked.  A small Adornments Arrow added (gold alcohol ink).  The photo is from the new Photobooth set.  I also used a Screw Eye and some chain to hang the Shield Charm from the top of the box.
You might notice there is a Mirrored Star on the Letterpress.  I used the star to cover up the "leg" on the Q, as I really needed two O's to spell out the phrase, with one set of Letterpress.  I'd like to buy a vowel please...
I used the new Trimmings- Lace to add a skirt to the Salvaged Doll.  The metal flower came from a vintage earring that I clipped off.  The little bottle is one of the new Tiny Vials that has been filled with glitter.  In the background you can see the trophy cup that I alcohol inked with silver (to cut back on the shine) and then burnished with very fine steel wool.
Hope you enjoyed today's project.  I sure had a great time making it.  Now it's back to doing the things that need to get done today so I can at least get the kitchen table cleaned off for dinner tonight!

I am teaching in Iowa and CA in March!
Hope you can join me!

Ankeny, Iowa
 March 6 and 7th

Down to Details
Stevenson Ranch, CA
(Valencia area)
Saturday, March 28th
Please contact ginger for more information
gingbugg@cs.com

now carry on,
paula