Showing posts with label valentines day. Show all posts

Sunday, February 9, 2025

Love Notes

Hello Friends,

Have you heard of Galentine’s Day? It’s like Valentine’s Day, but for gals! Celebrated on February 13th, it’s all about honoring friendships, especially among women. I created something special that could be given as a gift for this unique holiday.

This fun project features Stampers Anonymous Love Notes along with the Simon Says Stamp matching wafer dies! Who knew you could cut out so many hearts at once? I hope you'll pop on over to the Simon Says Stamp blog to see the step-out tutorial for this project. Just click HERE and you will go right to it!
Now carry on,
Paula

Friday, February 5, 2021

Love is in the Air

Hello friends,

I have post over on the Ranger Projects Blog today, showing how I created this Matchbox Valentine featuring Kitsch Flamingo. I hope you will pop by the Ranger site to see how I created the Valentine, start to finish!

There are unlimited options for filling the boxes so I thought I would share four of them here! 

Salvaged Doll 
  1. Sprinkle Mushroom Alcohol Ink over the top of the doll and wipe over it with felt.
  2. Cut out a small heart (Kitsch Flamingo sprayed on White Heavystock) and glue to the chest.  Cover with Glossy Accents.
  3. Use gold Mixative to color the tiny crown, then glue to head with Glossy Accents

Mini Pocketwatch
  1. Glue in ephemera background.  Add Clippings sticker.  
  2. Cut out a flower from Worn Wallpaper and glue in place.
  3. Secure to the box with 3D foam squares.

Type Chips
  1. Find the 4 letters to spell Love.
  2. Use a piece of scotch tape to secure letter together (they need to be flexible to bend).
  3. Cut away the top, uppercase letters leaving only the lowercase.
  4. Use a doubled foam square to add to the box.

Heart
  1. Cut a heart from wool (I used an old Sizzix Bigz Die called Heartfelt).
  2. Use wire cutters to clip the Adornment Arrow in half (use safety glasses).
  3. Make a small cut into the wool heart for each piece of the arrow to slip inside.
  4. Add Collage Medium to the back of each end of the arrow and slip in the tiny hole.  Hold in place until secure.

I hope you will take the time to pop over to the Ranger blog to see the rest of the project - the Monoprint background is my favorite!
Now carry on!
paula


Tuesday, February 10, 2015

Easy Valentines

I'm thinking about Valentines Day today!  It's coming up in just a few short days, so I thought I better get cracking on a few ideas that have been whirling around in my head since last week.  I had some fabric bags left over from another project and thought these would work like a charm for what I have in mind.
I'm using two stamp sets today -
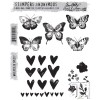
Watercolor
 and 
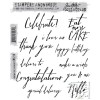
Handwritten Sentiments
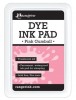
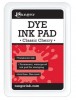
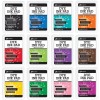
I am also testing out the new Dye Ink from Ranger that was released at CHA.  I used vibrant Classic Cherry and Black Tie to stamp the images on the fabric bags.  Super simple, just ink and stamp onto the bag.  The ink went on easily and had good solid coverage.  This ink is permanent and waterproof once dry.  Liking it so far!
The Watercolor stamp set also comes with a small hearts in a row stamp.  I stamped this image 4 times in Pink Gumball (it's a perfect shade of pink) then added the "you & me" sentiment above the hearts.
You can see here, that in just a few minutes you can create a couple pretty cute bags that can be used for candy or small gifts. 
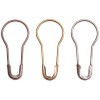
You might notice I added a Loop Pin with a Heart Charm to embellish the bow.  I think the "Special Delivery" stamp would look great stamped onto a small tag, if you wanted to add one to the Loop Pin!
Now why not use the same idea to make a card?
This time I inked only 7 of the hearts to leave a space for the stamped sentiment.
I stamped the image onto a piece of Ranger Specialty Stamping Paper, which is a smooth matte coated paper, that is perfect for getting a nice crisp image.  You can see how vibrant the color is on the paper compared to the woven fabric.  Stunning.
This card could work for Valentines day or an anniversary.  Change the color of the hearts and it could even work for a best friend.
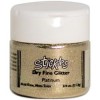
And if you are wondering, the Letterpress XO, was made using Multi Medium and Stickles Dry Fine Glitter - platinum.  Once again, quick and easy to do but what a super effect!
Well that's it for today.  I'm super happy with how these turned out.  I think both these stamp sets are great for a multitude of projects!  I hope you use some of the ideas I've shared with you today to make something special for a friend or loved one.
now carry on,
paula