Hi everyone!
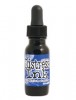
A super quick post today to share a few ideas about Distress DIY Ink pads. The best news of all is that they are very easy to make (
in fact quite additive). Tim created a video back when the DIY ink pads came out - you can see that
here to get started.
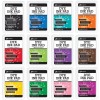
Today I'm working with the new Blueprint Sketch, Peacock Feathers, and Twisted Citron. Killer combination right?
NOTE:
to keep the color stable and vibrant on the paper label, rub Distress Micro Glaze over the top, then lightly buff away the excess (a little goes a long way). Also, if you use a heat tool to dry your inked label, be sure to let it cool before adding the Micro Glaze, otherwise it can melt on contact (and no one wants that).
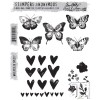
I decided I to use the beautiful Watercolor stamp set with the new ink pad.
I stamped each butterfly onto a piece of Distress Watercolor paper (
smooth side). What I wanted to show here is that even though the DIY Ink pad was created in "stripes" of color, the way you place your stamp on the pad, will determine the look. You can see here that the butterflies were stamped so that the darker color is at the top, on the bottom, on the right, and on the left. The butterfly on the top left was even inked on the diagonal. So even though I used the same ink pad, each butterfly has it's own look.
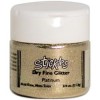
I sprayed the butterflies with Brushed Pewter Distress Spray Stain just to give them a bit of shine.
Once dry, I cut them out.
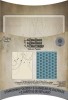
To make a card front for the butterflies, I decided to use watercolor paper for the background (because of it's weight it makes a great impression). I'm using Snowflake Texture Fade. Love when a die or embossing folder can be used beyond the season it was intended for!
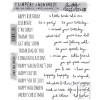
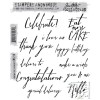
I stamped a sentiment for the front of the card using the super cute Crazy Talk stamp set.
Then a little Crinkle Ribbon. I used Blueprint Distress Stain to color the ribbon leaving some white areas. Before drying the ribbon, I dripped Twisted Citron re-inker to get a super intense green color intertwined with the Blueprint Sketch.
Put it all the pieces together on Core'dinations cardstock.
Then add butterflies. I secured the butterflies with two small foam dots under each wing.
This may be the first card I have ever made that I did not use Distress Ink on the edges! First time for everything I guess. I am super happy with the coloring on the butterflies.
Loving the ribbon too. I wish you could really see how vibrant the color is! I've never dripped ink from a re-inker onto Crinkle ribbon before but it was fun and very effective to get a super intense color.
I hope today's post will give you a few ideas on using a Distress DIY Ink pad (or 10). I know I will be making more, because with over 50 colors of Distress, the sky's the limit!
now carry on,
paula