Showing posts with label transparent things. Show all posts

Monday, July 31, 2023

Full of Wonder Panel

Hello Friends,

This is one of my favorites that I made from the Etcetera release.  Here I have used a Etcetera Panel + the house shapes from the Facades pack.  I actually used two house shape (because it was just easier) but I have given you an alternative in case you only have one pack.
Lets get started...
Cover the Etcetera Panel with Backdrop paper  - this paper is from Backdrops Volume 5.
I added Design Tape Trims to the edges of the panel.

This is just a test run to show you placement on the panel - NO GLUE YET.

I chose two transparent layers from two different packs. The moon transparency is from the "Transparent Things" pack. I chose it for the stars in the background, not the moon, so I placed it as far to the right as I can.  *This will make more sense when the top transparency is placed on the second layer.

The photo is from the Photomatic pack - I just cut around her, then added a thin foam square to the back so she is raised off the surface.
I squeezed some Stickles out onto the craft sheet, then picked some up with my fingertip and pressed it onto the transparency to dry.  Its hard to take photos of glitter, so trust me it looks better that it does here!
So here is how I put all the pieces together...
I used a cutting knife to cut paper for the top of the house shape (Etcetera Facades). I had multiple packs of Facades so I am going to use two house shapes for this project.  If you only have one package, then you can use Foam squares to raise the house up from the panel.
Tape the 2nd transparency to the FRONT of the house Facade. 
*notice my cut piece on the left, waiting to go in top.
Add Collage Medium to the back of the cut piece.
Then flip over and place on top of the Facade, covering the tape.  Press down till smooth and flat.
FACADE 1
Now, using the second Facade house shape, adhere the moon transparency to the back as shown. I used Scor-Tape to add the transparency to the Facade.

PLEASE NOTE: If you are going to use foam squares instead of the second house shape, then the moon transparency will be adhered directly to the panel, with facade 1 + foam squares placed over the top.
So your piece should look like this.
The double house gives maximum space between the top transparency and the moon transparency.  And you can barely see the moon off to the right!
I added Hardware Heads to the corners.
And a Word Band to the top. I used Foundry Wax in the recessed portion and sanded the letters to bring out some contrast. I believe I added some Mushroom Alcohol Ink with a small brush to grunge the gold wax up a bit.
On each side I added some ephemera and then pieces of "Leafy Twigs".  This is a Sizzix Thinlit that I cut and inked.  I splattered it with white paint. Once dry I added the bright green Distress Crayon, Crushed Olive.  It has been snipped apart to use the individual pieces as I wish.  I adhered it to the panel with Collage Medium.  The tiny beads were added at the end.
I also added a tiny label from the Snippets pack.
Here is a close up of the left side.
I used the Feather from the "Quill and Arrow" pack as a grounding piece on the front. I painted it black and then added Foundry Wax to the high parts. Once heated, the gold and black work really well together.
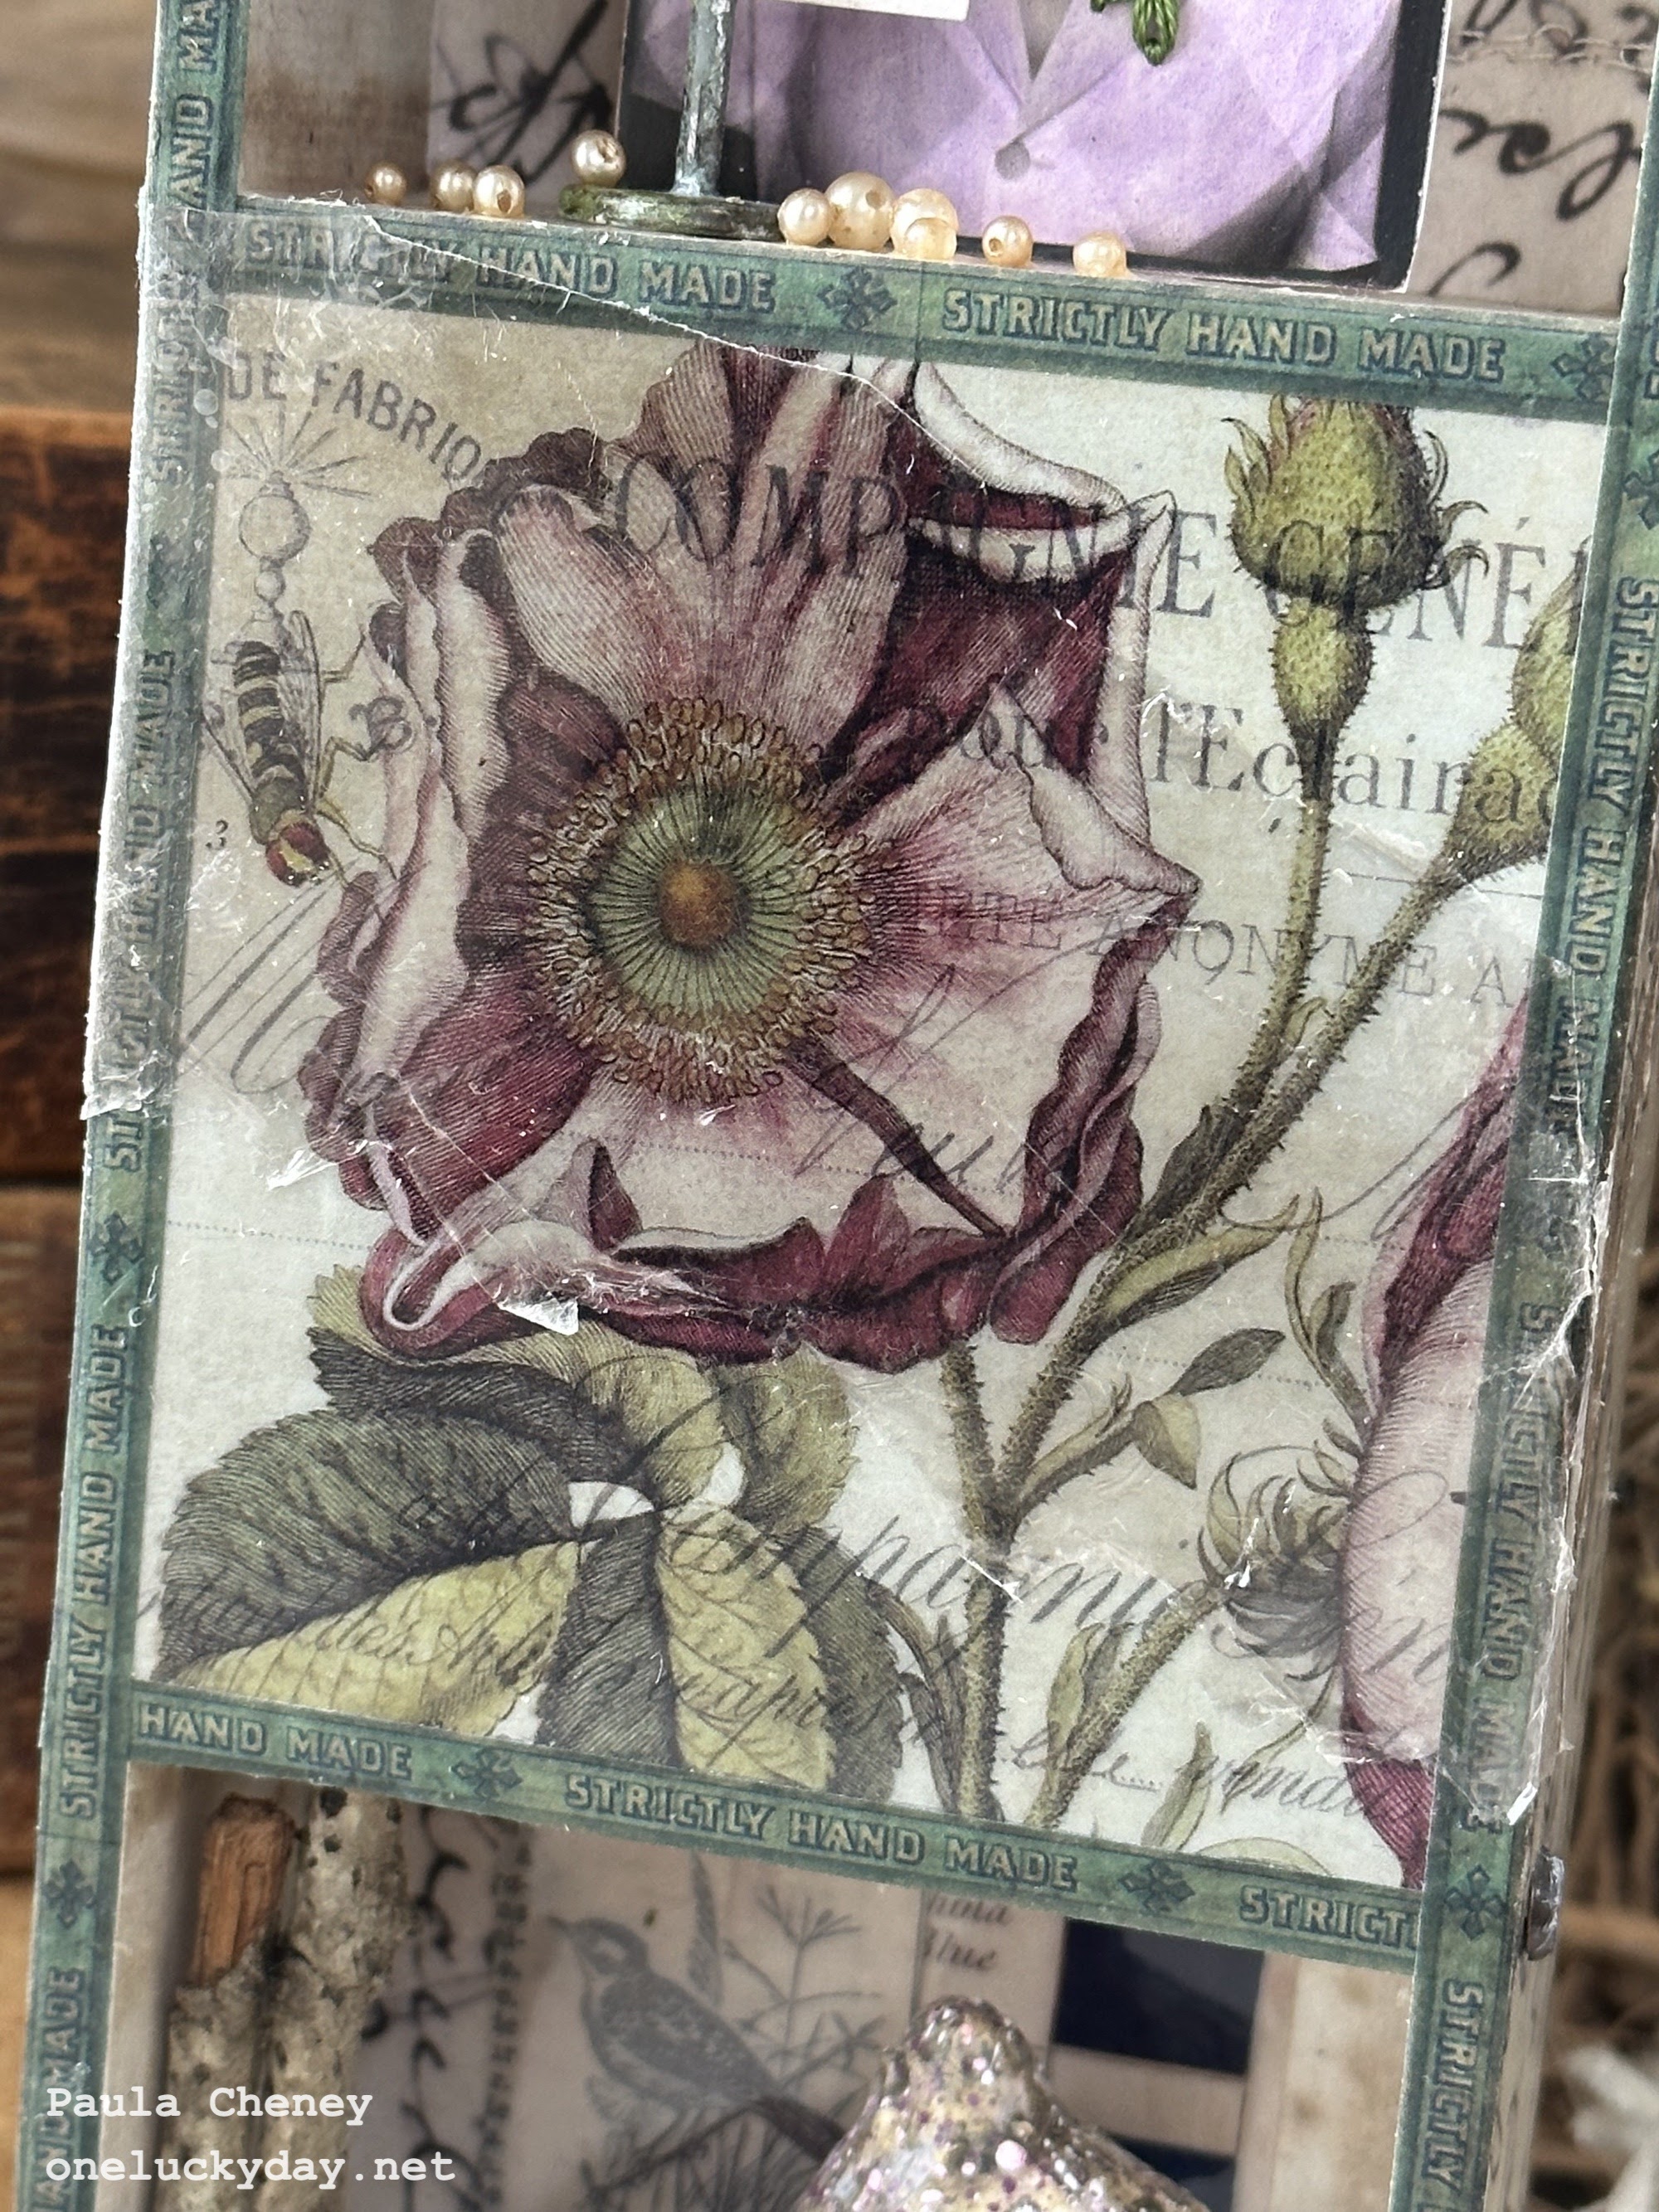
I love this piece - it is so ethereal with the double transparency.  You could use any photo you wanted inside and really go with any theme.
Now carry on,
paula

Thursday, March 23, 2023

Lucky Star

Hello Friends!

Happy to be here today sharing my Vignette Divided Drawer. I don't normally go for "purple" but the Transparency with the flower was the catalyst for this project and it just lead me that direction.  Lets get started!
I first adhered paper to both the inside and outside of the Divided Drawer.  I used paper from Backdrops 4 (the neutral pack) because I needed a neutral base for the "purple" story. It takes a bit of time to add all the paper pieces, but once it's done the rest was easy to fill in.  I also think the choice of the green Trim Tape was good to offset the purple.  I've never used the green tape in the Trim pack before, but once it was on, I knew it was the perfect choice.
*I previously drilled a hole for the Tiny Lights, that will be added to the center section.

I added Large Fasteners to the sides of the box that I had dented with the new Texture Hammer.  I cut the brad "legs" off each Large Fastener before denting and adding white paint - then I just used Collage medium to glue each metal Fastener to the box, mimicking rivets.  I added 3 Large Fasteners to each side of the Divided Drawer.

I added a Quote Chip Labels to a metal Label Frame. The oval size worked perfectly on the top of the Divided Drawer.  I adhered it with Collage Medium and let it sit for 30 minutes before laying the box down.  While this was drying, I worked on coloring the Photomatic and doing the stitching with embroidery floss. 
Distress Crayons were used to color the Photomatic: Peeled Paint, Uncharted Mariner for the background and Villainous Potion for her dress.
EMBROIDERY
I used a sharp needle and embroidery floss to stitch three french knots and two small leaves, as a corsage on her lapel. The photos are easy to stitch through and the texture is a fun addition.  Just remember, a sharp needle is a must.
TIP: to get the photo to appear to be freestanding, I added a small wood block to the back.

FIGURE STAND
I glued the star to the stand.  Once secure, I wiped white paint over the metal and let that dry.  A few pounces of Mushroom Alcohol Ink gave the metal a good Patina, making it look much older than it is.  The words LUCKY STAR came from the Clippings Sticker book.  The stand was secured to the box with Collage Medium.
*Figure Stands - this is the one item that is still on pre-order.  Hopefully they will be in shortly!

PEARLS
The pearls are vintage (from an old necklace).  I painted Collage Medium onto the surface of the box and just poured the pearls into the box to see which ones stayed put.  Once I let them dry, I banged the box on table to see if any would come loose - about 4 rolled to the back.  I used tweezers to grab the loose ones and glued each of them back in place with a little more Collage Medium.  
*remember, Collage Medium dries clear and shrinks around the item being glued.
TRANSPARENCY
I cut the flower transparency to fit the center compartment (where I had already added the Tiny Lights). I used 1/4" Scor-tape to adhere the Transparency to the wood box. The transparencies are thick and hold up really well over the open space.
After the Trim Tape is added to the box, the transparency will be enclosed on all sides. I added a piece of mica over the transparency (collage medium just on the edges) to add texture, but that part is optional.
For the bottom section, I wanted to keep the nature theme going.  I started with the background, adding ephemera pieces from the Transparent Things 2 pack.  I used Scor-Tape to add them to the back of the box before adding the Barrel and Toadstools.
TOADSTOOLS
You might notice I covered the cap of each Toadstool with vintage paper from an old book.  I coated the Toadstool cap with Collage Medium, then wrapped strips of book paper over the top till covered, adding more Collage Medium over the top.  Dry with a heat tool before adding the paint splatters (Villainous Potion and Picket Fence).  I also glued moss up inside the Toadstool so it hangs down one side.
BARREL
The Barrel is just glued into the box with Collage Medium (a nice big dollop!).  That much Collage Medium takes longer to dry, but once it is dry, it's like cement and will not move.
I added the moss and then some Bouquet flowers that were sprayed with Shaded Lilac Distress Spray.
One of the new metal leaves (Foliage Adornments) was added at the bottom.  I wiped Rustic Wilderness Distress Paint over the leaves before adding to the barrel with Collage Medium. 
I hope you liked the project today.  I love the spring colors and the nature theme.  It's hard to photograph with the Tiny Lights on (in the center section) but I like the way it looks in person. 

Now carry on,
paula