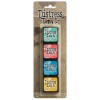
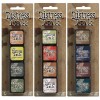
Hi everyone! I promised to create a project using one of the new Mini Distress Ink sets. I chose set #10 - Iced Spruce, Squeezed Lemonade, Bundled Sage and Tattered Rose. You know I had to pick the one with Iced Spruce right?
Lets get started:
Gather supplies - Four #8 manila tags, Dina's white Gesso, paintbrush and Tissue Tape (any pattern).
Lay the four tags out and tape them together (
add tape to both sides). Be sure to leave a 1/16" between the tags so they will fold up without buckling.
Use the paint brush to add Gesso over the tags and tape. Once one side is dry, repeat on the back until all of the manila surface is covered.
Once finished, your tags should be able to fold up like this.
I chose Iced Spruce (
of course) to create the background layer. I used the Mini Iced Spruce ink pad to add Distress Ink directly on the surface of the tag. Remember, the tags are coated in Gesso so the tag surface will not soak up the ink.
Next I made a puddle of Multi Medium on my craft mat, then used a paintbrush to brush the move ink around the tag. I only put out enough MM to work two tags at a time.
Once I covered two tags, I used a wet wipe to get rid of the brush marks of the ink/MM mix until it looked like a smooth stucco surface. So you might ask why not just use Distress Ink over the Gesso and rub it with a Blending Tool? The answer is that Distress Ink over Gesso will never really dry because of the slick coating the Gesso gives. When adding the MM to the wet Distress Ink, the ink color becomes part of the MM - you can manipulate it when it wet but once dry, it becomes permanent over the surface.
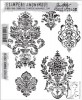
Once everything was dry, I used Archival Ink (
which is permanent ink) - Watering Can and the large Distress Damask Stamp to create a pattern. Love that grey Watering Can color over the Iced Spruce.
I took a piece of dyed cheesecloth and ripped it in a long strip, then stitched it to the right of the fold.
I used Remnant Rubs (Botanical) in combination with words cut from a book to add a message to the inside of the book. After I added the words, I used my finger tip to cover the message with a bit of MM to seal it. Once dry, I used a Walnut Stain Distress Marker to add a bit of color around the word "
And", then smeared it with more MM to seal the color in.
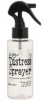
I wanted to use some splatter using the Distress Marker Spritzer but because I have used MM to seal the booklet, using a Distress Marker is out of the question since it will not dry over the slick surface. The solution...a Sharpie marker. The thicker marker slips easily into the collar of the Spritzer tool and therefore can take the place of a Distress Marker in this situation since Sharpies have permanent ink. I decided to practice on a sheet of paper before spritzing over my booklet since the ink/pen is different than what I am used to. Always a good idea to practice first.
The Sharpie gave me a super fine spray. Harder to see, the further away you are, but still a nice effect.
I wanted to use Crinkle Ribbon to add ties for each tag - 10" per tag x 4 tags = 40" of Crinkle Ribbon to be colored.
I used three of the colors from the set - Iced Spruce, Tattered Rose,
and Squeezed Lemonade. The ribbon came out beautifully with a muted,
vintage tone. I know I will be using that combination again.
A few pieces of metal are in order to complete this project.
I chose a small Word Key that had the word DREAM on it. I colored the key with Weathered Wood Distress Paint and then Mushroom Alcohol ink to create the aged appearance. The color helps
"marry" the metal piece to the paper booklet.
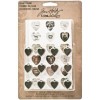
I also used a Swivel clasp, Monocle, and Heart Charm to create a message for the cover of the booklet.
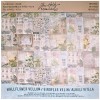
A ripped piece of Wallflower Vellum under the cheescloth on the cover adds another layer.
Note:
you might notice that I changed the Heart Charm - I decided I
didn't want to repeat the word heart, so I changed to "beyond measure".
I love how the ribbon turned out. I was able to create this look by pouncing the Distress Ink colors
next to each other on the craft mat in this order: iced spruce, tattered rose, squeezed lemonade, iced spruce. I folded the 40" piece, 4 times (
you could also pre-cut the 10" pieces), then laid the ribbon into the Distress Ink soaking up the colors and then drying.
cover
tag one and two
tag three and four
I really like how the simple booklet turned out. Very muted but quite lovely. I also think the cheesecloth added the much needed dimension. I don't have very much cheesecloth that is dyed this dark so I might have to have another dying session soon.
And on to what you have all been waiting for -
the winners of the Distress Ink Minis!
If your name is on this list, please email your shipping information to paula@oneluckyday.net
Thanks to everyone for stopping by and commenting!
Set #10
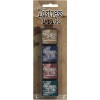
Set #11
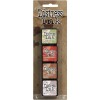
Set #12
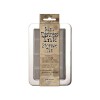
Products used in today's tutorial.