
Today's Vignette Tray was crafted with femininity at its heart. The Paper Doll group featuring a mother in yellow with her three daughters was intentionally selected to evoke a feeling of togetherness, love and support.
I love how easy it is to transform idea-ology products like Photo Studio cards, Curio Frames and Adornment Keys with Distress paint, ink and crayons. The Layers Organic botanicals reinforce the feminine feel and carry the theme, while Cello Tape Stickers complete the vintage aesthetic I love. I hope you enjoy this as much as I did making it!


So let's get started on the project...starting with the Vignette Tray.
Use Collage Medium and Backdrop paper to cover the large Vignette Tray. I used 4 different prints from the Backdrop 3 pack to cover the tray. Feel free to patchwork the prints as you please.


Photo Studio Cards
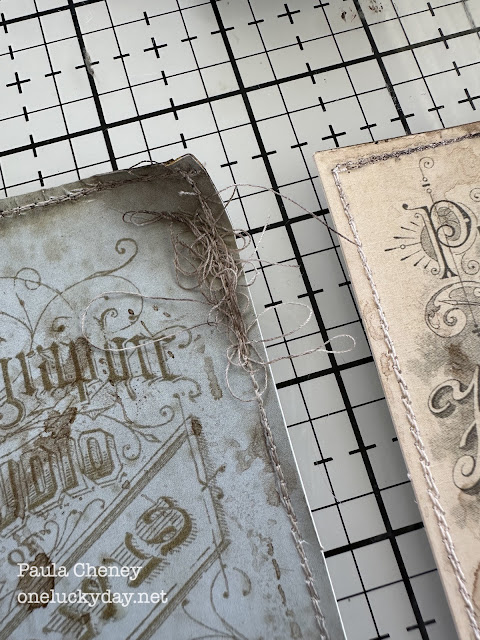
Lets start on the inside of the tray.I began with a couple Photo Studio cards. I stitched around the edge of each card a few times to get thicker stitch lines. I then made a puddle of Distress Ink and dipped the cards into the puddle, drying with a heat tool. It takes a couple of passes through the ink but its worth it in the end to make them look aged.
 I pulled thread from my machine, spritzed it with water and wadded it up. Then I held it in place (as good as I could) while sewing over it. So even though it looks like the thread got jammed in my machine, it's really just extra thread I added after the initial stitching was done.


Circle
This embellishment was made using one of the circles in the Etcetera Facades pack (3 3/4"). If you don't have the Facades pack, you could die cut multiple chipboard circles and sandwich them together with Collage Medium.
The paper is from Backdrops 4 (the Neutral pack), but again any neutral paper would work here.
 I used an old trick to decorate the edges of the Facade circle - Bead Chain. I used my fingertip to add Collage Medium (liberally) to the edges of the circle then placed it face down on the Studio Mat to add the Bead Chain around the edge. NOTE: I purposefully added the chain with the circle facing down so the chain would sit closer to the front side of the circle.


Paper Dolls
I chose a selection of Distress Crayons for my Paper Dolls. Funny, I picked them individually yet they are perfectly cohesive!


The Detailer Water Brushes were used for the small details like flowers and buttons. In this case, I scribble directly on the glass mat and picked up the crayon with the tip of the damp water Brush. I have a bit of water on the glass mat to dampen the brush tip (there is no actual water in the Water Brush). Honestly, you need very little water!
Once the Paper Dolls are dry, you can use them as is or spray them with a sealer so the color becomes permanent. If you want to know more about that, you can read a post I wrote about using Distress Crayons HERE.

 Once dry, use steel wool to sand away some of the paint.
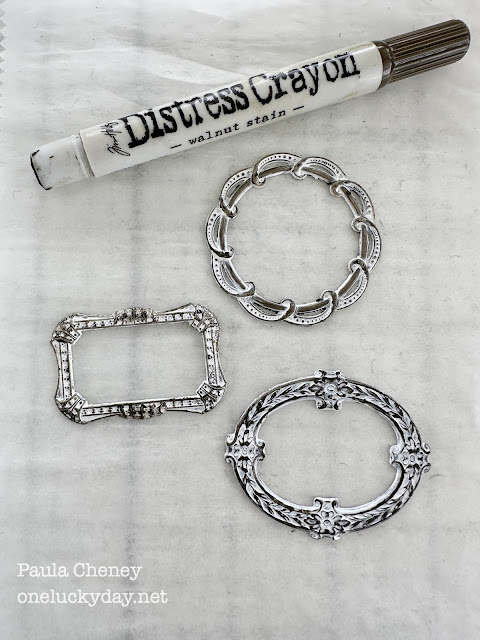
 Then add a bit of Walnut Stain Distress Crayon to add more contrast.
 You can add anything to the Curio Frames. I decided on a bit of muslin (there is also Watercolor Cardstock behind the muslin because it was see through). I stitched the buttons to the muslin before I added the paper backing. The second frame is just a piece of ephemera with words from the Clippings Sticker Book.
 Repeat the three steps to paint the Adornments key just like the Curio Frames. Once done, add a small jewelry tag with a Remnant Rub word.
 So here are all the things we have made so far.

Metal
I rubbed white acrylic paint on three Curio Frames and set them aside to dry. I wasn't sure how many frames I was going to use at the time I painted these and clearly I ended up only using two.


I also have some leaves from the Layers Organic pack as well as double stacks of bingo chips that will be used on the Paper Dolls. This tray project is all about layers or different levels if you will. When we start adding all the things to the tray, layers are what makes it come to life. So please take care when adding the elements. Don't be afraid to use 3D foam squares, foam tape, bingo chips or anything else you can think of to add the different levels.
 Okay, let's start loading!

The two Photo Studio cards were added using two different thicknesses of 3D foam tape so one can float over the other. I like using foam tape instead of foam squares for this part since these cards create the base for everything to come. You don't want sagging in the center!
 Next is the two circles that play off each other. In the end I added a couple more bingo chips to the back of the big circle for more stability. The small circle was secured with four 3D foam squares.
 Okay, so on to the Paper Dolls. Remember we are using double stacks of bingo chips for the Paper Dolls. If you do not have access to bingo chips, then use double 3D foam squares. Anything to raise the Paper Dolls so they float over the rose circle (they should not touch the circle).
 And on the right side, the Curio Frame was added with 3D foam squares and the key with both foam and Collage Medium. I used a small piece of foam under the flat portion on the left side and under the tag. Collage Medium was used on the right end. I cut off the end of the leaves (the stem part) and tucked them under the key. There are 3D foam squares under each leaf.

 The last step is to add some cheesecloth. You can use Mummy Cloth or fine weave Cheesecloth...Both work. I just shredded the cheesecloth, paint on Collage Medium onto the tray and place it with tweezers.
 I think it helps to ground the ladies.


 I hope you like this one as much as I do. I love the femininity and all the different elements.
  There are so many things that could be used to create a feminine tray or Vignette Box. I know you have all kinds of thing stashed away that could be used to make your own! Time to start digging!


Add a pink postage stamp from the Postmarked Sticker Book (I used pink to visually connect the stamp to the rose). Now to tie all the pieces together...the secret weapon: Cello Sticker Tape. Add just a few pieces across the project to visually connect the components. Amazing how a simple piece of tape adds so much.


Here are a couple shots of the finished tray.


Now carry on,
paula
That's fabulous, Paula!!!!
ReplyDelete