
Hello Friends,
Inspired by Tim's LIVE demonstration last Saturday, I decided to experiment with applying Distress Spritz over Distress Crayons tags. Creating these tags is so fun because each one is uniquely beautiful, thanks to the varying color combinations and layering techniques. The addition of Distress Spritz, along with another secret sparkly touch, gives them a wonderful glow!
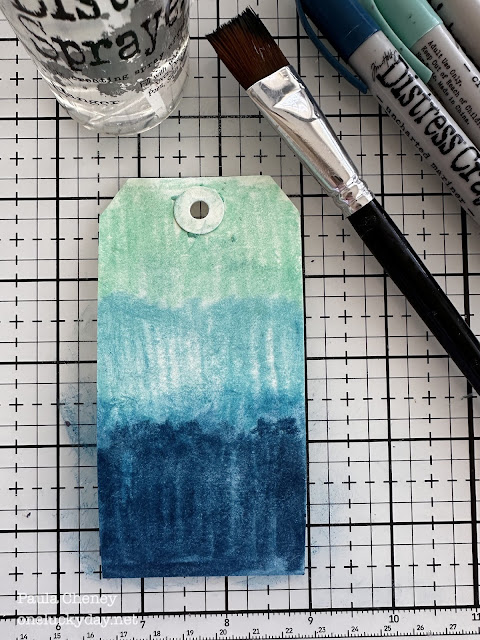
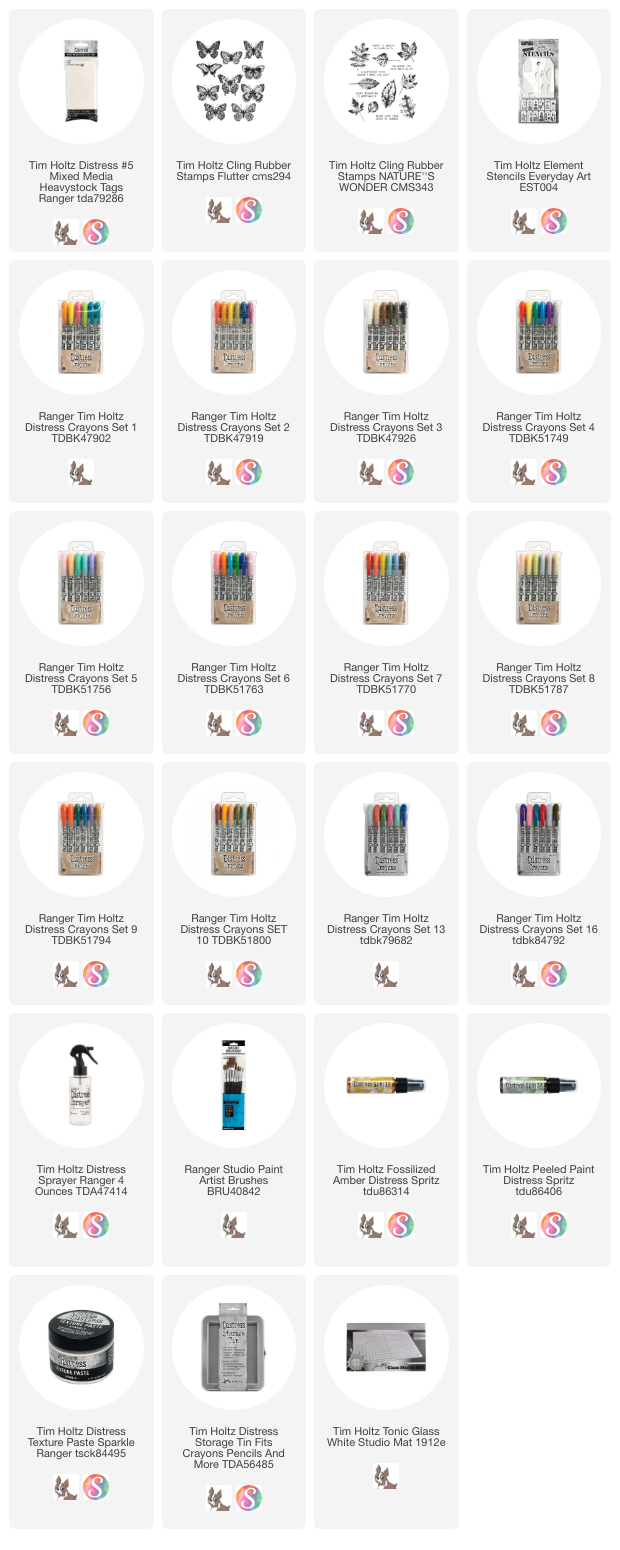
 To get started, grab a few Distress Mixed Media tags. These are #5 tags (4 3/4 x 2 3/8") which makes them the perfect size for using on a gift. These coated tags are the best for wet techniques with lots of layers. There are so many color combos but I'm going to share just three that I came up with. This one is Salvaged Patina, Cracked Pistachio and Uncharted Mariner.

 5. Add more crayon and repeat the process. Remember, this tag will have other layers so it does not need to be perfect.
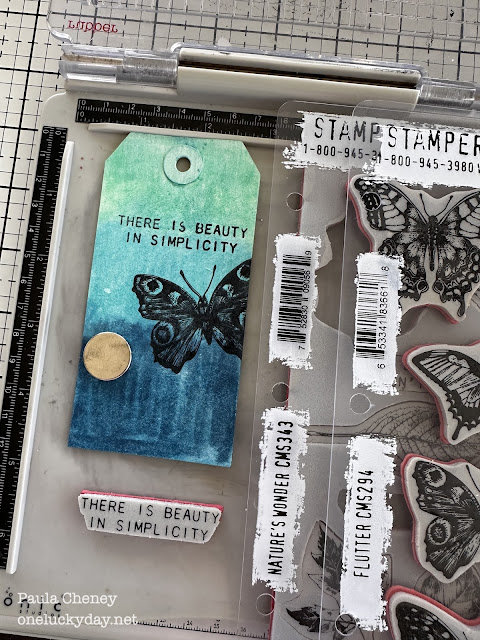
 Once the tag is dry, stamp with Archival Ink. I used both Nature's Wonder and the Flutter stamp sets on the three tags.
 I added Sparkle Texture Paste (which is translucent when dry) through one of the "Everyday Art" stencils to add the stem. Set aside to dry.
 Once the Texture Paste was dry, I sprayed with Distress Spritz Fossilized Amber over the tag. I also opened the bottle and used the end of the plastic tubing to drip a larger amount of Spritz directly around the edges of the stem.
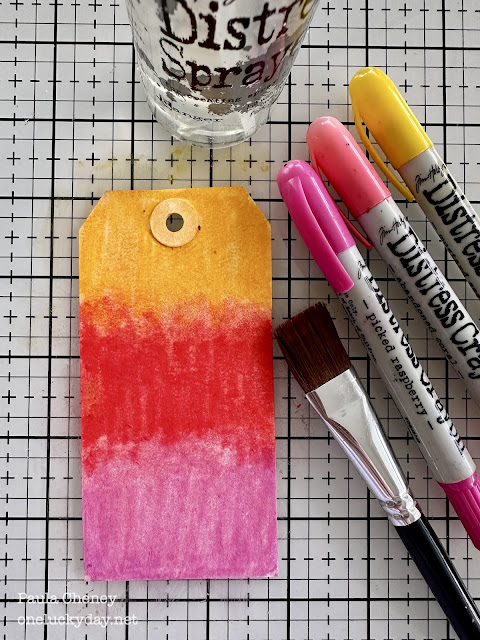
 Lets change colors to Picked Raspberry, Mustard Seed and Abandoned Coral. Follow the same steps to get the base color.

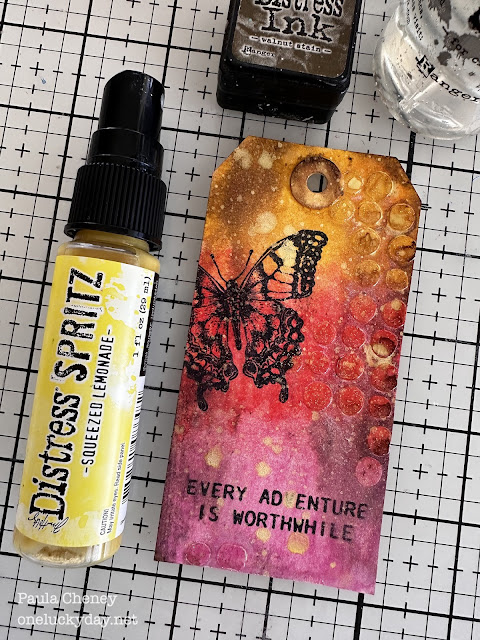
 Use a different Everyday Art stencil to create dots over the tag (still using Sparkle Texture Paste).
 Once dry, I added Walnut Stain Ink and Squeezed Lemonade Spritz over the top. I wish the Sparkle Texture Paste and the Spritz come through on camera as good as they do in person. It's so sparkly!!
 And our last one: Milled Lavender, Shaded Lilac and Crushed Olive.

 I loved adding the second layer of colors with more Shaded Lilac and Tumbled Glass.

 This is time I used a very small cloud-like stencil from the Everyday Art stencil set...a bit hard to see in this photo but its there! I added ink and Peeled Paint Spritz to the small tag. The Spritz appears as dark dots but in person it is very sparkly.
 I hope you will give these little tags a go. The Distress Spritz along with Sparkle Texture Paste really make these tags fun. And with so many color combinations of Distress Crayons - well, sky's the limit on color!

Inspired by Tim's LIVE demonstration last Saturday, I decided to experiment with applying Distress Spritz over Distress Crayons tags. Creating these tags is so fun because each one is uniquely beautiful, thanks to the varying color combinations and layering techniques. The addition of Distress Spritz, along with another secret sparkly touch, gives them a wonderful glow!

Now let me walk you through the easy steps:
1. Spray tag with water (Remember, I am using Distress Mixed Media Tags which are made with a coated paper - that is very important in this technique).
2. Working quickly, scribble crayon over tag.

3. Use a paintbrush to move the crayon around, blending between the colors. You may need to add more water or use a wet wipe to pounce over crayon.
4. Dry with a heat tool then repeat steps 2 and 3 (add more crayon and blend again).
NOTE: When using a paintbrush, you must rinse the brush between colors or use more than one brush.


I have two other posts of Distress Crayon Tags that can be found HERE (all the basic of coloring with Distress Crayons on tags) and HERE (adding embossed embellishments).
Here's to some fun creating time this weekend!
Now carry on,paula
No comments:
Post a Comment