
Hello Friends,
Today I am sharing one of the projects I created for the new idea-ology release. This is a project that I created on a whim! I had a basic plan in my head, but was not sure it would work or not till I really got into the project. I wanted to use the house (I cut it out by hand) from the Snapshots pack as my centerpiece, since I was envisioning the lives of the people who had lived in the house surrounding it.

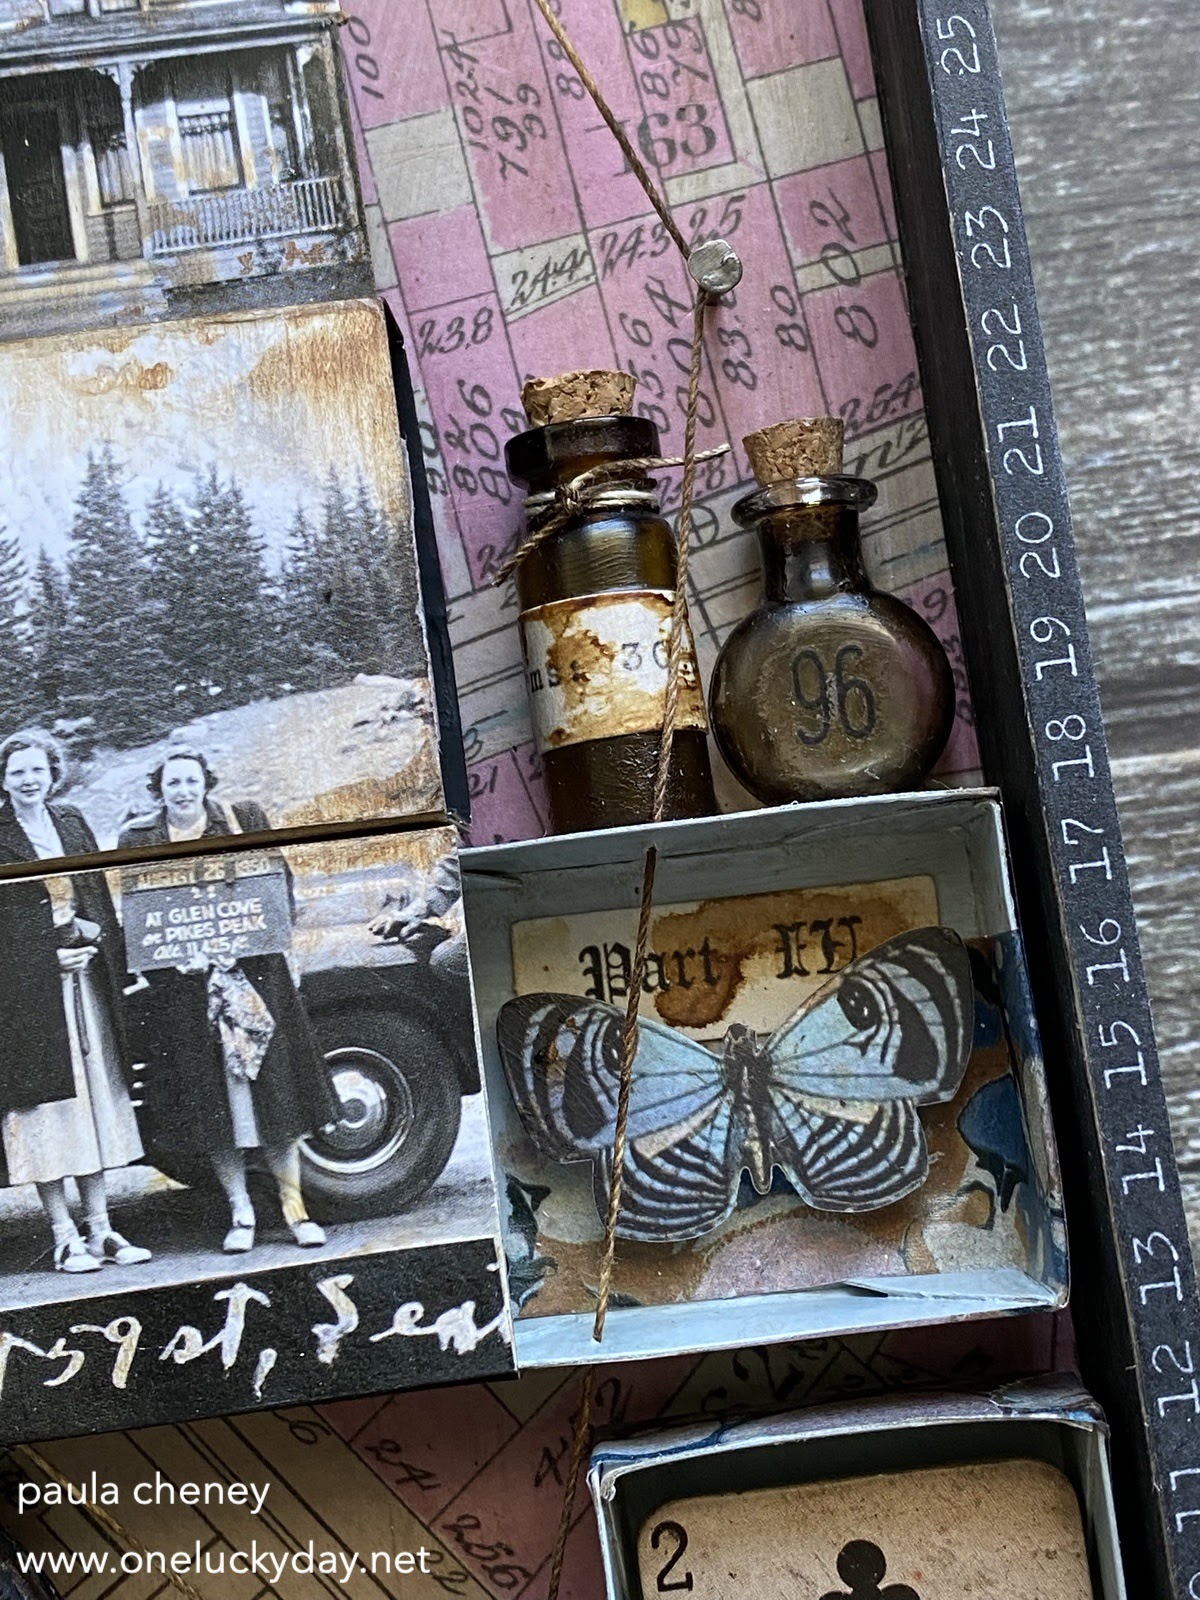
I started by painting the large size Vignette Tray black. I painted the entire outside and the inside walls of the box. This gave me a good vehicle for the pink map paper that is in the new Backdrops 3 paper pack. The black paint makes the pink map really pop! I knew that I was going to be using neutral photos so I needed the pink as my backdrop.
The black tape that wraps around the lip edge of the tray is from the new tape pack that has 12 different, 3/16" tapes. This was specifically made to fit the lip edge of Vignette boxes. You can see the one I used right at the top.

MATCHBOXES
I removed the drawers from each box, painted the inside of each with 2 coats of Weathered Wood Distress Paint and set them aside to dry. Once dry, I wrapped the outside of each drawer with Marbled Tape.


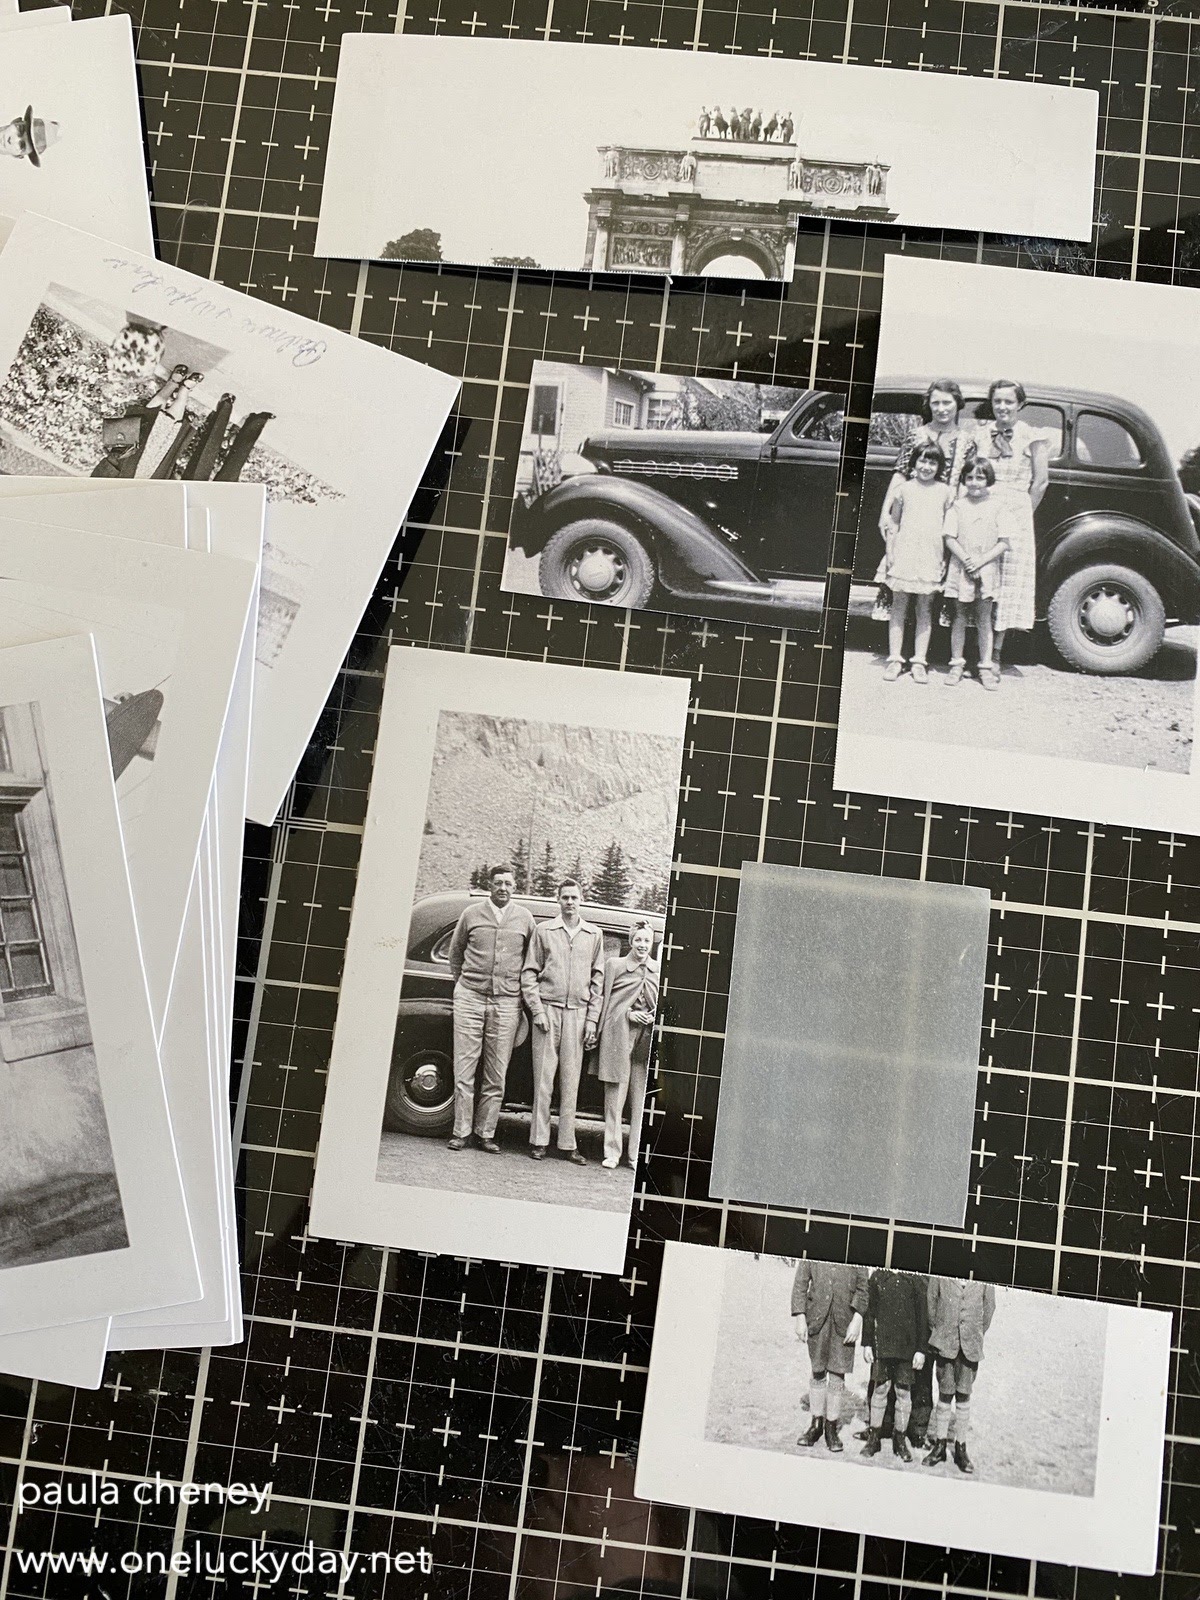
 I had a vision of old photos found in a box so I decided to only color with Gathered Twigs Distress Ink. I pressed the ink onto my glass mat and spritzed it with water. Once I decided which photos I wanted to use (and cut them to fit the matchboxes), I pressed each into the ink and dried it with a heat tool. Just that simple.
 You can see that I have added things to the drawers. You can use whatever you have in your stash. New or vintage...it does not matter.
Snapshots are a new addition to the idea-ology line. It is an entire bag of snapshot photos. The paper is the same as Paper Dolls - thick and slick to the touch. You can color them with Distress Crayons if you wish and they are very easy to stitch through if you were wanted to sew them to a surface.
For this project, I decided to add the photos to the Matchboxes, but of course they are way too big for a Matchbox. That wasn't going to stop me.
I cut a piece of velum the size of the front of the Matchbox. I used the velum to help me find the part of the image I wanted to cut out. I could move it around and up and down till I found the right place. Then I just hand cut that part of the photo with scissors.

I used Collage Medium to adhere all the parts and pieces, from Flashcards to bottles to Number Bocks...all Collage Medium.


 All the string work was done after the boxes were in place. I started with the nail at the top, then worked my way around the tray till I came back together. I used a needle that was big enough for the string. It would be helpful to have a thimble (if you have one) to push the needle through the boxes. The tray could also be created without the string.
 I blackened the Pocket Watch with black paint, then sanded some if it off again. The center is from the new Gauge Dials pack. It fits perfectly, you just have to open the back and pop it in. I added some chain from my stash and a tag from the new Ephemera Snippets.


I hope you like my Matchbox Tray! I know it is kind of an unusual piece but I love it. The new idea-ology products are so fun to work with and I can't wait to use the Snapshots in more projects.
now cary on,
paula


DRAWERS
Word Keys

Number Block

Apothecary Bottles
Junk Drawer Baseboard pack

Gauge Dials and Pocket Watch

Flashcard

I hope you like my Matchbox Tray! I know it is kind of an unusual piece but I love it. The new idea-ology products are so fun to work with and I can't wait to use the Snapshots in more projects.
now cary on,
paula
Wonderfully charming in every way.Some great tips too!
ReplyDeleteThis is so very cool, Paula! I love all of the little matchboxes with each one having it's own story to tell.
ReplyDeleteWhat a fabulous project! You did a great job. Thanks for sharing.
ReplyDeleteSo so fun that you basically just played and this is what came from it. Love the house as a focal point and all the peeps that encompass it.
ReplyDeleteI love this! I used to make random projects with old photos from the flea market. Inspired again!
ReplyDeleteI plan to make this awesome project,but have two questions: How did you accommodate the paper being shorter than the box and where did the moth image come from? Thanks so much. <3
ReplyDelete