
What an exciting day celebrating the release of the new Foundry Waxes to the Distress line! Tim's live demo on YouTube live was epic! If you missed it this morning, please take the time to watch the replay! He really does answer all the "what if" questions about using this new product. I have included my own notes as part of this blog post.

There are two Foundry Wax kits:
Kit 1- gilded + mined
Kit 2 - sterling + statue

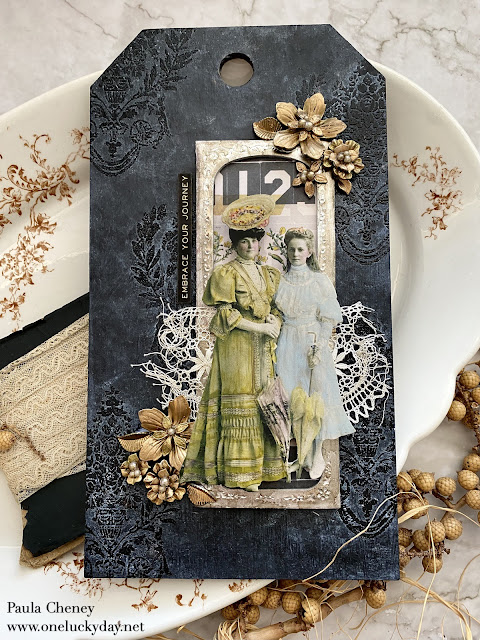
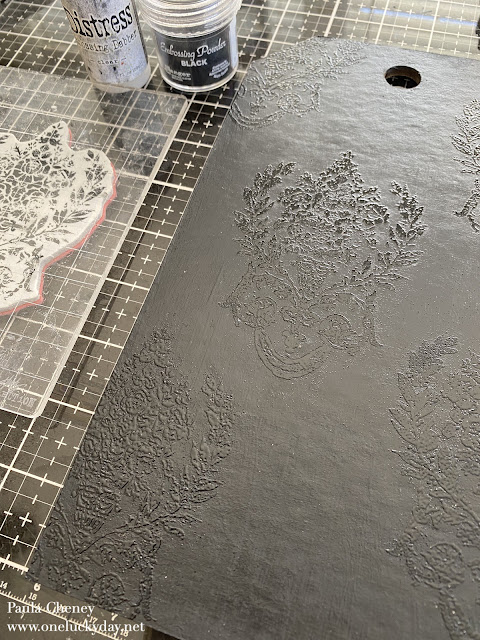
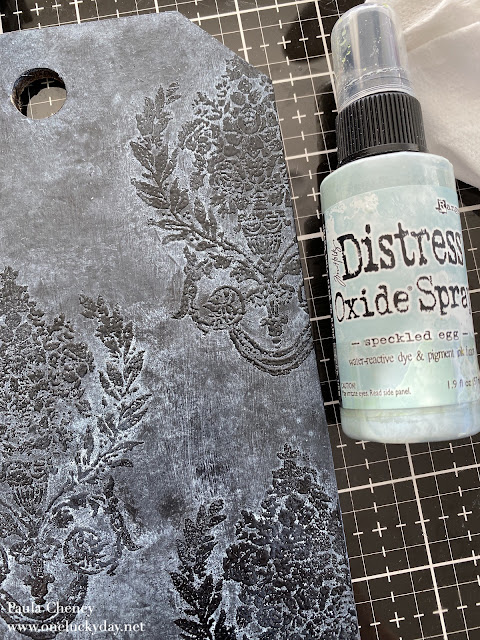
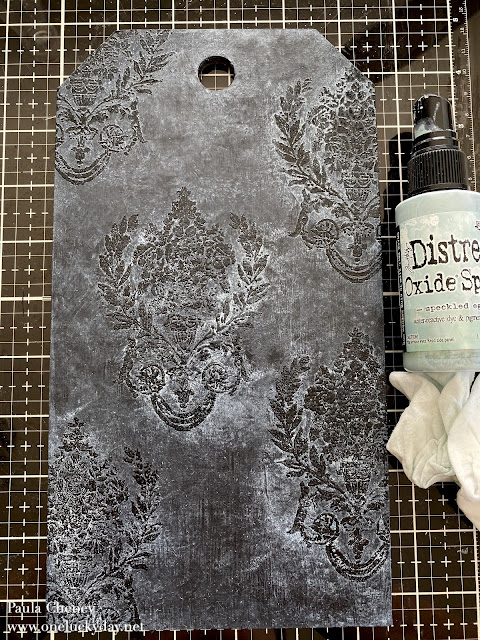
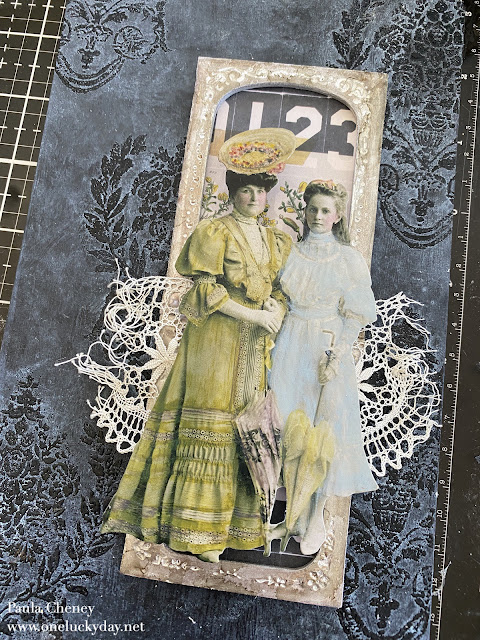
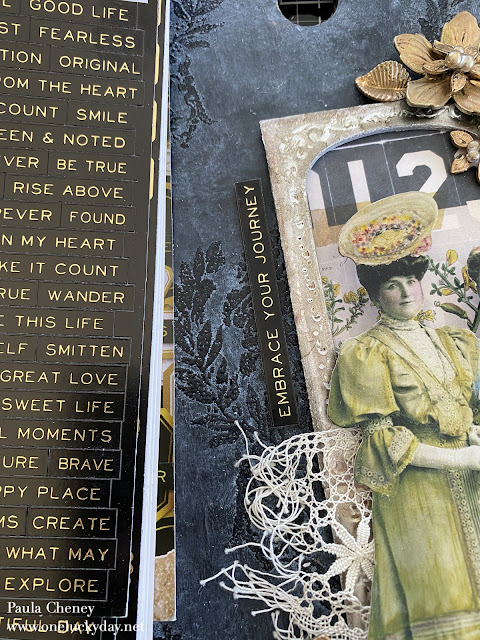
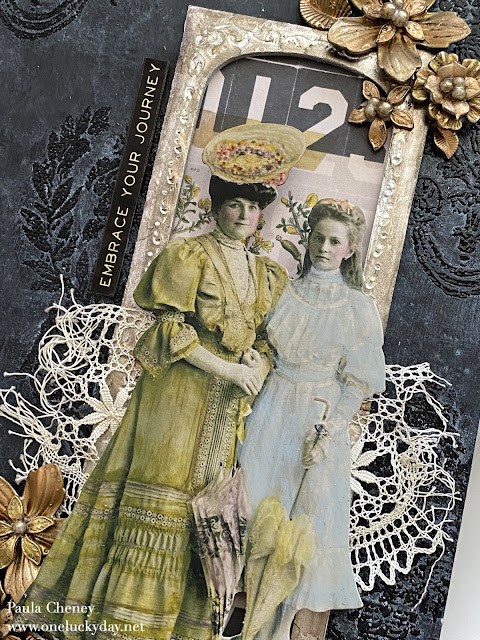
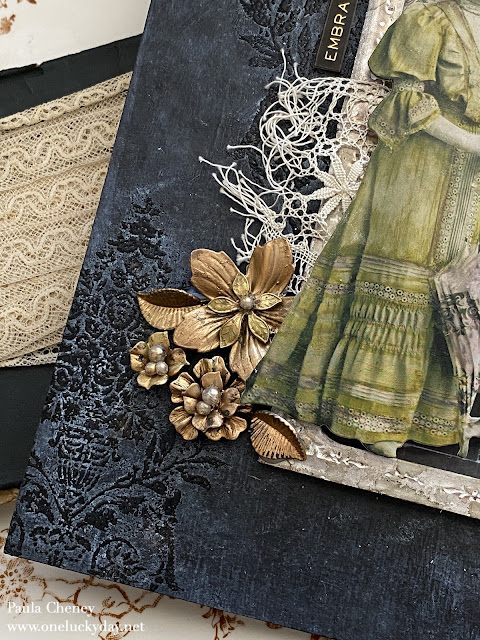
Today, I'm using a small Etcetera Tag for the foundation. I painted the tag with two coats of Black Soot Distress Paint. You could also use a black acrylic paint if that is what you have on hand. Once the paint is dry (leave it at least 30 minutes), use the Embossing Dabber to coat the stamped image. I chose a medium sized damask from the Distress Damask stamp set. One by one, I added the ink to the stamp, stamped the tag, then embossed with my embossing gun (concentrated heat compared to the Ranger Heat Tool). When it was done, I had created a pattern over the painted surface, leaving lots of room between the stamped images.
These are my personal notes on using Foundry Wax.
Please refer to Tim's YouTube demo for more instruction.
You can find the link on his blog www.timholtz.com
Foundry Waxes
Fluid in the bottle
Bottle needs to be shaken before use. Each has a mixing ball but some mix easier than others depending on color.
Becomes a cream when exposed to air (adding to a craft mat)
Permanent when heated
The bonding to surface is VERY quick, like 10 seconds quick.
It will not come off, flake off and you can’t scratch it off. It is not plastic like embossing power so you are not melting it, you are creating a chemical change with heat.
Please Note:
- Foundry Wax is flammable (like Alcohol Ink) so use in a ventilated room.
- DO NOT point the embossing gun towards the bottle or the heat could cause the liquid to solidify in the bottle - literally become a solid. So when in use, just place away from heat source.
- Work directly from craft sheet, not the bottle.
- It is important to recap the bottle when not in use. I like to wipe off the nib after I drip the dime size puddle on the craft mat.
- Use a small brush to apply. You could also use your finger tip for application, but since it's a solvent based product, you need to make that personal decision due to possible allergic reaction.
- Clean brush with 97% Isopropyl Alcohol NOT Blending Solution.
- It will NOT stain the silicone craft mat and can be easily cleaned up with Isopropyl or hand sanitizer and a paper towel.
- It can be used on paper, like die cuts or embossed paper, as well as metal or wood.
Now lets go back to the project!
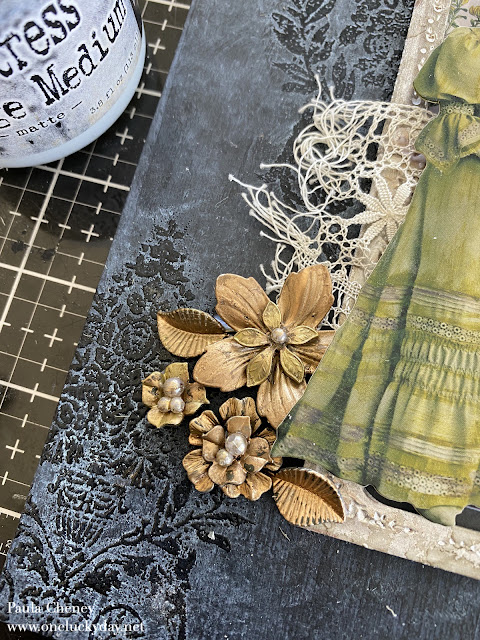
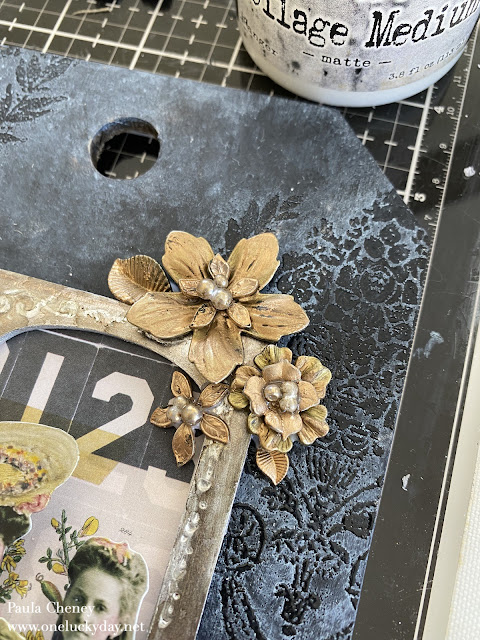
Once shaken (and I hear the mixing ball moving), I dripped a puddle of Foundry Wax on my silicone craft mat. I just picked up the liquid wax with a small brush and painted the metal Adornment Florals. You can see they come only in silver so having the ability to paint them with the wax was intriguing!


Collage Medium secured the flowers into stacks.
Glossy Accents was used to add pearls to the centers of the flowers.


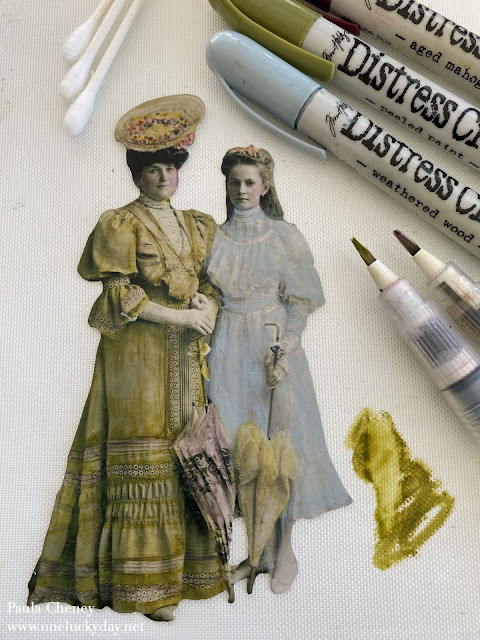
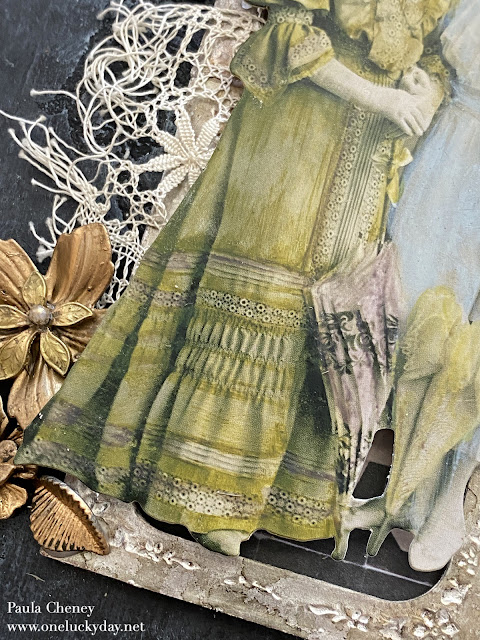
I colored (as I love to do) a mother/daughter from the Paper Doll Groups pack. Her dress in Peeled Paint and the daughters in Weathered Wood. Aged Mahogany on the cheeks. I scribbled the Peeled Paint over the dress until it was heavy. Then I used my fingertip to smooth it out as much a possible (removing any coloring on arms and face with a cotton swab), but the dress still looked very one note. At that point I used a damp (not wet) cotton swab and a water bush to start removing the crayon, leaving only a slight color in certain spots. I love coloring paper dolls, so for me this was relaxing to figure out how to make the dress come to life. It probably took me 30 minutes, start to finish to get the result I wanted.
 The Paper Dolls were added to the bingo chips. I used a UHU Glue Stick to add the Paper Dolls to the bingo chips. I find that if too much Collage Medium is used on the bingo chip it could give your Paper Doll a slight bend because of the excessive wet medium.
 Time to adhere the metal flowers. Here Collage medium is the best glue. It takes a bit to dry but left alone it will dry, even heavy pieces, like cement. I like that.
 I added a Metallic Sticker to the side of the Curio Frame using some cut up 3D foam pads. And with that we are done!
 Here are some closeup photos of the finished project.
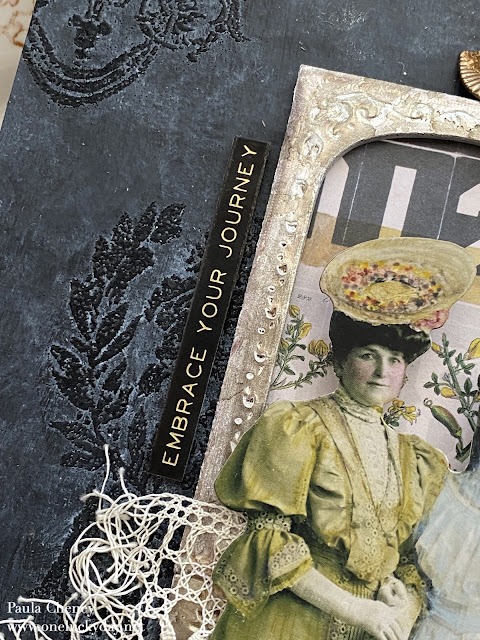

 Hope you like this one as much as I do! I love the contrast of the gold and black! I love the new Foundry Waxes and I am quite sure you will be seeing more projects using them.
now carry on,
paula

paula
This is beautiful, Paula! Thanks for the detailed tutorial!
ReplyDeletethank you!
Deleteyour transformation of the curio frames is fabulous and stacking them to make the larger arch is brilliant. ps i’m stealing your UHU hack
ReplyDeleteI love a good UHU glue stick. I finally had to order in bulk from Amazon because no store in my area (I went to 4) even had it. It's a great glue stick for so many things.
DeleteThis is gorgeous! Thank you for the step by step.
ReplyDeletethank you Marci!
DeleteThank you for the step by step! This is gorgeous.
ReplyDeleteThis is absolutely beautiful. I love all of your creations.
ReplyDeletethank you Barbara!
DeletePaula, Your tag is simply gorgeous! Love that damask stamp and the beautiful background on the tag. Hugs!
ReplyDeleteI love these new projects! I think the Foundry Wax will be an instant hit!
ReplyDeleteI think so too! It is very fun to use!
DeleteGoodness, Paula, this project is so GORGEOUS!!!! That black with the embossing, your paper doll coloring, and those metal flowers with the pearls..perfection!!!! Absolutely love it! ♥️ Also, that vintage lace, and the frames..so clever!
ReplyDeletethank you Stacy! I will be doing that black background again!
Delete