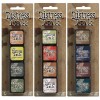
Hi everyone! I promised to create a project using one of the new Mini Distress Ink sets. I chose set #10 - Iced Spruce, Squeezed Lemonade, Bundled Sage and Tattered Rose. You know I had to pick the one with Iced Spruce right?
Lets get started:
Gather supplies - Four #8 manila tags, Dina's white Gesso, paintbrush and Tissue Tape (any pattern).
Lay the four tags out and tape them together (
add tape to both sides). Be sure to leave a 1/16" between the tags so they will fold up without buckling.
Use the paint brush to add Gesso over the tags and tape. Once one side is dry, repeat on the back until all of the manila surface is covered.
Once finished, your tags should be able to fold up like this.
I chose Iced Spruce (
of course) to create the background layer. I used the Mini Iced Spruce ink pad to add Distress Ink directly on the surface of the tag. Remember, the tags are coated in Gesso so the tag surface will not soak up the ink.
Next I made a puddle of Multi Medium on my craft mat, then used a paintbrush to brush the move ink around the tag. I only put out enough MM to work two tags at a time.
Once I covered two tags, I used a wet wipe to get rid of the brush marks of the ink/MM mix until it looked like a smooth stucco surface. So you might ask why not just use Distress Ink over the Gesso and rub it with a Blending Tool? The answer is that Distress Ink over Gesso will never really dry because of the slick coating the Gesso gives. When adding the MM to the wet Distress Ink, the ink color becomes part of the MM - you can manipulate it when it wet but once dry, it becomes permanent over the surface.
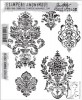
Once everything was dry, I used Archival Ink (
which is permanent ink) - Watering Can and the large Distress Damask Stamp to create a pattern. Love that grey Watering Can color over the Iced Spruce.
I took a piece of dyed cheesecloth and ripped it in a long strip, then stitched it to the right of the fold.
I used Remnant Rubs (Botanical) in combination with words cut from a book to add a message to the inside of the book. After I added the words, I used my finger tip to cover the message with a bit of MM to seal it. Once dry, I used a Walnut Stain Distress Marker to add a bit of color around the word "
And", then smeared it with more MM to seal the color in.
I wanted to use some splatter using the Distress Marker Spritzer but because I have used MM to seal the booklet, using a Distress Marker is out of the question since it will not dry over the slick surface. The solution...a Sharpie marker. The thicker marker slips easily into the collar of the Spritzer tool and therefore can take the place of a Distress Marker in this situation since Sharpies have permanent ink. I decided to practice on a sheet of paper before spritzing over my booklet since the ink/pen is different than what I am used to. Always a good idea to practice first.
The Sharpie gave me a super fine spray. Harder to see, the further away you are, but still a nice effect.
I wanted to use Crinkle Ribbon to add ties for each tag - 10" per tag x 4 tags = 40" of Crinkle Ribbon to be colored.
I used three of the colors from the set - Iced Spruce, Tattered Rose,
and Squeezed Lemonade. The ribbon came out beautifully with a muted,
vintage tone. I know I will be using that combination again.
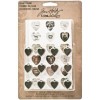
A few pieces of metal are in order to complete this project.
I chose a small Word Key that had the word DREAM on it. I colored the key with Weathered Wood Distress Paint and then Mushroom Alcohol ink to create the aged appearance. The color helps
"marry" the metal piece to the paper booklet.
I also used a Swivel clasp, Monocle, and Heart Charm to create a message for the cover of the booklet.
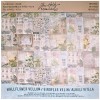
A ripped piece of Wallflower Vellum under the cheescloth on the cover adds another layer.
Note:
you might notice that I changed the Heart Charm - I decided I
didn't want to repeat the word heart, so I changed to "beyond measure".
I love how the ribbon turned out. I was able to create this look by pouncing the Distress Ink colors
next to each other on the craft mat in this order: iced spruce, tattered rose, squeezed lemonade, iced spruce. I folded the 40" piece, 4 times (
you could also pre-cut the 10" pieces), then laid the ribbon into the Distress Ink soaking up the colors and then drying.
cover
tag one and two
tag three and four
I really like how the simple booklet turned out. Very muted but quite lovely. I also think the cheesecloth added the much needed dimension. I don't have very much cheesecloth that is dyed this dark so I might have to have another dying session soon.
And on to what you have all been waiting for -
the winners of the Distress Ink Minis!
If your name is on this list, please email your shipping information to paula@oneluckyday.net
Thanks to everyone for stopping by and commenting!
Set #10
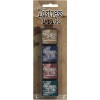
Set #11
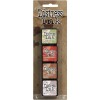
Set #12
Products used in today's tutorial.


Beautiful as always Paula!!
ReplyDeleteCongrats to the winners! :D
Bookmarking this gorgeous project so I can refer back to it when I get home from vacation :-)
ReplyDeleteSally
I found some cheesecloth in my stash this past weekend and almooooost threw it away! So glad I didn't. Love the look of your latest creation. You rock!
ReplyDeleteOMG so stinkin awesome!!
ReplyDeleteNice!!
ReplyDeleteOkay i have officially added Iced Spruce to my GOTTA HAVE list. Beautiful tag...what a great way to start of a Monday. Thanks!
ReplyDeleteOh Paula what a totally fab make again! I am in love with the Iced Spruce/Multi Medium combo, such a stunning effect and what a great tip!! I will definitely give this a try, I'm sure it will look brilliant with different blues too. Love the addition of the cheese cloth and the vellum underneath looks super.
ReplyDeleteBig congrats to the winners too, lucky souls!
what fun - thanks for the tutorial!
ReplyDeleteSandra ltb
Wonderful romantic project. I love the feel it has, thank you so much for an amazing tut! Love the serene colors. I will have to make one :)
ReplyDeleteSuper Gratz to the winners!~kim
That background is gorgeous and I really like the damask stamped on it with the sweet little bird! Thanks for all the tips too--I didn't know that about the gesso and ink combo not drying all the way.
ReplyDeleteAwesome tag booklet! And thank you for sharing how you got the crinkle ribbon to be the colors that you chose...soft, subtle, distinct. I'll be referring back to this project often for all the tips you shared. And congrats to the winners of the new mini distress inks!!!
ReplyDeleteGreat tag booklet, thank you for the tutorial!!
ReplyDeleteCongrats to the lucky winners!!
Your tag booklet is beautiful, I love that combination of the multi medium with the iced spruce to create a beautiful background and the addition of the fabric was a lovely touch. Huge congratulations to the lucky winners too! Anne x
ReplyDeleteLove this project - those colors are so pretty together. Thanks for the inspiration. Congrats to the winners!!
ReplyDeleteTags, what a great idea for a booklet. Your tips are really helpful Paula. Thanks!
ReplyDeleteabsolutely beautiful!
ReplyDeleteOh, Wow, Paula!! Your tag booklet is Fabulous! Gosh, I can see it being used as a small journal or even as a nice way to write a letter or note to someone. It's lovely and I love the pop of yellow on the crinkle ribbons! You have the BEST creative ideas, Paula!!
ReplyDeleteCONGRATS to the Mini DI Winners!! YAY!! That's a good way to start the week!!
XOXO-Shari T.
Congrats to the winners!! Love this tag booklet Paula. Such a fantastic vintage vibe and seriously love the sentiments. What a perfect gift for someone special. Pinned! -- Mary Elizabeth
ReplyDeleteWhat a beautiful project! Congrats to the winners!!
ReplyDeleteBeautiful - I really like the background technique I'll have to give it a try.
ReplyDeleteOH MY GOODNESS... this is BEAUTIFUL!!! Love this tutorial...OMG the colors, the cheese cloth detail... WOW !!!
ReplyDeleteAnother beauty Paula. There is no stopping you! I just love this color combination and guess I will have to go shopping again. Thanks for the tutorial.
ReplyDeletecongrats winners, LOVE the tag booklet, thanks for sharing.
ReplyDeleteCongrats to the winners! Cute book Paula. I love the use of the dyed cheesecloth. The texture is wonderful.
ReplyDeleteYour tag booklet is beautiful. I love the muted colors of the background and the added elements. The cheesecloth adds so much...I look forward to trying it sometime. Thanks for sharing your creativeness. Congrats to the winners.
ReplyDeletethis is just beautiful…love all the details that came together incredibly…so pretty!!! I adore it!
ReplyDeletethanks and is very beautiful
ReplyDeleteBeautiful project, and a super tute, Paula. Thanks for sharing!
ReplyDeleteGentle and soothing... Feast for the eyes and soul!
ReplyDeleteHuge Congrats to the winners, yay! Oh my, Paula, This tag booklet is one of my favorite pieces you have shared!! I love it so much. The colors; stunning! I'm so glad I can do it too! I have to use this color combo on my next project. I guessed right, you would use the Ice Spruce! So love that color :) Thank You!!
ReplyDeleteI love this work PAula! it's wonderful, Thanks so much for sharing with us your creativity! BArbarayaya
ReplyDeleteGorgeous! Thanks for sharing your techniques.
ReplyDeletewow I love this tag book! and congrats to the winners. =)
ReplyDeleteThis is absolutely gorgeous , love the colours here and the iced spruce is a much loved colour of mine! the touch of fabric sets this off perfectly!
ReplyDeletewow wow wow Paula...you learn something new every day when you hang out at your place...love your tag book and thanks for another gorgeous inspriatiomal project hugs kath xxx
ReplyDeleteThis is so awesome! What a great idea to turn tags into a booklet this way, love it!
ReplyDeleteTotally fab!!
ReplyDeleteWhat an amazing end result from so many techniques. Loved the vellum and cheesecloth touch.
ReplyDeleteJaw dropping gorgeous project, Paula! I laughed out loud when you said you chose set 10 to work with! Like there was ever any doubt you'd use Iced Spruce!!
ReplyDeleteCongrats to the lucky winners!
Great little booklet, with so many new techniques to try! Thanks for the inspiration and congrats to the winners.
ReplyDeleteWONDERFUL tags!
ReplyDeleteelegant & simple; something about the background that has a wow factor; tfs!
ReplyDeleteHi Paula, I spent hours here at your blog today...every single piece I missed is awesome...I really admire your imagination and creativity! Also compliments to your husband, who made gorgeous die storage! Hugs from Slovenia
ReplyDeleteJust GORGEOUS, Paula! Every step adds so much to the project. Wow!
ReplyDeleteStunning i love it!
ReplyDeleteJust beautiful! Thanks so much for sharing your tip for using matte medium and distress inks over gesso, will be really useful in my art journal when sometimes I have regretted gesso in pages in advance, intending to use acrylic then change my mind and want to use inks lol!
ReplyDeleteBeautiful! Love the way you've added the stitching. So many great details.
ReplyDeletetaking (for me) the fear out of trying new things! thanks!! :)
ReplyDeleteI love this, Paula! It is rich in color without a lot of color if you know what I mean...Fantastic project!
ReplyDeleteThe gesso/iced spruce background is really beautiful and the finished project gorgeous!
ReplyDeleteI love it. It's very beautiful. And congrats to all the winners. Johanne Lacombe
ReplyDeleteThis is beautiful. I always learn something from you. Love that stamp set!
ReplyDeleteAnother gorgeous project ! Love the four tags joined together, I've also got those stamps and absolutely love the way you have used them here. I shall be giving them an airing after seeing your work ! Thank you so much for taking the time to leave such a nice comment about my butterfly bunting over on the eclectic Paperie blog. It really means a lot to me ! Toni x
ReplyDeleteI absolutely love this. I am going to make one for my holiday photographs. The cheesecloth stitched into the seam is GORGEOUS! It's just very dreamy. Thanks for the tutorial. :)
ReplyDeleteCongrats to the winners! This tag booklet is just gorgeous! Thank you for the step-by-step.
ReplyDeleteWow, Paula, this is just beautiful!! I could totally see adding a couple of vintage (or vintage-looking) family photos to the booklet too and giving it as a gift. Congrats to all the winners!!!
ReplyDeleteWONDERFUL folding tag book! Love the paint colors and techniques you used. Great stamped design and the cheesecloth and vellum and metal details are FAB! TFS the design process, too. :)
ReplyDeleteOMG... it is a really good tutorial! I love this project, it is so elegant! Thank you for share with us! xxx
ReplyDeleteI love your project. It is so charming.
ReplyDeleteTHANK you for the dreamy, vintage look - it has to be my most favorite! You have all the details that just make it perfect!
ReplyDeleteFirst I love your booklet and the choices you made. This is a serious question. What are you going to DO with it?
ReplyDeleteThis comment has been removed by the author.
DeleteBeautiful!
ReplyDelete