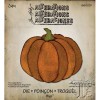
The new Sizzix dies started shipping this week so I thought I would make a card using the new Pumpkin Parts Bigz die. Super cute and great for fall!
I cut the pumpkins parts from Grungepaper. You'll notice the pumpkin is scored when run through the Vagabond machine. This makes it super easy to see right where the parts go when putting the pumpkin together.
I painted the pieces with Ripe Persimmon and Peeled Paint Distress Paint.
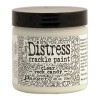
Once the Distress Paint was dry I gave the main pumpkin a coat of Distress Crackle Paint then set it aside to dry.
About an hour later, I came back and the crackle had done it's job. I pounced Frayed Burlap Distress Stain over the entire pumpkin so the stain would seep into the cracks, then wiped away the excess.
Love the effect its gives!
I coated each of the remaining pumpkin parts with a thin layer of Glossy Accents.
Then poured Spiced Marmalade Distress Glitter over each piece. Tap off the excess glitter and leave to dry on your craft sheet. Do do not press the glitter down.
Once dry, you can use Distress Ink to color the edges of the glittered piece.
I cut a card base from Core'dinations Kraft Core cardstock in a dark green as well as a card front from the 6 x 6" section of the Wallflower Paper Stash. I used a Tonic Paper Distresser to rough up the edges of the patterned paper, then inked it with Vintage Photo.
A quick stitch around the card front with dark brown thread.
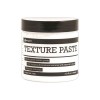
Once the card base was complete, I used the Burlap Layering Stencil and Ranger Texture Paste to add texture to the card front.
Just a couple notes on the new Texture Paste - it's very light and easy to spread. It also dries really quickly with the Ranger Heat Tool. Super happy about that!
And two minutes later, it's dry and ready to ink.
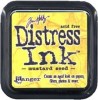
I chose three colors of Distress Ink I thought would complement the orange pumpkin; mustard seed, wild honey and seedless preserves. The Distress Ink and the Mini Blending Tool work like a charm over the Texture Paste. I love that the Texture Paste is totally inkable!
The pumpkin is large so I needed a small quote. Yes, I could have just stamped the card front, but I decided I wanted to stamp on a transparency with Stazon Ink and add it to the card front with a Tiny Attacher.
I did add a bit of Antique Linen Distress Paint onto the card front to obscure some of the flowers and writing so the quote transparency would stand out.
I added the pumpkin and a few Mirrored Stars to the card front.
I decided to add some small leaves at the stem of the pumpkin. This was easy using the same color cardstock as the card base and the Autumn Gatherings Decorative Strip.
A little sanding and bending and there you have it. The Kraft Core cardstock is easy to work with, one quick sanding and you have a great distressed look.
I added the leaves to the stem with Multi Medium making the pumpkin complete.
I also added a bit of Jute String to the folded edge to complete the card. Love how this big sparkly pumpkin turned out! The Distress Glitter was the perfect medium make it shine.
Note:
I used a Walnut Stain Distress Marker along the left side of the "faux creases" in the pumpkin, then smeared it with a bit of Multi Medium, giving the pumpkin more depth.
I hope you will check out the new dies that were released this week....you know you can count on me to be back with more ideas!
carry on,
paula


Very cute Paula!!
ReplyDeleteI just love how distress glitter inks up don't you?! :D
yes, I do. Sometimes I have forgotten that simple step and I'm always disappointed. Today worked out well.
DeleteI love Fall & Halloween so this die is already on my "wish list"!
ReplyDeleteSally
Love this beautiful card! Great idea to just glitter some of the pumpkin sections. I have some of that glitter and it is a gorgeous orange!
ReplyDeleteI will be starting my Halloween cards soon and you've given me some great ideas! Thank you! Your card is smashing!
ReplyDeleteLove this pumpkin card and I love that it isn't necessarily Halloween!
ReplyDeleteGreat card Paula! I'm looking forward to getting the new dies!
ReplyDeleteJust lovely Paula! The texture and layers with the crackle, texture paste and glitter really brings it to life. Love how the placement of the pumpkin has some of the flowers peeking out from the wallflower background. Thanks for sharing!
ReplyDeletePretty card! Great how to, as always. I'm still in summer mode, not ready for fall:)
ReplyDeleteOMG that is just the bees knees! LOVE it!! and you're right I can always count on you to inspire me, you always do :)
ReplyDeleteLove the pumpkin card, Paula! Love your tutorial, too. The wallflower paper is so versatile. It works well for Fall cards and is a wonderful background for that gorgeous pumpkin. TFS!
ReplyDeletethanks Laura! You are always so nice about my simple projects. Hopefully I'll see you in TX in Oct.
Deletesuch fabulous techniques!!! thank you for sharing your inspiration...awesome card!!
ReplyDeletethanks Chelle! Loved your ice cream card!
DeleteBeautiful card, thank you for your tutorial fabulous, you sharing your inspiration
ReplyDeleteGreat card!! Love the crackle on the pumpkin and the addition of the stencilling balances everything out so well. Great idea to add the little oak leaves to the top of the pumpkin too!
ReplyDeleteI really did not think I needed the pumpkin die ..... Until now that is! I love the way you used the glitter on the pumpkin, it really makes it 'pop'.
ReplyDeleteOh wow.... amazing card and love that die. Wish we celebrated pumpkin time here :) stunning Paula.
ReplyDeleteBeautiful card, Miss Paula! The pumpkin die is on my want list. Can't believe you couldn't find a place for Iced Spruce though!
ReplyDeleteWonderful project, Paula! Every detail looks great. Fall is my fav season and I am looking forward to getting this die. :)
ReplyDeleteFabulous card! Love all the techniques. Thanks for the great tutorial on how you created this, Paula. I love that distress glitter!
ReplyDeleteStunning card Paula! fab tutorial too - perfect to herald in the Autumn TFS x
ReplyDeleteI love Fall and this pumpkin card is a great incentive to start some Fall projects. Thanks for sharing Paula.
ReplyDeletelove fall colours but not looking forward to colder days. Thanks for the inspiration and sharing. Love the die and project
ReplyDeletePaula, Thanks for the very helpful tutorial. I don't have the pumpkin die but the techniques for the products will be very helpful. And you gave me another use for my Wallpaper stash.
ReplyDeleteI love this. Now I want all of these dies.... ;)
ReplyDeleteWowza! Perfect combination of details - great card!
ReplyDeleteLove this card! That is one of the new dies on my wish list!!
ReplyDeleteJust beautiful... the techniques you use are just awesome... that crackle paint on the pumpkin with frayed burlap ... WOW, THEN the paste WOOOOOOOOOOOOO ... you rock Paula !
ReplyDeleteAbsolutely love it! Thank you!
ReplyDeleteWow, love it to bits...great job Paula thanks for sharing love all the new releases!
ReplyDeleteJust pumpkinlicious, Paula!! I didn't think a pumpkin could have possibilities!! That new TH/Sizzix die is wonderful and you've turned that pumpkin into a work of Art!! This is such a lovely card :) Awesome as always, Paula :) XOXO-Shari T.
ReplyDeleteFantastic, love the pumpkin and the texture paste with those colours.
ReplyDeleteWhat a fun card. Love that pumpkin die
ReplyDeleteSuper!
ReplyDeleteWow - what a stunning card Paula. Love all your techniques and that fab pumpkin die. Nicola x
ReplyDeleteOh my goodness!!! This pumpkin rocks! LOVE LOVE LOVE this! The whole card is fabulous!
ReplyDeleteYour card turned out awesome! I love all of the details in the pumpkin. I must get this stamp!
ReplyDeleteLove all the layers of good stuff... LOL.. all really great looks and feelings and TEXTURES... great card... Love, Light and Peace...Bonnie
ReplyDeleteThe pumpkin looks fab, and I'm loving the colored paste... so pretty!
ReplyDeleteI love your card. The pumpkin is gorgeous.
ReplyDeleteI'm was hooked with all the creativity applied to the Wall flower paper! It's so pretty as is, but I love the height you took it to!
ReplyDeleteWell this is another card I have fallen in love with, I am not a glitter girl normally but you have very cleverly shown how good it looks against the crackle and that extra texture looks amazing. I love the coloured texture paste in the background that pick up the colours in the papers perfectly. Thanks for the tutorial Paula you are such a great inspiration. Mo x
ReplyDeleteStunning card!!! So going to get the leaf and the pumpkin die. Yep you just put them on my want list!!
ReplyDeleteOh yummy! Halloween isn't as huge in the UK but this is perfect for harvest time and autumnal projects. Thank you for sharing your creative process. Jenny x
ReplyDelete