Friday, November 5, 2010

No. 25 Merry Christmas

1. Paint edge of plaque with 2 coats of black acrylic paint. Let dry thoroughly.
 2. Sand sharp edges of plaque so there is some bare wood showing.
3. Stain bare wood areas with Burnt Umber acrylic paint. You can also use your Vintage Photo ink for this step but it will color the Gel Medium if you work it too much. Let dry.

4. Lay a piece of scrap paper over the plaque. Run your finger around the edge to make a pattern. Cut out and use as a pattern to cut ledger paper.
boy, can you tell I had distress ink on my fingers when I did this step?

5. Use a thin coat of Gel Medium to glue ledger paper to plaque.  Let dry.
NOTE: Gel medium (Golden or Claudine Hellmuth brand) or Mod Podge will both work for the plaque.
Burnish with a brayer or bone folder.
I am sure you might notice that I have the brayer upside down in this picture.  The yellow stoppers are suppose to be facing up but when I staged the photo I was more concerned about trying to take the photo with my left hand.  Sorry about that.
Optional: Lightly sand edges of paper when the gel medium is still a bit wet to extremely distress the paper.  If you don't like this extreme distressing, then just wait to do the sanding until the gel medium is dry.
6. Ink edges of paper to increase aged appearance.

7. Paint another thin coat of Gel Medium over the entire plaque.  Set aside to dry again.


How to add word to the plaque-
8.  Use you computer to print the words Merry Christmas.

I used my current favorite font, Jailbird Jenna (it's a free font too) but you can use any font you like, just make a test copy to make sure it fits on the wood plaque.
We are going to do a tape transfer to get the words from the paper to the wood plaque.  If you have done this before then just skip to step 13.
So, before you can doing one more thing...with your Merry Christmas copy in hand, grab your purse and keys and drive to your local copy store to make a toner based copy of the words.  The only way you can skip this step is if you have a laser printer at home.  The technique will only work with a toner cartridge copy...ink jet will NOT work.  


9.  Once you have your toner based copy, trim paper from around the words.  Lay words on the table face up.

10. Peel contact paper from backing and place over words (sticky side down).  Burnish well with bone folder to adhere the contact paper to the copy of the words.  Do not skip this step.
NOTE:  Many people use packing tape to make these kinds of transfers.  I like using MATTE contact paper because I get to control of the size.  With packing tape you are limited to about 3" wide.  I also like the matte finish instead of the shiny tape.
you can trim away the extra tape before submerging in water
11. Submerse entire paper in water for at least 5 minutes. Yes, really in water.  I just put it in the bathroom sink.
12. After 5 minutes, use your fingers to roll away the paper pulp from the contact paper until contact paper is transparent and only the words remain.   Try not to send the paper pulp down the drain!
Trim away contact paper again (if you haven't already).  Lay on craft mat to dry, making sure sticky side is up or it can stick to the table.
13. After contact paper is dry it will become tacky again.  Add a bit of glue stick on the back (don't worry, it won't show) and add words to plaque over ledger paper.  Burnish well.
NOTE:  Because the font Jailbird Jenna has sharp edges I cut the contact paper right along the side of the letters, it was easy to cut right next to the black letters because of the straight lines.  If you use another font, just trim close.
if you click on the picture, you can barely see where the tape transfer begins and ends
14. Add glittered 7gypsies numbers and red bow to the plaque with a liquid glue. 
15. You can add an eye screw to top of plaque for hanging on the board with large T-pin.
I have mine stuck to the board with a large piece of foam tape but I think the eye screw in the top of the plaque would work much better to use from year to year. 


PINS 
Step by step instructions for the pins to hang the tags were given back in Dec of 2009 but I thought I would include a picture of all of them together.  Again, I used the Jailbird Jenna font for 4, 11, 17 and 24.

Well, we are off shopping today with our group that are here for the class on Sat.   I will try and post some pictures of the fun later.  Have a great weekend!

Wednesday, November 3, 2010

No. 15 Crystal Crown


1. Adhere vintage Christmas music paper to tag.  Ink the edges of tag and set aside.

Perfect Pearls Dry technique-
2. If you have a kit or instructional CD use oval template No. 3.  If you don't, then create an oval pattern about 3 x 4 1/2".  Cut oval from black cardstock and a piece of chipboard.  Then glue the two ovals together.  Don't worry if your oval is not perfect it will not make a difference in the end.
NOTE: You could also glue the black cardstock and the chipboard together, then cut out the oval.  There is always more than one way to do the same thing, so use which ever method works best for you.
3. You will need Perfect Medium for the next step.
Perfect Medium is an embellishing ink for Perfect Pearls...it is basically glue that the powder can stick to. 
Rub Perfect Medium directly from stamp pad onto black oval.  It may look dry but it there, just tilt the card and you can see it in the light.

4. In the original tag I did (found above) I only used Heirloom Gold which looks great, but I thought I would change it up and show you what it would look like with multi-colors of the Perfect Pearls.  Then you can compare and see which style you want to try.  Remember, this is a dry method, totally different than the wet method used in tag No.18 with the wood block stamp.

Color 1 - Dust on Heirloom Gold with a small brush.  
Since we are doing multiple colors you do not have to cover entire surface.
 Color 2 - Dust on some Perfect Gold
 Color 3 - and just for the heck of it, let's add another Perfect Bronze.
 Once you are done covering the card with Perfect Pearls, gently whisk off excess with a larger fluffy brush.
 So here is where we stand but we're not finished yet.
5. Using a stamp of your choosing, “ink” stamp with Clear Perfect Medium (yes, the same stuff I stamped the card with).  If you don't have a large enough stamp you can use a smaller one, but you will need to clean the stamp and re-ink for each stamping.
6. Stamp the oval... I know you can't see it, but it's under the stamp, I  promise.
In this technique, the Perfect Medium works to "grab on" to the Perfect Pearls powder and pull it away from the card.
wow, my hand is white...I gotta get out more!
So when you pull the stamp away from the black cardstock you will create a negative image of the stamp.  Cool, huh?  Oh, and before you ask...the stamp was a gift from a friend in South Africa.  I believe it is hand made.  Phenomenal, right?


7. Set with a fine mist of water from a Mini Mister.  The water "sets" the image and allows you to touch the image without smudging it.  Set aside to dry.

7. Once dry, use a small flat brush to “paint” on a band of thick white glue around the perimeter of the oval about 1/4” wide.  Be sure to paint the glue on the edge of the piece too.  You must work quickly to add the glitter before the glue dries.
I found that this method of pushing the tag into the glitter worked well so I didn't get the glitter all over the center of the oval. 

edge of the oval

finished
Cut the number from a book page and add to the bottom of the oval.

 Adhere oval to tag with a tape runner.
 8. Hanging Crystal
Using template or one of your own making, cut out ledger paper to fit behind the 7gypsies crystal.  

Stamp the crown from the Paris set by Cavallini.  I mean, who doesn't love Cavallini?

  Adhere to flat side of the 7gypsies crystal with a glue stick.
I made this funny little drop for the top part of the crystal with a bead from an old necklace, two jump rings and a really big crystal brad I liked.
You can see here that I hooked the two jump rings into the legs of the brad and then folded the legs as flat as I could.  You could add a spot of glue but it seemed pretty secure to me.
 Combine the two pieces to complete the dangle.
 Add a bow to either of the jump rings.
 Ready to hang...

Yeah, ONE MORE TO GO! 
So I will see you back on Friday for the Merry Christmas Plaque and the pins.

Oh, and maybe I should mention before I go that we have had so many people contact us about buying any "leftovers" from the kit that we decided to make several partial kits.  I admit the packaging is not as glam as the original kit and there will be no stamps or storage box, but many of the pieces are  included such as...all chipboard pieces, hanging crystal, the plaque for 25, most of the ephemera pack and several vintage items including the little butter pat plate. We will have a very limited number of kits that will be available for purchase at
8:00am pst
Wednesday, Nov 10th. in the Etsy shop.
Okay, now back to preparations for our class on Sat!

Monday, November 1, 2010

No. 22 Shield


1.  Adhere book paper to tag.
2.  Stamp tag with multi-star rubber stamp (Stampers Anonymous - Tim Holtz collection G4-1471)
3.  Glue or staple a piece of a vintage measuring tape to tag.

4.  To make shield shape you will need a piece of paper, a ruler and a pencil.

Draw two vertical lines 1 3/8" apart in the center of a piece of paper.
Draw two horizontal lines 3" apart.
Make a tick mark 1/2" from the top line on the left hand side.
Use a pencil to draw 1/2 of the shield shape inside the 1 3/8 x 3" space that you just created.  You can do it! 
 Cut the shield shape from the paper.
5.  Creating the shield
Using a pencil or pen trace around the shape on a piece of chipboard, flip over and trace the other side.
 Cut out the shield.
Sand the edges of the chipboard...a great way to get rid of the pen markings.
Paint the shield silver.  Love using the Dapper paint, no paint brush needed!
 Once the paint is dry, cover with a thick craft glue.
 Place a piece of paper on your craft sheet.  Pour glitter over shield.  Let dry for a few minutes before tapping off excess.  Remember, NO flicking.  Set to the side to dry.
 I have included this picture to show that the shield will raise up until the glue dries.  Leave it alone and once dry it will be flat again.
6.  To finish shield you will need these supplies; ribbon, small piece of cheesecloth, needle with thread, three small pearls, 2 jump rings, 4" chain and the glittered shield.
NOTE: The needle must fit through the center of the pearls/beads to be able to sew them on.  You will use the same thread for all the sewing so make sure your needle is double threaded 12" long.
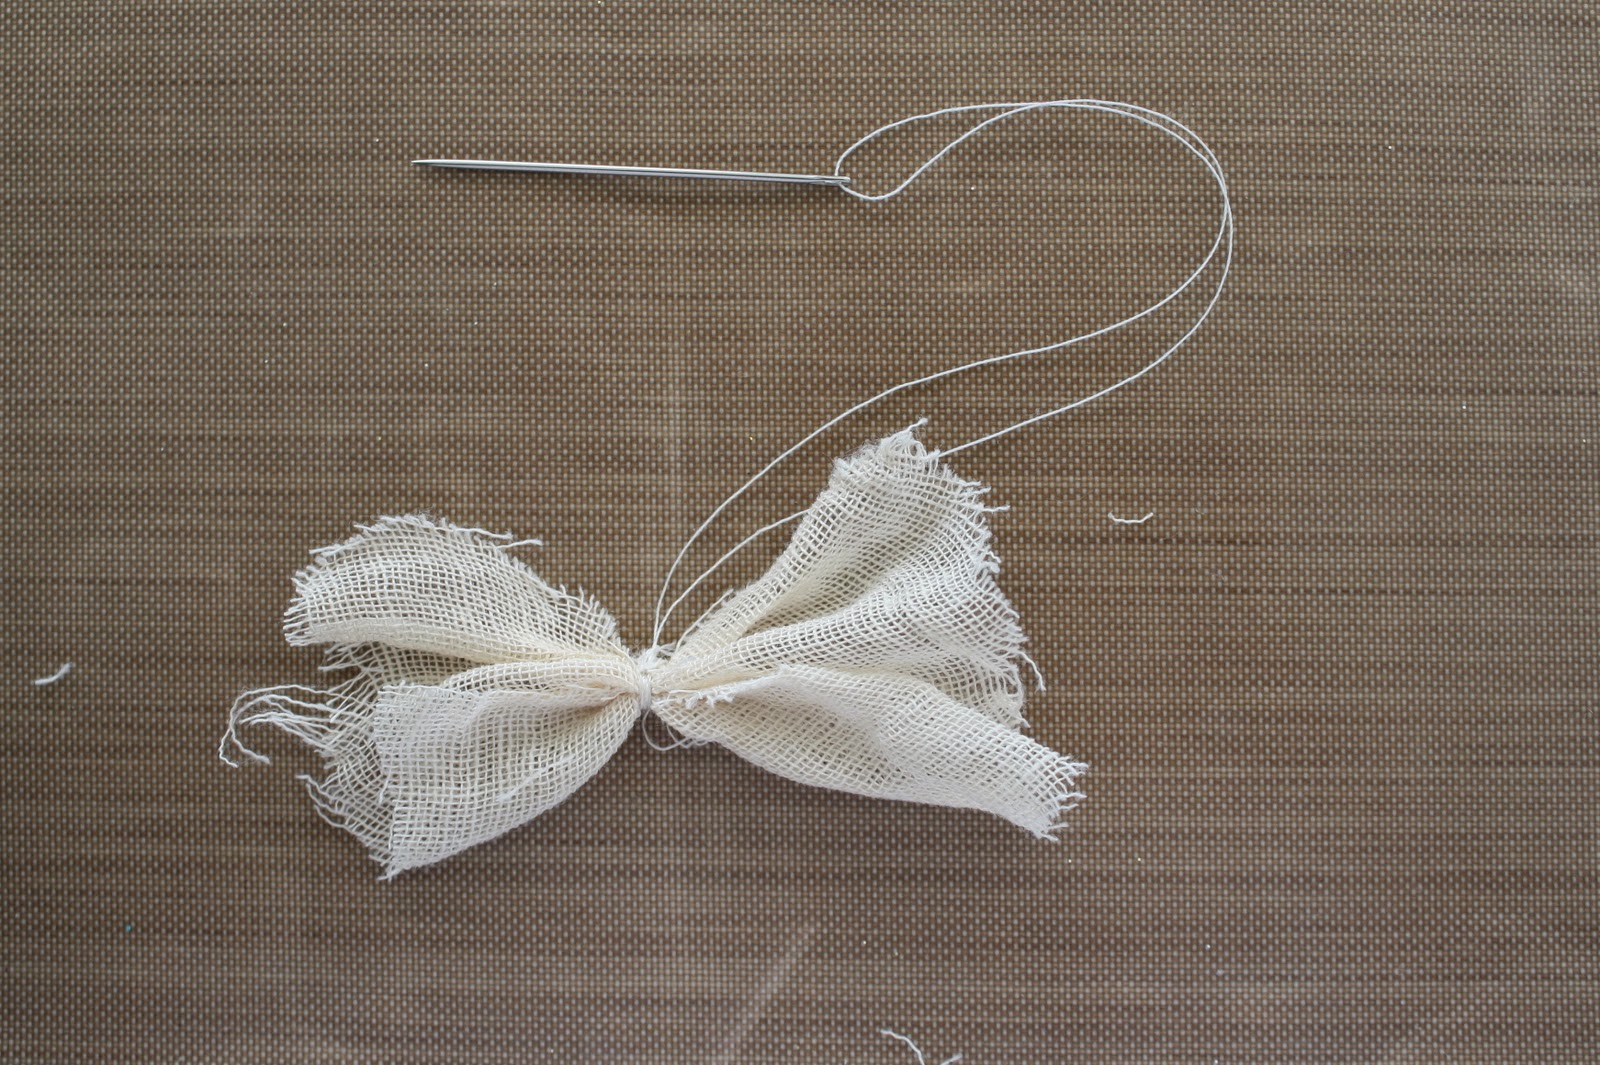
Pinch the center of the small piece of cheesecloth.  Secure the center by making a stitch in the fabric then wrapping the thread around the center a couple of times to secure.  Make a knot but do not cut the thread.  Use your shield to test the size of the cheesecloth before proceeding.
Make a bow with the ribbon.  Stitch the cheesecloth to a bow.  Do not cut the thread.
 Add the three pearls one at a time, stitching at the top of the bow.  Make a knot, now cut the thread.
 Add a bit of glue to the back and add to the shield.

7.   Use a paper piercer to make two holes at the top of the shield for the jump rings.
Add the jump rings and 4" of chain (Tim Holtz)
8.  Tag
If you go back to the picture of the complete tag at the beginning of the post you can see I added a small jewelry tag.  That tag is on the left in the picture below.  I stamped it with a Stamping Up stamp I had here at the house but I thought, that's not going to help you.  So, I found that the Avignon stamp set that you need to complete the calendar has a No. stamp.  It is part of a larger stamp, so I just inked the part I needed to stamp the bitty tag.  It worked perfectly.  The o in the stamp is not complete (on purpose) so I filled in the top of the o with a pen.  You could even add the dot like the original if you wanted.

stamp from the Avignon stamp set
This is how it will hang once it is placed on the board.
That one was easy, right? 
I am leaving for Deb's tomorrow to prepare for teaching (mixed in with a little shopping) on Saturday.  I thought I would show you the tool list/schedule that went out to all of the ladies coming to the class.  Love it, want to marry it. 
I am sure there is a future class in there somewhere.  I'll have to wait and see on that one since my brain can only get to Nov 6th right now.


I have two more tags prepared to post this week. 
Wed - No. 15  and Friday - the Merry Christmas plaque a fitting end this little escapade.  I also have a picture of all the number pins needed for the board.  The instructions for the pins are already online from last year.
So have a great week and we'll see you back here on Wed for tag 15.
-paula