When Tim posted his
tag last month he used a Sizzix Framelits die. The tag was wonderful (
of course) so I decided to try my hand at creating a card using the Framelits - Framed Silhouettes. Each Framelits set comes with a set of stamps and the matching dies. I have always liked this frame so I thought it was a good one to use for the card.
I stamped all the images I wanted to use with Archival Ink onto Specialty Stamping Paper...because I'm just a little obsessed with this paper right now (
the image is so very crisp).
Then I colored the images with Distress Markers and my water brush. Yeah, for coloring outside the lines!
You sure don't have to be precise with this technique (
maybe that's why I like it).
I used the
Sizzix Magnetic Platform and the Framelit dies that match the stamped images. Just make sure you follow the instructions to get the right "sandwich". Which is... Sizzix Magnetic Platform on the bottom, a cutting pad, then your stamped paper, then the Framelits dies, then another cutting pad. If you would like to see my friend Stephanie Barnard from Sizzix demo this platform and show the "sandwich", just watch her 2 minute video
here.
The magnets in the platform are so strong you can stand the platform up and they do not even move!
They look so nice all cut out!
I know I just showed monoprinting a few weeks ago in my
Simon Says Stamp tutorial, but today were going to do a double monoprint (
i'm not even sure if that is a real thing...Well, it is today!).
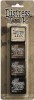
Gather your supplies...Distress Ink, Layering stencil and #8 tag.
Use the Mini Distress Ink pads to cover the stencil surface.
Give it a good spray - don't underestimate the amount of water you need!
Flip it over onto the #8 tag. Press down with a paper towel to soak up any excess ink.
And there you have the 1st monoprint. You can see on the right side where I needed a bit more water but it's a small patch so I'm cool with that.
For the second monoprinting, I repeated the same steps to ink and spritz the Layering Stencil. But this time I wiped off the wide edge of the stencil with a paper towel before flipping it over onto the tag.
To create the plaid design you will need to lay the stencil over the tag horizontally. You only have to ink the stencil once, if you use half the stencil for the top, then pick it up and use the other half for the bottom. If you don't like that method you could ink the stencil a third time.
Here I am using the bottom portion of the stencil to create the double monoprint...
And then the top half of the stencil that still had ink on it, to finish the design.
Blot off any excess ink and dry with the heat tool.
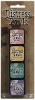
I think it looks really cool. Love the Mini Distress Pack with the Spun Sugar, Evergreen Bough, Scattered Straw and Shaded Lilac.
So, lets gather all the pieces we have made so far and ink them with Vintage Photo Distress Ink using a Mini blending tool.
I cut a card base from turquoise Core'dinations Cardstock and also a piece of kraft cardstock. I used the texture folder, Trellis to create the texture on the kraft cardstock. Then I painted the entire piece with Distress Paint in Tarnished brass. I purposely created puddles of the Tarnished Brass paint to create more richness and texture over the kraft paper. I did have a to wait a bit for it to dry, but I think it was worth it in the end.
Once dry, I used the Spritzer tool and a Black Soot Distress Marker to create another layer over the gold paint.
I cut the tag to fit the card front (I used a little foam tape to raise it up off the gold cardstock).
Added my frame and a butterfly from the Remnant Rubs: botanical.
Next, I made a snip in the paper (see the arrow)....
So I could do this with the banner.
Then the banner and floral spray (again, with little bits of foam tape on the back) was added over the frame.
Remnant Rubs -Words and a Heart Charm added and I'm done.
Super easy!
Loving the pop of the gold background. That Texture Fade is awesome (
love the small scale). And seriously, the Framelits couldn't be easier to use.
The plaid background just makes me happy!
Oh, and I know you were waiting for this part...
Hobby Holster Winner
Congratulations to ldybg93
"I was just getting irritated with my glue gun yesterday as it kept
tipping over on my craft table. I was thinking about sticking it in a
clay flowerpot (a tip I saw on Pinterest) but didn't have one handy. The
Hobby Holster is THE PERFECT solution. I would love to win this!"
ldybg93 please send your shipping address to paula@oneluckday.net so I can get your prize in the mail!
Now carry on,
paula


 I
I