Hi Everyone!
I'm here today sharing a card I made for the Tim Holtz 'Facebook Live' event on Friday. If you missed the event, you can still go to
Tim's Facebook page to see re-play. Tim talks about all the new Stampers Anonymous Halloween stamps, stencils and inspiration cards.
That's where this post comes in. I created this invitation for the live event and I thought I'd would share how I did it.
I started with a piece of Distress Watercolor paper.
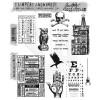
I'm using the Haunted House image from the Mini Halloween set, stamped in Jet Black Archival ink so it will not run when I watercolor the image.
I wanted to make the house larger so I cut a mask using scrap paper to cover the first image while I stamped the second.
I chose a couple Distress Ink Colors, Crushed Olive and Dusty Concord and made a palette on my craft mat. Using my Detailer Water brush I painted in a background. I did use a
round mask (
not shown) that I cut from a post it note (
so it would remain in place) while I colored around it.
The first watercolor layer was more of a lavender wash using lots of water. The second and third were more haphazard, just painting a night sky.
I did a quick wash over the Haunted House with Hickory Smoke
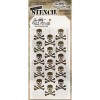
I really liked the Crossbones stencil (
love the detail of the teeth!) and wanted to see them in the shadowy background. Antique Linen Distress Ink through the stencil worked perfectly for this tiny detail.
The crow stamp from the Mini Halloween set is perfect flying in front of the moon!
Now here is where the background comes together.
I inked the edges of the card with Vintage Photo Distress Ink. Then pulled the trigger on the Distress Sprayer, ever so slowly, to dribble water over the card front. Give the water about 10 or 15 seconds to sit on the ink then pat with a paper towel to soak up the excess water, removing ink the process. Leaving you with a great night sky!
You could leave the moon as it is with the cool Crushed Olive halo or add Hickory Smoke with the water brush for definition. I like it both ways!
While the card is drying, I used the new Gothic Gate Thinlit to cut a piece of black cardstock. I will say this die cuts wonderfully even though it is so intricate!
I did need to use the Sizzix Die Brush to clean the die from all those
tiny pieces. It also works like a dream on the two Doily dies that were
released in the spring. If you don't have one, I highly recommend it...for $9.99 it will save you
a heap of frustration and time when cleaning the intricate Thinlits. Wish I had bought one sooner.
I used Watermark Embossing ink to "ink" the Gothic Gate (
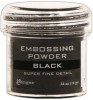
it's the "glue" that allows the embossing powder to stick to the cardstock). Normally in embossing you just pour the powder over the image/die cut, but I wanted to mix the two colors so the gate looked worn away in places. To do this, I took a pinch of one and then a pinch of the other until the gate was covered. It was just that easy. Tap off the excess (
throw it away) and then emboss.
I used my FAVORITE embossing gun to
quickly emboss the gate. Using the Wagner, it took less than a minute to emboss the entire gate. Well worth the investment for such quick results.
Love how this turned out with the mix of gold and black embossing powder!
I cut two small pieces of mixed media cardstock to create hinges for the gate.
(
I wasn't smart enough to use cardstock for the gate that was black on both sides so I had to pounce Distress Paint over the back).
Distress Collage medium worked well to adhere the gate to the hinge.
I used a tape runner on the back of the hinge to add it to the card (
the hinge will be sandwiched between the card front and a purple backer card that I will add later).
Cut the gate up the center.
Mount the card on a purple backer.
Add Mini Fasteners in the corners.
Mount the card on a black backer which will hide the brad legs poking through the purple.
Make a palette on Dusty Concord on the craft mat. Add a water to make a puddle. Using the water brush, pick up the ink/water mixture. Tap the end of the water brush so it sprays across the card. Dab up any excess with a towel.
I created an invitation on my computer to fit in the open space.
The large font is a free one called:
Le Mysteres De Paris
(
You might notice that I painted the inside of the hinges the same color as the gate)
One last stamp from the set, just perfect for the invitation!
And there you go, a perfect little invitation for a Halloween party! Once you make one, it would be easy to make more if you did it assembly line style. I would be all over embossing more Gothic Gates since I love that part with the Heat Gun!
I hope you liked today's tutorial. It's a fun invitation but would also make a super Halloween card too!
I'll be back next week with a few little tidbits from the second card I made for the Facebook Live event. But for now...
carry on,
paula