Hello everyone!
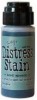
I have a fun project to share today for the Tim Holtz Media Team using Distress Stains. I have to say, when the Distress Spray Stains were first released a few months ago I thought, why do I need spray stain when I have Distress Stain in a bottle? Well, I have come to understand that each have their own purpose because of the way the bottle dispenses the liquid. And YES, I do need both! Follow along and I will show you what I created.
I cut a couple sheets of Ranger Watercolor Cardstock about 3 /1/2 x 8 1/2". You will get three strips per page.
Once you have your strips cut, gather a few more supplies.
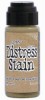
1. Distress Stain - any color (I'm going for a Christmas theme so I included Peeled Paint and Festive Berries. I also included some colors that might not scream Christmas like, Salty Ocean, Pumice Stone and Iced Spruce.
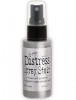
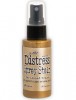
2. Distress Stain Spray - Brushed Pewter and Tarnished Brass
3. Paint brushes in varying widths
4. Two craft sheets (optional)
It does not matter what color you use - just pick one! I pounced out a good amount of stain into a small puddle onto my craft mat. *Do not add water.
Using a paintbrush, drag the stain across the watercolor paper -
Until you reach the bottom of the paper. You can air dry or use a Heat It Tool.
Now lets change it up and use Distress Spray Stain to spritz over the surface. Dry again.
Remember to shake before use - and clean the nozzle after use to prevent clogging. No one likes clogging.
NOTE: This is where the second Craft Mat comes in handy. I painted the stripes on one Craft Mat and sprayed on the other (
because we all know, sprays go everywhere - even on your camera that you might be taking photos with, to document the process).
In the end, I tested all 6 colors I chose up front. Some I sprayed with the metallic Distress Spray Stain and some I left with just the stripes. I love that each has a totally different feel. Of course now you're wondering what the heck is she doing with a bunch of striped paper?
The answer is this...
I die cut the strips to create shapes for tags and cards.
I used Sized Ovals, Sized Circles, Stacked Stars, Ornamental, Mini Baroque and even Tarnished Trophies and the Festive Gent. Really, any die is fair game.
I inked all the edges with Frayed Burlap.
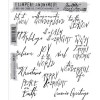
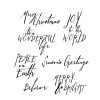
Then stamped a Christmas sentiment. Seriously, how good does that look?
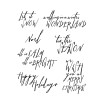
I used Handwritten Holidays 1and 2 for the stamping, with Archival ink in Jet Black and Vermillion. I did use one small stamp from the new Mini Handwritten Holidays to stamp "Peace on Earth" onto the trophy cup. You can see that the image is much smaller than the blue card right behind it.
I made some of them into gift tags. I think that trophy cup is super cute and that stamp fits perfectly!
I also made simple card using the large sized oval. Perfect!
I added a Vial Label at the bottom. The 25 comes from the Botanical Remnant Rubs.
If I was going to make these in bulk, I would replace the 25 with a small stamp.
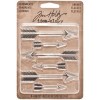
I also colored a mini Arrow with gold Alcohol Ink and added it to the card with Multi Medium.
Well I hope you enjoyed today's tutorial enough to try this simple technique at home. These are easy enough for the whole family to get involved, from the painting to the die cutting (
just watch the spraying part...that could go awry with small kids...okay some adults too. Just saying...).
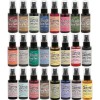
And if you hadn't heard, 24 new colors of Distress Spray Stain were just released by Ranger last week! I'm gonna need a bigger Craft Mat.
now carry on,
paula