
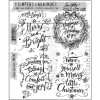
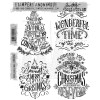
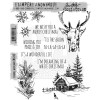
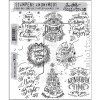
I created a few cards for the Tim Holtz Facebook Live event last week. I thought I could share the cards here to give you a better view and show you how I did it. My number one rule about making Christmas cards is that they need to be easy so I can make multiples. This card is just that...easy! It also uses Ranger products you probably already have in your stash. I am using two of my favorite new stamp sets from the Tim Holtz/Stampers Anonymous Christmas release, Doodle Greetings #1 and Stripes and Holiday Type.

I cut the largest size of the Stitched Ovals using Distress Watercolor Cardstock. Then stamped the image using Distress Embossing Ink and heat embossed it (I never tire of seeing the dust turn to shiny gold!).
Once the embossing was cool, I made mixed water and Fired Brick Distress Ink on my craft sheet. Using the broad Water Brush, I create a wash of color over the Watercolor paper.
Once the embossing was cool, I made mixed water and Fired Brick Distress Ink on my craft sheet. Using the broad Water Brush, I create a wash of color over the Watercolor paper.

Start with Festive Berries and ink all around the oval but not quite to the center.


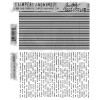
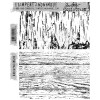
I stamped TWO pieces of Mixed Media Cardstock with the Stripes stamp. The reason I needed to stamp it twice was that my card front needed to be wider than the stamp image (to accommodate the Stitched Oval).


An easy, doable Christmas card that could easily be repeated for multiples.

I'll be back in a few days with another of my cards!
Now carry on,
paula
 |  |  |  |
 |  |  |  |
 |  |  |  |
 |  |  |  |
 |  |  |  |
 |  |  |  |
 |
Oh I don't know if I can stand my own giddiness watching your process... it's Beautiful !
ReplyDeleteGorgeous as always Paula! Love the bright red too.
ReplyDeleteThis comment has been removed by the author.
ReplyDeleteBeautiful card Paula! Love the stripes background.
ReplyDeleteGorjois!!!
ReplyDeleteWhen I first saw this card on Tim's Facebook live event, it really caught my eye. I love the pinstripe background, that red to faded vignette, with the gold embossing and finished off with a gorgeous green bow! Absolutely beautiful, as always Paula!
ReplyDeletethanks Bobbi!
DeleteI think I need that stripes background! I see many uses for it. Your card is beautiful, as always!
ReplyDeleteBeautiful card - I seriously cannot tell where you pieced that background together. Love the striped background.
ReplyDeleteI know! It made me so happy!!
DeleteGreat card...would you mind telling me the size of the card please...thanks!
ReplyDeleteCharlotte the card is 6" tall and 5" wide.
DeleteThank you so much!!
DeleteYou're always incredible! i love much your way to show how we use stamps! I've already ordered Stripes background, it's fabulous! BArbara
ReplyDeleteA wonderful card!!!!!!!!!!!!!! I never would have guessed the background was pieced - wow!!!
ReplyDeleteYou are getting me in the Xmas mood! Thank you for your always fabulous tutorials.
ReplyDeleteLOVE the coloring in of the leaves and multi tones of red! Very striking and FUN card! You are so inspiring!
ReplyDelete