Hi Everyone! I'm here today with my post for the Tim Holtz Media Team.
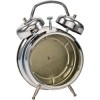
I decided I wanted to use the Idea-ology Assemblage Clock to create a new Halloween Decoration (
since it IS almost October!). I've created many clocks in the past year or so, but I've never made one without the glass. So I'm going to give it a go! Follow along and I'll show you how it went....
Take apart the Assemblage Clock. You may need needle nose pliers to help the process.
I like to keep the pieces together just as they are used in the clock so I remember how to put the clock back together
. I also have set of pictures of the inside and outside of the clock on my computer thus giving me a permanent reference in case I need it. Trust me, I have used them a few times.
Paint all the pieces with Black Soot Distress Paint. Let dry for at least 30 minutes.
When the paint is tacky, go back and wipe away some of the paint with a paper towel so the metal shows through. Set aside to complete the drying process.
I want a really old rusty clock so I'm going to use Distress Embossing Powder - Vintage Photo over the black and silver surface. To do this, pounce Distress Embossing Ink over the metal surface.
NOTE
: I did the clock in two phases, using the holes as markers since the Embossing Ink is clear.
Pour Distress Embossing Powder over the clock piece. Slide the excess powder back into the jar.
I want some of the black and silver to show through, so I brushed away some of the powder before drying. I don't know why, but the entire time I was working on the outside of the clock I kept thinking how much it looked like a graham cracker crust once the butter has soaked in. The funny things we think about while waiting for Embossing Powder to melt.
Please be very careful with this process, as the metal gets very hot.
After melting the embossing powder with a heat tool,
cool completely.
Run your fingers over the embossed surface to the loosen the release crystals (that's why it's called Distress Embossing Powder).
NOTE: Because these are release crystals they should go into the trash not back in the jar.
Once all the pieces are done, the clock can be put back together. I like the way the embossing Powder looks, nice and grungy, perfect for a Halloween clock!
NOTE:
Again, I am choosing not to use the glass in this project so I will not be adding it back in.
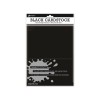
I need something for the background of the clock. I decided to use Black Cardstock from Ranger. Nice and heavyweight like the Manila cardstock I love so much. I used the back of the clock to trace a circle for the background and cut it out.
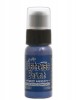
Distress Paint works well over paper, so I'm using Dusty Concord, Ripe Persimmon and Chipped Sapphire. I sprayed water into the paint and then swiped the black cardstock circle through the mix.
That looks like a nice Halloween sky to me.
Once dry, I sprayed it with one of the new Distress Spray Stain in Brushed Pewter. Nice and glittery... like a stars.
Adhere the cardstock to the clock back and trim away the excess.
Always good to test the fit before moving on.
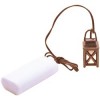
I'm going to add a Mini Lantern to the background. I decided to paint the Mini Lantern Brushed Pewter with a black top. When the Mini Lantern is put into the clock, the top will fade away into the background and the Mini Lantern will not appear as large.
You can use Multi Medium or thin Foam Tape to add the Lantern to the clock back.
The wire comes right out the top and connects to the battery pack. Eventually the battery pack will be secured to the clock with Velcro.
Again, keeping with the spooky Halloween theme, I decided to use cheesecloth to cover the walls of the clock. I used Multi Medium to adhere the cheesecloth, pulling parts of it forward and over the edge of the clock face. This part can get a little sticky so have the wet wipes nearby!
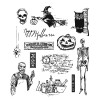
While the Multi Medium was drying, I stamped and embossed the cool owl from the Mini Halloween 4 set on the same black cardstock. Once the image was cooled, I cut away part of the stamped image, leaving just the owl on the branch.
I gave him just a little color using some Alcohol Ink (
eventually I added some Mushroom Alcohol Ink to the branch).
A little Multi Medium on the back and he sticks quite nicely to the back of the clock.
Okay, just a couple more layers...
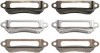
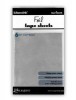
I adhered 1/2 of a Foil Tape Sheet to a piece of paper. Then flipped it over, onto the Ironwork Gate Decorative Strip and ran it through the Vagabond machine to create a fence for the background.
A bit of Alcohol Ink so it's not so shiny!
So how do you get a flimsy fence to stand up? Plastic.
Again, I used the back of the clock as a template.
It might be hard to see in the picture, but the bottom follows the curve of the clock and the top is straight. I adhered the fence to the plastic with Multi Medium, running it along the straight edge.
I also created a Label Pull for the front of the clock using the Apothecary Remnant Rubs.
All right, almost there! Fence is in and Label Pull is in place.
We need the main characters! Love these new Occasions Found Relatives! "Occasions" means there are cards for Halloween, Christmas, 4th of July, Birthdays, Summer and Easter, just to name a few.
I chose these four guys with the pumpkins.
Once they were cut out, I cut the little guy off the left side and moved him to the middle with a little bit of foam tape. I think he looks like he belongs there! I also curved the bottom so it fits down into the curve of the clock.
A little bit of Distress Marker color for the pumpkins and the stripe on the beanie and they really come alive.
I cut a small piece of cardstock for support. The cardstock slipped in perfectly under the fence plastic.
Notice the lantern in this shot?...because the top is painted black it's more like a porch light than a hanging lantern. Just what I was going for.
CLOCK TOP:
I used the Distress Spray Stain for the ribbon which is something new for me. I sprayed the Stain directly onto the Crinkle Ribbon using NO WATER at all, which caused some very unique patterns as the stain bled through the weave of the ribbon, almost like Ikat fabric.
Love the look of this. It does feel different, a little crunchier or stiffer than if you used water in the coloring process, but I don't mind the feeling and in some projects, having the stiffer ribbon could have an advantage.
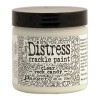
I also created some faux cracked glass bottles using Multi Medium, Distress Crackle Paint - rock candy and Alcohol Ink. Tim explains this technique on page 54 of Compendium of Curiosities Vol III. (
seriously, could I have any more Multi Medium dried on my fingertips?)
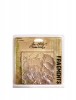
I added a few colors of Alcohol Ink to some Fragment Charms.
As well as Remnant Rubs from the Apothecary Sheet. All bits were added to a Swivel Clasp and Wire Pin.
Then into the bow on the clock.
Yep, lots of steps to make the clock, but it came out really cool. I love the grungy exterior and the Found Relative kids. The Mini Lantern is easy to add to the background plus it added a lot of interest, almost like the boys are standing on someones doorstep for trick or treating!
Hope you enjoyed today's Media Team tutorial. I know I had a great time making it! I also hope that if you have never made an Assemblage Clock that this tutorial might give you some ideas for a fun piece to share with your family in October.
Now carry on,
paula


Paula, I adore this spooky assemblage clock. Love the cheesecloth idea and your crackle turned out great on those added embellishments. (I wondered what you were up to) Another fantastic creation!
ReplyDeletethanks Annette! I want to experiment with that Crackle technique more - just need some time!
DeleteWonderful clock! All the detail is stunning!
ReplyDeleteThis is soooooo Cool!! Love love love! I love how you made the charms and the bottles! The cheese cloth and background--thank you for the step by step. Awesome! :)
ReplyDeleteThis is awesome Paula! Those little boys do look like they are trick or treating!
ReplyDeleteThis is such a fabulous Halloween decoration. Thanks for sharing all the fun techniques you used. (I could make a really scary version of this by putting a picture in it of what I look like in the morning, haha!)
ReplyDeletewe could all do that Renee! myself included!
DeleteFantastic!!!
ReplyDeleteIt really does look like you enjoyed making this wonderful creation Paula. They really do look like they are standing on someone's doorstep, they have quite mischievous looks on their faces! Anne x
ReplyDeleteWhat a fabulous piece of holiday magic!
ReplyDeleteVery cool Paula!! TFS
ReplyDeleteThis is spectacular! I do have one question. Your cheesecloth has a tighter weave than the cheesecloth my local stores sell. It's closer to a muslin - where did you get it? Thanks!
ReplyDeleteTracy, Good eye...the cheescloth I always use is 90ct. I can buy it locally from a regional fabric store but you can find it on etsy, just type in the words "cheesecloth 90" and you will see it. I buy it by the box, but Etsy dealers usually sell it in 2 or 3 yard lengths also. Hope that helps, paula
DeleteI always forget to look on Etsy - thank you!
DeleteWhat a terrific clock! I love all the Halloween stuff that appears on the internet every year & I'm trying to fit a project in myself this year, some cute ideas here & I shall be coming back to it again & again :-)
ReplyDeleteSally
Love this clock! Looking forward to taking my naked clock out of the box and creating something Halloweeny, too! Thanks for sharing!!!
ReplyDeleteREally I don't know what to say! I'm speechless !! I can't stop to observe every detail! Fabulous! BArbarayaya
ReplyDeleteLove the detail on this project! I always learn something new from you, Paula. Thanks for sharing.
ReplyDeletethanks Heidi!
DeleteDarling! Love the how to, especially about adding the die cut fence to the circle of acrylic.
ReplyDeleteFun Fun Fun!!! Love it!
ReplyDeleteOkay I can't stop grinning... this is way too fun ... (love the new love relatives) ... the fence ; OMG, the bottle and the fragments ... great inspiration here ... I love it !!
ReplyDeleteFabulous, so creative, love every element. Nikki x
ReplyDeletePaula as always what a very cute assemblage!!! Just love this and the whole process wow....thanks for sharing....Ubber cute and love the little guys with the pumpkins!!!
ReplyDeleteOh superb! LOVE that starry sky, owl and the little fellas with their pumpkins! Jenny x
ReplyDeleteLove it Paula! Your clock is awesome! Thanks so much for the detailed walk-thru.
ReplyDeleteHave a great day!~kim
I LOVE THIS, Paula!! This is one of my all-time fav things that you've made....and I LOVE EVERYTHING that you make :) Just fantastic--It's totally AWESOME!! XOXO-Shari
ReplyDeletethanks Shari - glad you liked it. I never know when I start how something will turn out so I'm glad this was a hit. Thanks again.
DeleteThat is awesome!! I love it! Thanks for sharing. Love ya' Patricia B
ReplyDeleteI just love this!! I keep wanting to play with one of the clocks, but I can never seem to pin down what I want to do with one, I figure one of these days my muse and I will agree on something ;) Thanks for sharing
ReplyDeleteits just aw!
ReplyDeleteThis is brilliant, love the use of the fund relatives card...lovethese guys and they look wonderful in their new home! Love the crackled vials...just done some myself for a piece x A great make and tutorial .
ReplyDeleteAmazing!!!!
ReplyDeleteWicked cool!!! I love it!
ReplyDeleteAnd Paula hits another Grand Slam outta the park! That is so cool!
ReplyDeletethanks Sue!
DeleteUnbelievable! Cute, yet spooky. Thanks for sharing.
ReplyDeletethis is AWESOME!!!! totally inspiring :)
ReplyDeleteGreat tutorial, and even better inspiring project! Thank you!
ReplyDeleteI don't even do Halloween but this is so inspiring that I may even try this! Thank you Paula for all the detailed instructions and cool techniques
ReplyDeleteFabulous tutorial and what a gorgeous project! I love every bit!
ReplyDeleteMy husband said, why don't you make a jack o'lantern clock? and I said my friend Anita made one already! Had to come up with another idea!
DeleteWell this is just a bit awesome! You've shared so many great techniques and tips that I don't even know where to start! The first tip is a winner for me, I am forever taking things apart and then have no idea what went where! LOL The paint and powder to the exterior of the clock is so wonderfully grungy and I am going to try distress markers on the found relatives. Even the velcro to hold the battery pack is a great tip, one I will be using for several Christmas projects. Thank you for such an inspired and detailed tutorial.
ReplyDeleteThanks Miss Zoe - glad you liked inspiration. It was really fun to make, no planning, just doing. I personally love how well the fence worked on the plastic!
Deletethanks again, p
Wow, just amazing, love all the wonderful details and the outcome is nothing short of fabulous!!!
ReplyDeletethanks Claudine!
DeleteLOVE LOVE LOVE your Halloween clock!!! So cute!!!
ReplyDeleteLove it! Love it! Love it! Love it! Love it! Love it! Love it! Love it!
ReplyDeleteAwesome Paula! XD
thanks Miyake!
DeleteThis is so great. I have a clock sitting at home waiting for me to use it and I just haven't gotten to it at all! :( Now I have some great inspiration to get me going!
ReplyDeleteOh this is just stunning Paula My clock is also sitting here waiting to be used, so thank you Paula for such great inspiration. I love the paint and embossing effect on the outside and all the wonderful details inside - my head is buzzing with ideas! Thank you !!!
ReplyDeleteVery cool clock! Love the finish on the outside - just like you picked it up at a junk sale! Great tutorial too - many thanks!
ReplyDeleteVery cool!
ReplyDeletesuch a cool way to use the clock.it does seem like a lot of work. but I am going to try it! love it!
ReplyDeleteWhat a great way to use the clock. I have a clock but haven't used it yet and a Halloween clock seems like just the ticket. Once it's done I may pass it on to my youngest daughter since Halloween is her favorite holiday (I like it too) and she starts decorating the 1st of October. Thanks for the great inspiration.
ReplyDeleteThis comment has been removed by the author.
ReplyDeleteThis comment has been removed by the author.
ReplyDeleteFantastic work!!
ReplyDeleteADORABLE!!!! So many layers, details and textures! Thank you for sharing!
ReplyDeleteI have looked at this tutorial several times and really loved how this came out!!!
ReplyDeleteI have to say this is my favorite 3 dimensional piece of Halloween art I have ever seen! There are so many perfect, thoughtful details in this! I love the way your mind works! thanks for sharing your creativity with us! I just received my holiday found relatives in my order, so if I may, I will borrow your idea to add them to my Halloween project!
ReplyDeleteI love it! Great tutorial. Thank you.
ReplyDeleteO my Gosh Paula…fantastic Halloween project…thank you for sharing the process, especially the part with fake rust…awesome! Hugs from Slovenia
ReplyDeleteThat is awesome!! I love it! Thanks for sharing. watchescave.com
ReplyDeleteabsolutely love this! thank you so much for the detailed tutorial
ReplyDeleteThanks for sharing the post.. parents are worlds best person in each lives of individual..they need or must succeed to sustain needs of the family. video alarm
ReplyDeleteWhat a beautiful project and thanks for the way to make the fence stand up!
ReplyDelete