So it all started last week with this leaf.
The leaf I didn't use in Fridays card project for the Tim Holtz Media team.
So I'm back to day with a project using it (
you know I couldn't just leave it on my desk right?).
Once the leaf was cut, it went into the Texture Fade that comes with the Layered Leaf Bigz die.
Once run through the Vagabond it looks like this. Pretty spectacular, right?
I gave the leaf a light spray of the Heirloom Gold Perfect pearls mist to give it a metallic sheen.
Setting the leaf aside, I cut a Sizzix Postage Stamp Frame (with the large "Sized Rectangle" in the middle to cut out the center of the frame) from Grungeboard. Here are the steps for painting the frame:
1. Paint the frame with 2 coats of Gathered Twigs Distress Stain.
2. After stain is dry, add a layer of Distress Crackle - rock candy and let that dry at least 45 minutes depending on thickness of the crackle.
3. Once crackle finish is dry, add a thin layer of Evergreen Bough Distress paint over the top of the crackle and rub over the surface with fingers.
4. Once Distress paint is dry you can add Distress Ink to the edges.
After the frame was complete I added a vintage postcard from my stash. I liked the handwriting in pencil and the stamp/cancellation in the top corner. I adhered the leaf to the postcard/frame with thin foam tape.
A couple Chit Chat words, inked with Vintage Photo and cut into little flags.
Made their way onto the side of the frame.
Next up I need something to place the leaf frame on.
Today I'm using a 6 x 7" board my husband cut for me a long time ago. Seemed perfect for the project today. If you don't have a board you can use heavy weight chipboard or a canvas.
Bear with me, this has many layers that come in this order. I dried each medium between layers.
White Gesso
Evergreen Bough
Multi Medium
Tumbled Glass
Evergreen Bough and Brushed Coruroy
Picket Fence
Tarnished Brass
Nice coat of Media White Gesso. I was using an old brush so it made drag lines in the gesso...you won't see it in the end but still, I should take better care of my big brushes!
A quick sand over the dry Gesso layer with my Sanding Grip to smooth out my shoddy painting job. (
wipe away any dust before moving on)
Heavy coat of Evergreen Bough.
Then rub it in with a wet wipe.
Next up, old paper ripped into strips and added to the surface with Multi Medium (yes, there is a layer of mm over the top of the paper).
From here on out I just used my hands to add the paint! If the paint gets too opaque you can remove some with a wet wipe.
Tumbled Glass
Then more Evergreen Bough and a bit of Brushed Corduroy.
Next up Picket Fence for some highlights.
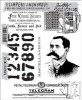
I stamped the huge numbers from the Stampers Anonymous Purveyor set (Watering Can Archival ink) several times to create some balance.
And the last paint layer - Tarnished Brass. I just shook it up and ran the dabber top along all four sides of the wood. This will get sanded later so I was not worried about getting too much on.
Next up - the Woodgrain Layering Stencil and Ranger Texture Paste to add the woodgrain motif over the surface.
I guess I could have gone from top to bottom, but instead I added the Texture Paste over three parts of the surface (
remember to wash the stencil right away).
I dried the Texture paste with a heat tool (
it took very little time) then added Evergreen Bough and Gathered Twigs Distress Ink with a mini Blending Tool. You can see that the ink colors the Texture Paste really well, but it also colors the background.
I found that if you use a wet wipe to remove the background ink, it will leave the color on the Texture Paste.
Leaving you a very cool look when you're done.
Time to sand away the edges of the board and remove some of the gold paint.
I wanted to add some of the new Expedition Vellum pieces to the front.
I chose these two to go along side the Postage Stamp Frame.
I also added a long strip of Linen Ribbon around the board. I cut the Linen ribbon so the ends were long enough to create extra loops by tucking them under (see below).
NOTE: You can see how thin the Linen Ribbon is by looking at the piece that is wrapped
around the board, then how full you can make the bow by just pulling
across the weave to stretch it out.
Add the Postage Stamp Frame over the Linen Ribbon with thin foam tape so it is raised up, off the board.
I wanted to add some metal so I colored a Timepiece, Game Spinner and brad in Iced Spruce Distress Paint, then wiped away the excess with my fingers leaving just a bit of blue grey residue around the numbers. After it was dry I added a foam square to the back.
Once the Timepiece was in place I used a small bit of Multi Medium to secure the two "faux loops" under the Timepiece. Stretch out the Linen Ribbon so it becomes fuller and fray the ends.
Still loving the Layered Leaf die - I am quite sure we all will be seeing this die popping up in projects from layouts, to mixed media to home decor. I for one am looking forward to seeing what crafters come up with.
Cheers for a great week friends,
now carry on...
paula


 P
P


I made almost the same postage stamp frame today! Oh my gosh! But I hadn't planned on putting it on another layer. Maybe I should re-think that! Can't believe my idea was so similar! It was a take off from your earlier post.
ReplyDeleteNo worries SusanK, I used the same stencil Emma did on the project she posted this morning http://stickydots.blogspot.com/2014/09/blessed.html
DeleteHow cool! And, yes, the leaf is a true found treasure!
ReplyDeleteWOW love this a lot and the leaf looks so lifelike. The vintage postcard is awesome, its really a lovely project.
ReplyDeleteThat is gorgeous!! I love the layers, the colors, the textures! Just fantastic! Thanks for sharing. Love ya' Patricia B
ReplyDeleteI really like this, beautiful!
ReplyDeleteLove love love it! great colors too. I must get that leaf die.
ReplyDeleteWhat a grand leaf! LOVE your inking, layer of die cuts and product that give it texture and depth. Another wow project, Paula! Thanks for the inspiration. :)
ReplyDeleteAwesome!!! Love the leaf and your design!
ReplyDeleteFabulous Paula...wonderful leaf and awesome idea to add vintage postcard...I Love it! I also have to admit that I am a bit "angry" because every time I visit you I add some more crafty stuff to my wish list and believe me my wallet is not happy...
ReplyDeleteHugs
Beautiful colors! Perfect use of the leaf. Where do you put all of the gorgeous projects you make?
ReplyDeleteWonderful project Paula! I just love that leaf die and am looking for it in local stores - thanks so much!
ReplyDeleteBeautiful, Paula. I love that leaf and your mix of the distress media, inks and paints. It makes me want to get in my studio and just start inking and painting and experimenting with different combos. It is amazing the different looks you can achieve. And all are vintage and gorgeous! Thanks, girl!! I am always so inspired after your project post.
ReplyDeleteIt's all about the layers. What a beautiful project. Thanks for sharing the steps. I think you are right, we are going to see these leaves falling everywhere. I for one am looking forward to experimenting with it.
ReplyDeleteLove all the layers! And it's nice to see Iced Spruce make a return appearance!
ReplyDeleteLove this piece Paula!
ReplyDeleteI am watching for my Leaf die to arrive. You have given me so many great ideas. Thanks for all your time Paula.
ReplyDeleteI loved the leaf in the postage frame on it's own but it looks even better the way you have framed it. Thanks for the tip about removing ink from the surrounding area but leaving the colour on the paste, that is so useful to know.
ReplyDeleteOh Boy, Paula!! This is beautiful!! LOVE everything that you've assembled here to create this gorgeous décor piece!! Gosh, more necessities going on the wish list!! ;) Good thing Christmas is coming!! ;) :) Thank you for sharing your steps on this, Paula! You make us better crafters!! XOXO-Shari T.
ReplyDeleteThis is stunning just beautiful :))
ReplyDeleteGorgeous. Love all those layers and the colors.
ReplyDeleteThank you, thank you Paula. I know I can always be inspired by your work and ideas when mental blocks rear their troublesome heads. That base for your frame is genius! Jenny x
ReplyDeleteJust love how this turned out so much detail. It is perfect :) Thanks for sharing.
ReplyDelete