
Nice to be here today because this is going to be a fun one! I am giving the new Neon Alcohol Inks from Tim Holtz and Ranger Ink a test run and I guarantee you are not going to be disappointed. The new Neons come in a pack of 8 or as individual colors. I swear, the pack of 8 is the way to go because all the color are amazing. My personal favorites are Hyper, Florescent and Radioactive and Ignite.

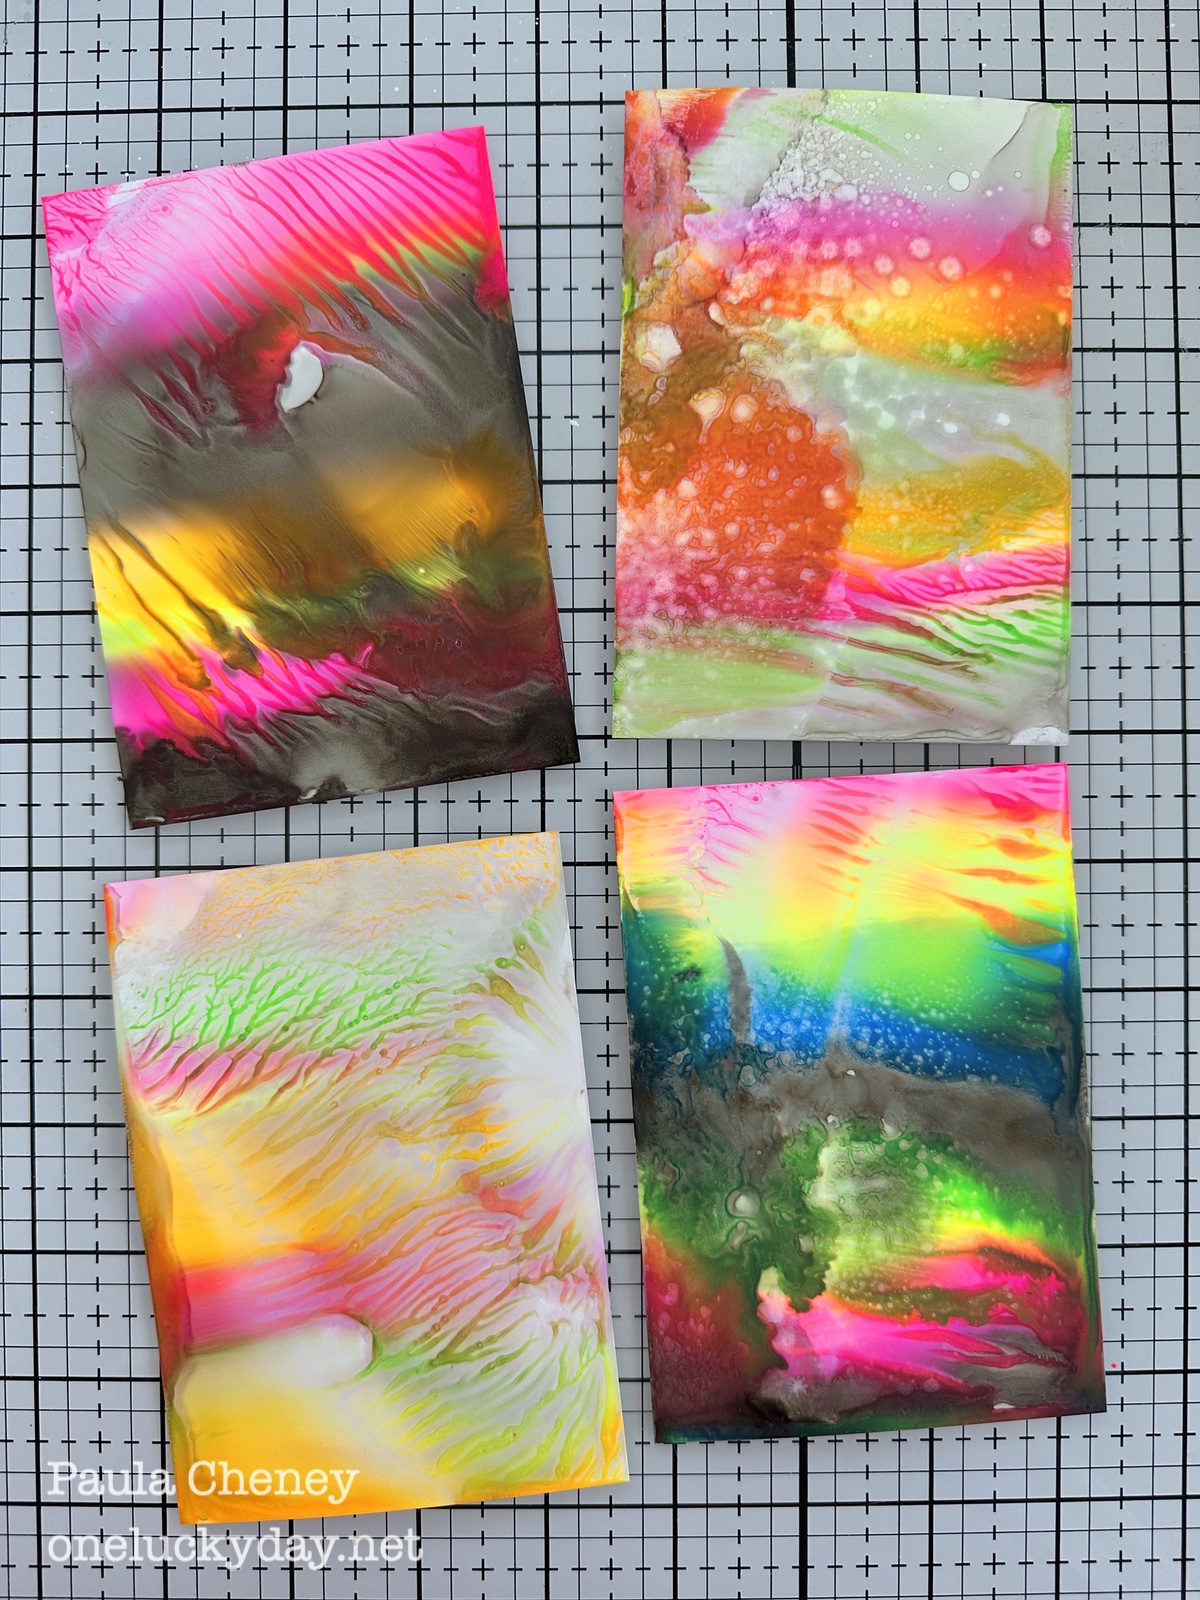
The colors are so fun but I really didn't know what to expect from a Neon - that is not in my regular wheelhouse. But look how my cards turned out! Aren't they amazing?


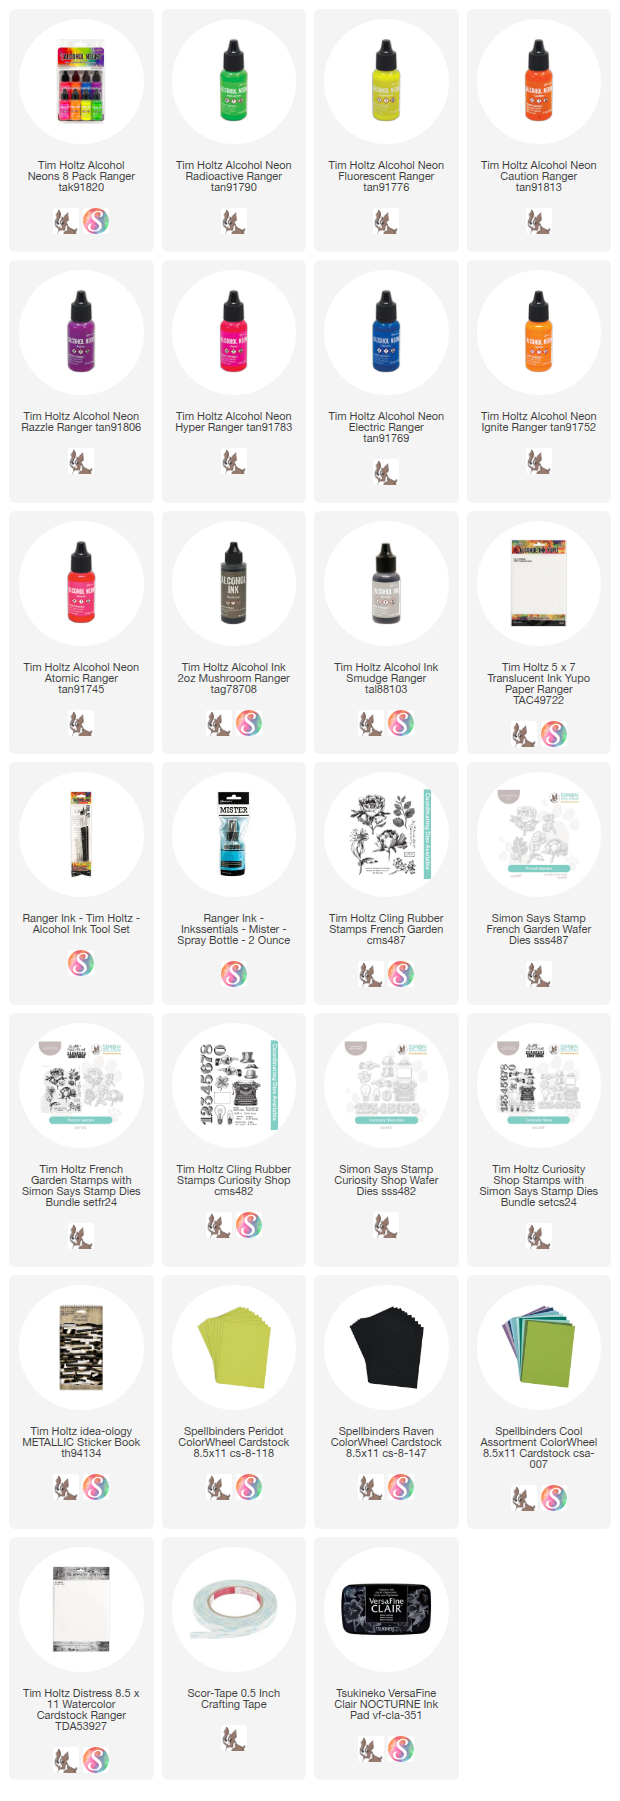
So lets gather the supplies you will need:
Yupo (5 x 7") - I cut each sheet in half to create twenty - 3.5 x 5" cards so I would have plenty to work with. This is the perfect size for a card front and this technique.
Alcohol Ink Neons (at least three colors)
Alcohol Ink Mushroom, Smudge
Alcohol Ink Tool set
91% Isopropyl Alcohol in a small spray bottle (or even in a mini mister - one comes with the Tool Set)

Now lets talk about the technique I used to create the card fronts. It's a simple one!
Working on my glass Studio Mat (for easy clean-up with a spray of isopropyl), I created lines of color, including some of Smudge (which is not a Neon).

I did not photograph step two, which is to mist the Yupo with 91% Isopropyl Alcohol.
Immediately after misting, lay the Yupo into the ink.
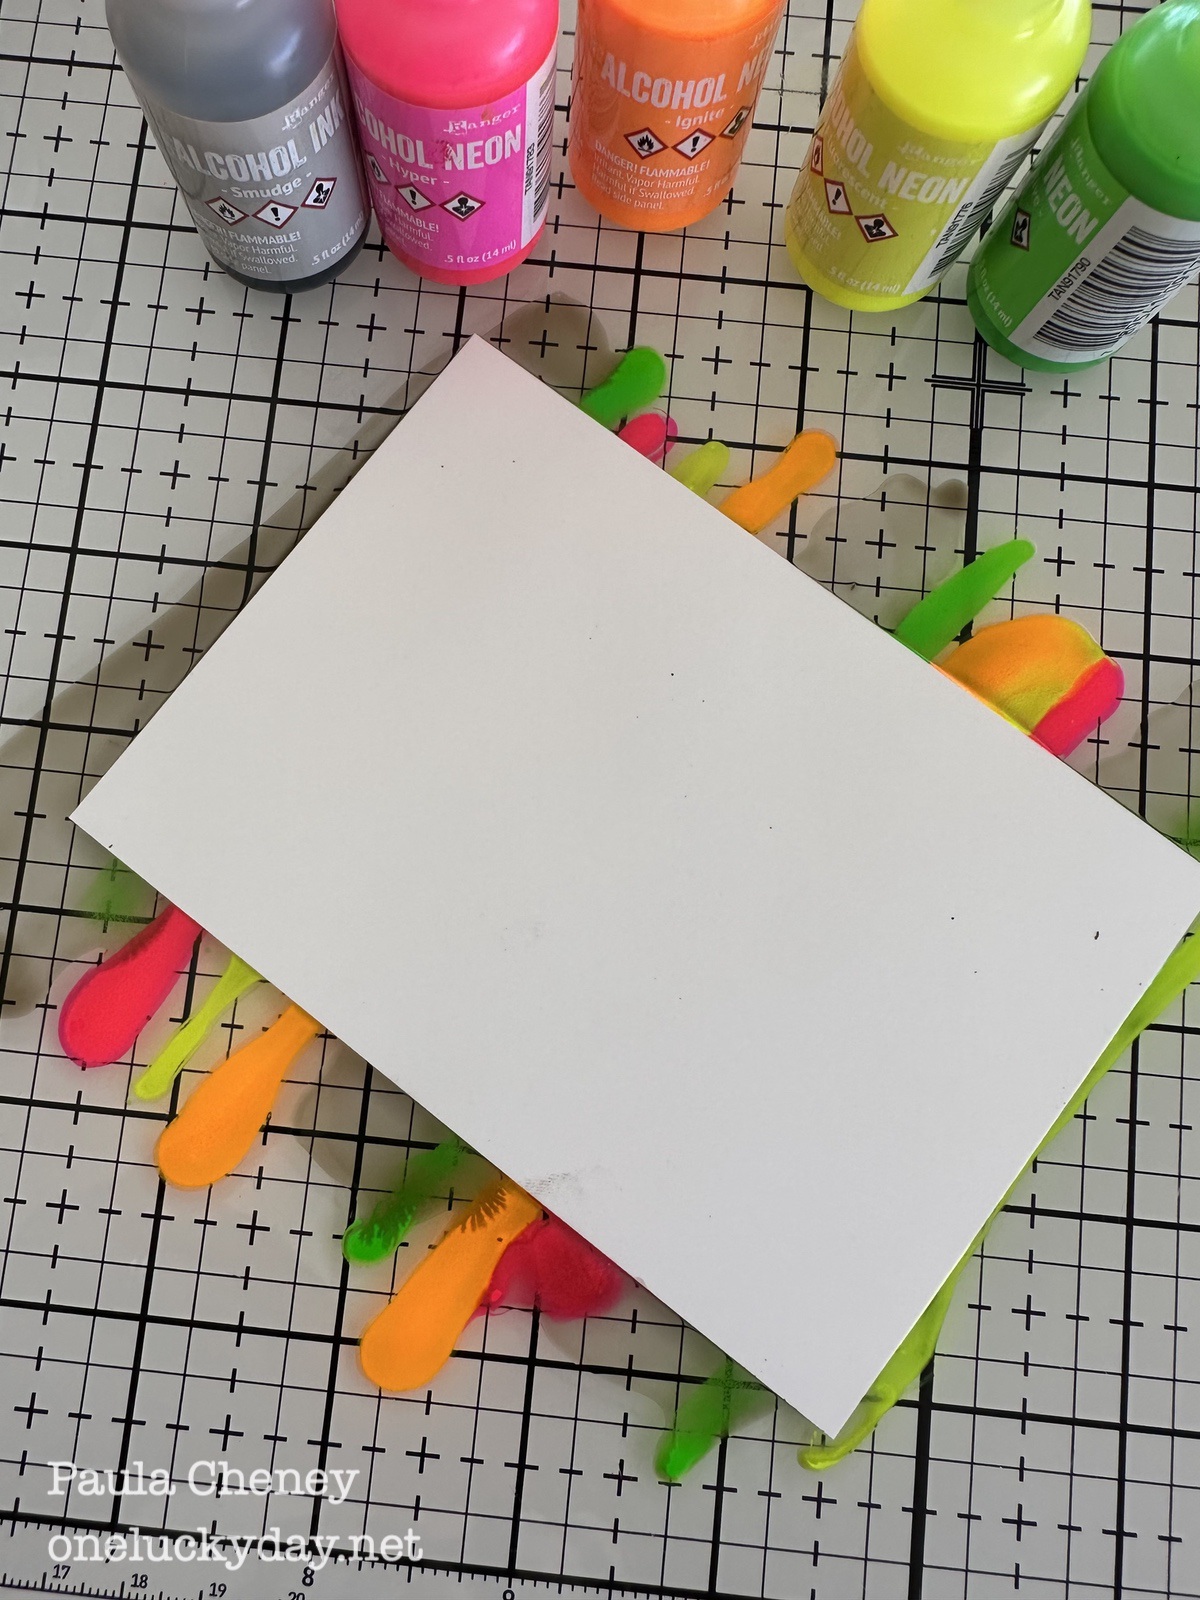
I moved the Yupo back and forth to get good coverage, then lifted it from the glass. The movement will create a suction effect with the glass surface so a small pair of tweezers can be helpful to lift the card from the glass.

Once I turned the Yupo over, I misted part of the surface with more Isopropyl (optional). You can also use the Mini Mister that comes with the Alcohol Ink Tools set because it gives you more of a fine mist rather that a spray, which can be hard to control.

So that is the basic technique - I just changed out the colors and the optional addition of Smudge.
What about combining it with Mushroom instead of Smudge? This time I only used Hyper, Ignite and Florescent with the Mushroom for a totally different look.


You might ask if you can use the excess ink. Well you can, but it will not be as good or true to color as the first pass through the ink. The ink does dry on the glass mat, so you have to spray with isopropyl to revive it.
 I chose 4 of my favorite backgrounds from the ones I made (it was very hard to stop) to use for the cards. Each are so different and I love that!
 I used 1/2" Scor-tape to mount the Neon backgrounds on Watercolor Cardstock.
 Then I added the front to a card backing made from Spellbinders ColorWheel Cardstock. This is 100lb cardstock so it is perfect for a card back (and it comes is a million colors!).


 I initially thought the Neons might not work on the Watercolor Cardstock or that it might cover the black stamping, but it worked perfectly. As you can see the black ink is still perfect after painting. And the bold color comes through!
 I love how the color 'Florescent' looks splattered over the 'Hyper' pink!


Even though I liked the cards as the are (those Neons speak for themselves), I decided to try something. What if I added a image to the center? Something like a flower that could be colored with the Neons? And did I have to use Yupo or could I use Watercolor Cardstock?
So I used my favorite Nocturne ink (it is so BLACK!) and the a flower from the French Garden stamp to stamp on Watercolor Cardstock. Then I used the Simon Says Stamp French Garden dies to cut out the image.

Shake up any of the Neon colors and drip a bit out on the glass mat. Use a Alcohol ink brush to color the image. These brushes are synthetic so they work with the Alcohol Ink. After use, just clean them with Isopropyl Alcohol instead of water.
I did spray a tiny bit of Isopropyl Alcohol into the Neon Ink to thin it out. When the ink dried on the glass mat I can revive the ink with a spritz of the Isopropyl. You can decide if you want full strength Neons or a bit looser, both worked.


Here are images of the final cards. I kept them very simple using the two stamp sets French Garden and Curiosity Shop, along with the coordinating dies from Simon Says Stamp.


Well, I for one was surprised how much I enjoyed myself playing with these new Neons! Honestly, they are so fun to work with! I hope you give them a go!
Now carry on,Paula
Paula, thank you for this tutorial! I followed your instructions & made a bunch of backgrounds using the Neons & Mushroom & Smudge AI! They will be used for future projects! I learned so much!
ReplyDelete