
Hello Friends,
Happy to be here to share another Christmas make, the Festive Tin. This is an easy project to create so follow along and I'll show you the steps.
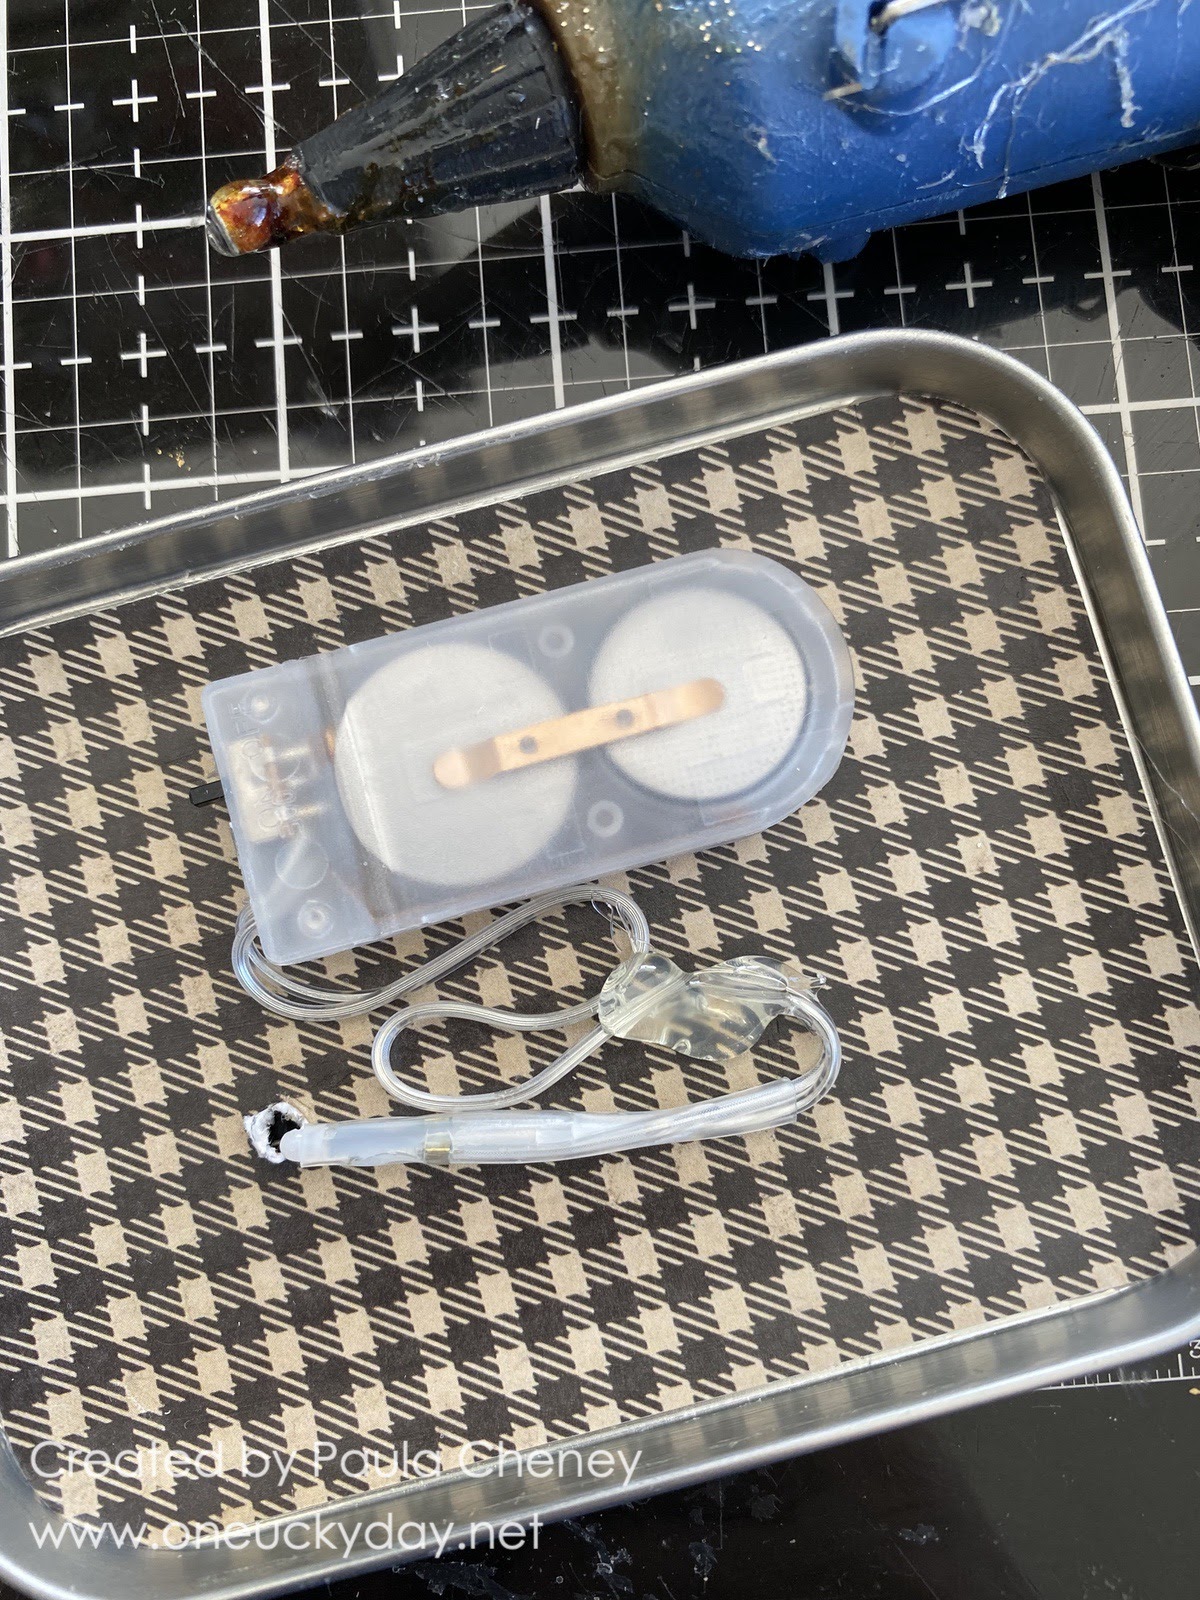
Start by punching hole through the tin with an awl.
*This photo shows the tin on my glass mat. In reality, I punched the hole over a cork trivet on my craft table so the awl would not damage my glass mat.


Add foam pads to secure the battery pack to the lid.
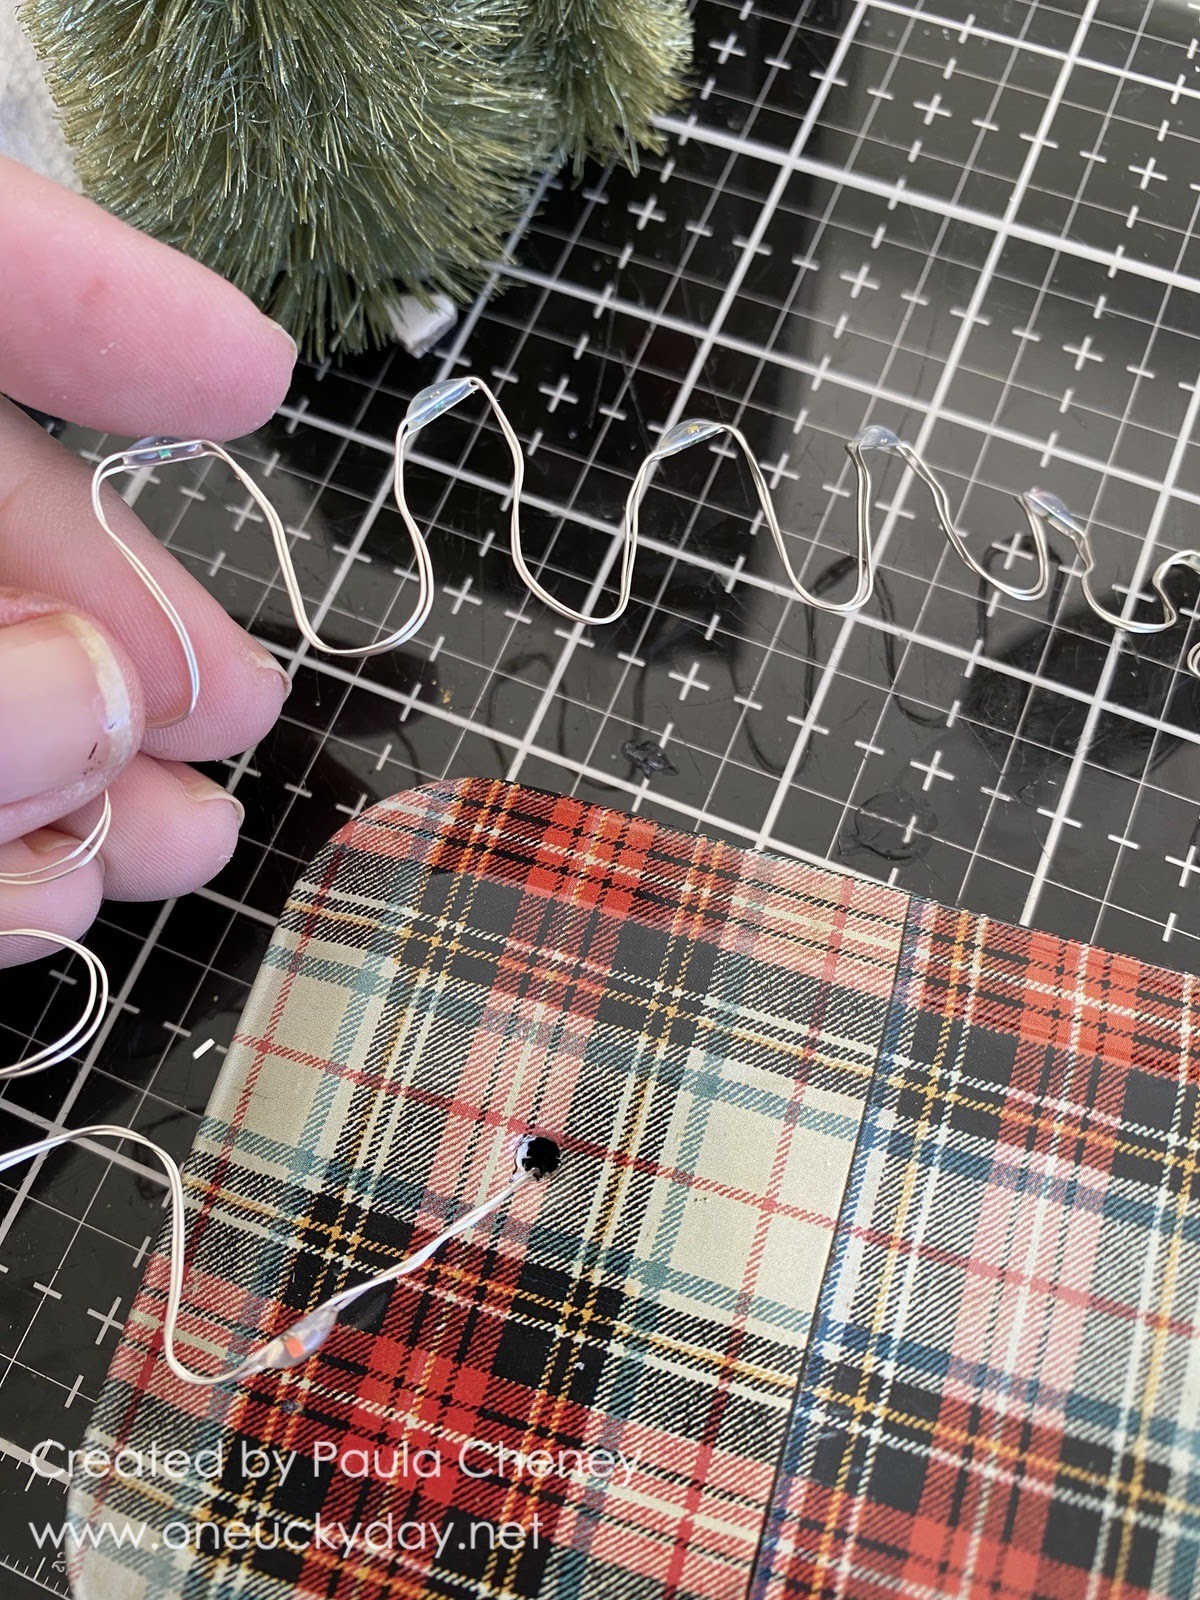
 I secured the wire (the thick part) to the tin with hot glue. Hold the wire in place until the glue is stable.

Hide the battery pack (except for the light switch) with a poinsettia from the Layers Botanical pack. The words are from the Baseboard pack - I just cut the flags at each end with sharp tipped scissors.

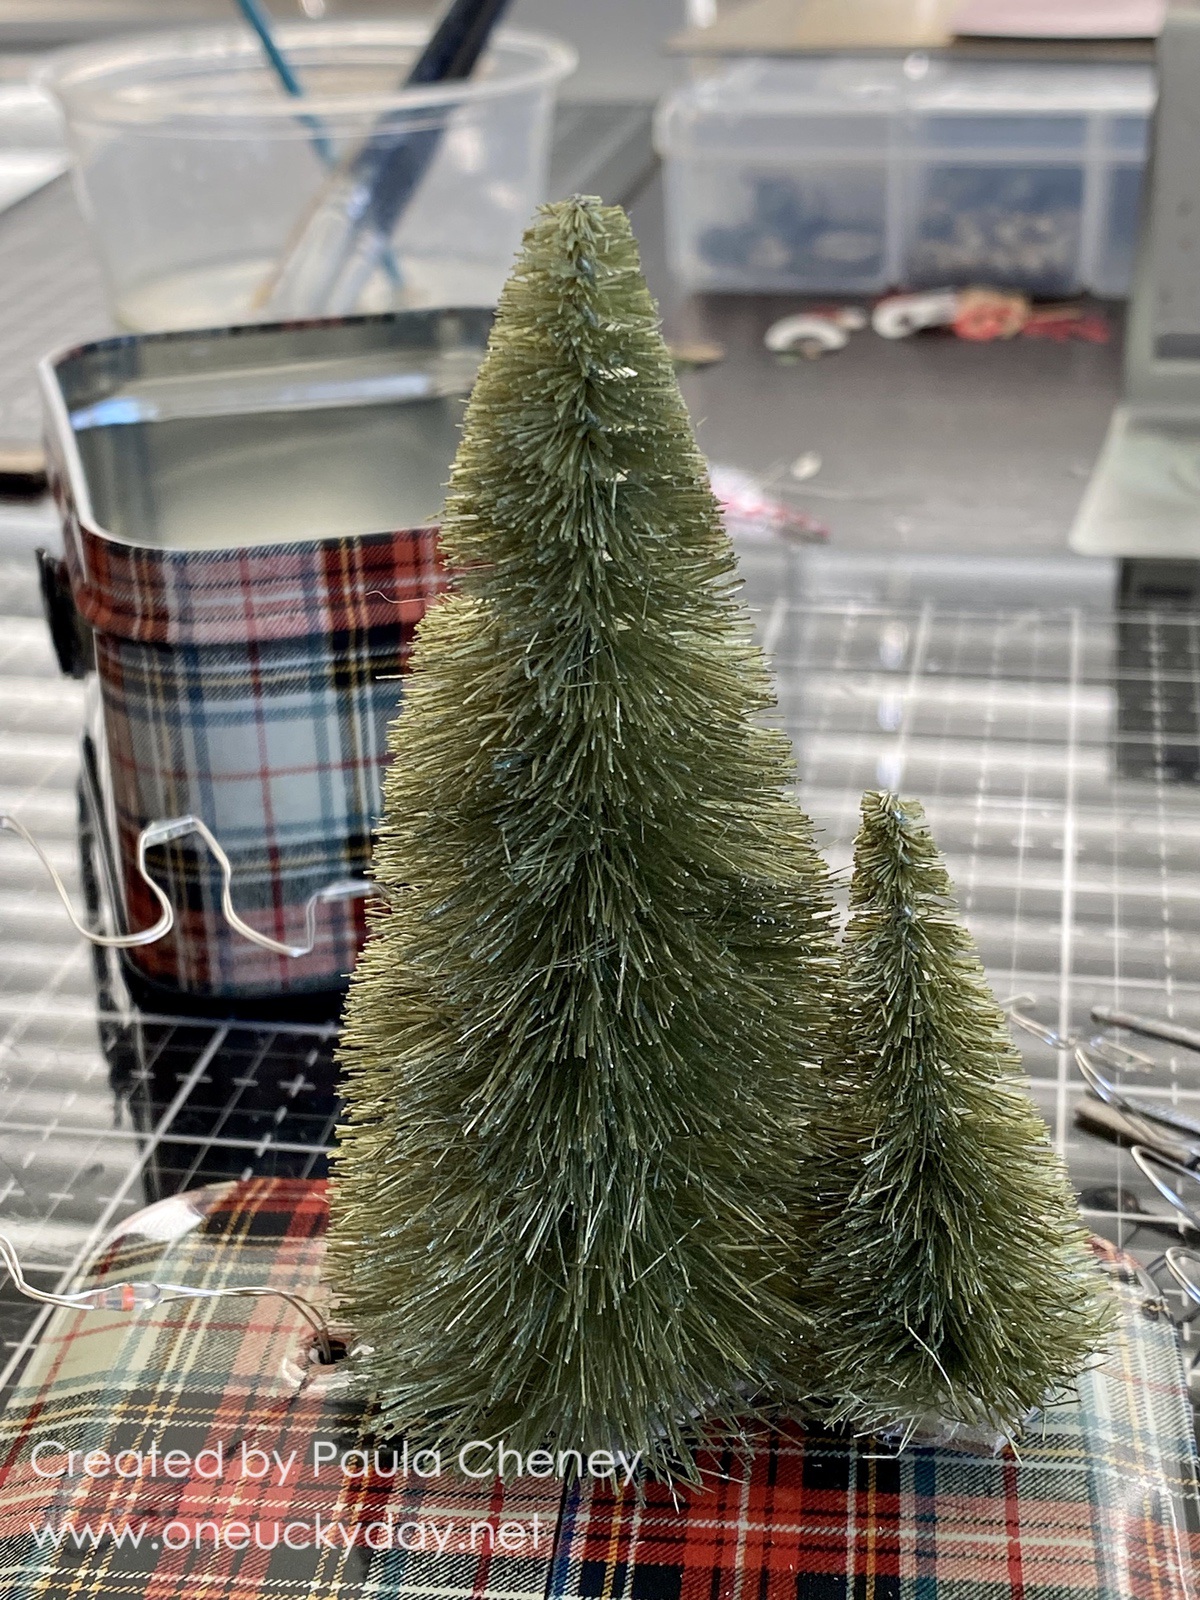
I used wire cutters, to cut off the base of each tree so the branches would be right on the snow. I used hot glue to add a chipboard square to the bottom of the trees (for stability).
 You may want to hot glue the trees to the tin top, but I think they would just pop off the metal at some point in time. So I used Collage Medium to glue the trees and let them dry in place for a few hours.

Notice how close the trees are together. I did that so the lights could go seamlessly between the trees (no hanging wires).
 Once stable, I wound the lights around the larger tree, then over to the small tree.

 At first I was going to wrap the Tinsel but when I was trimming it, the tiny pieces kept piling up and I thought, I could use it on the tree like the old fashion tinsel.


So that is just what I did.I used a brush to add Collage Medium on the tips of the branches and then sprinkled the cut Tinsel over the trees.
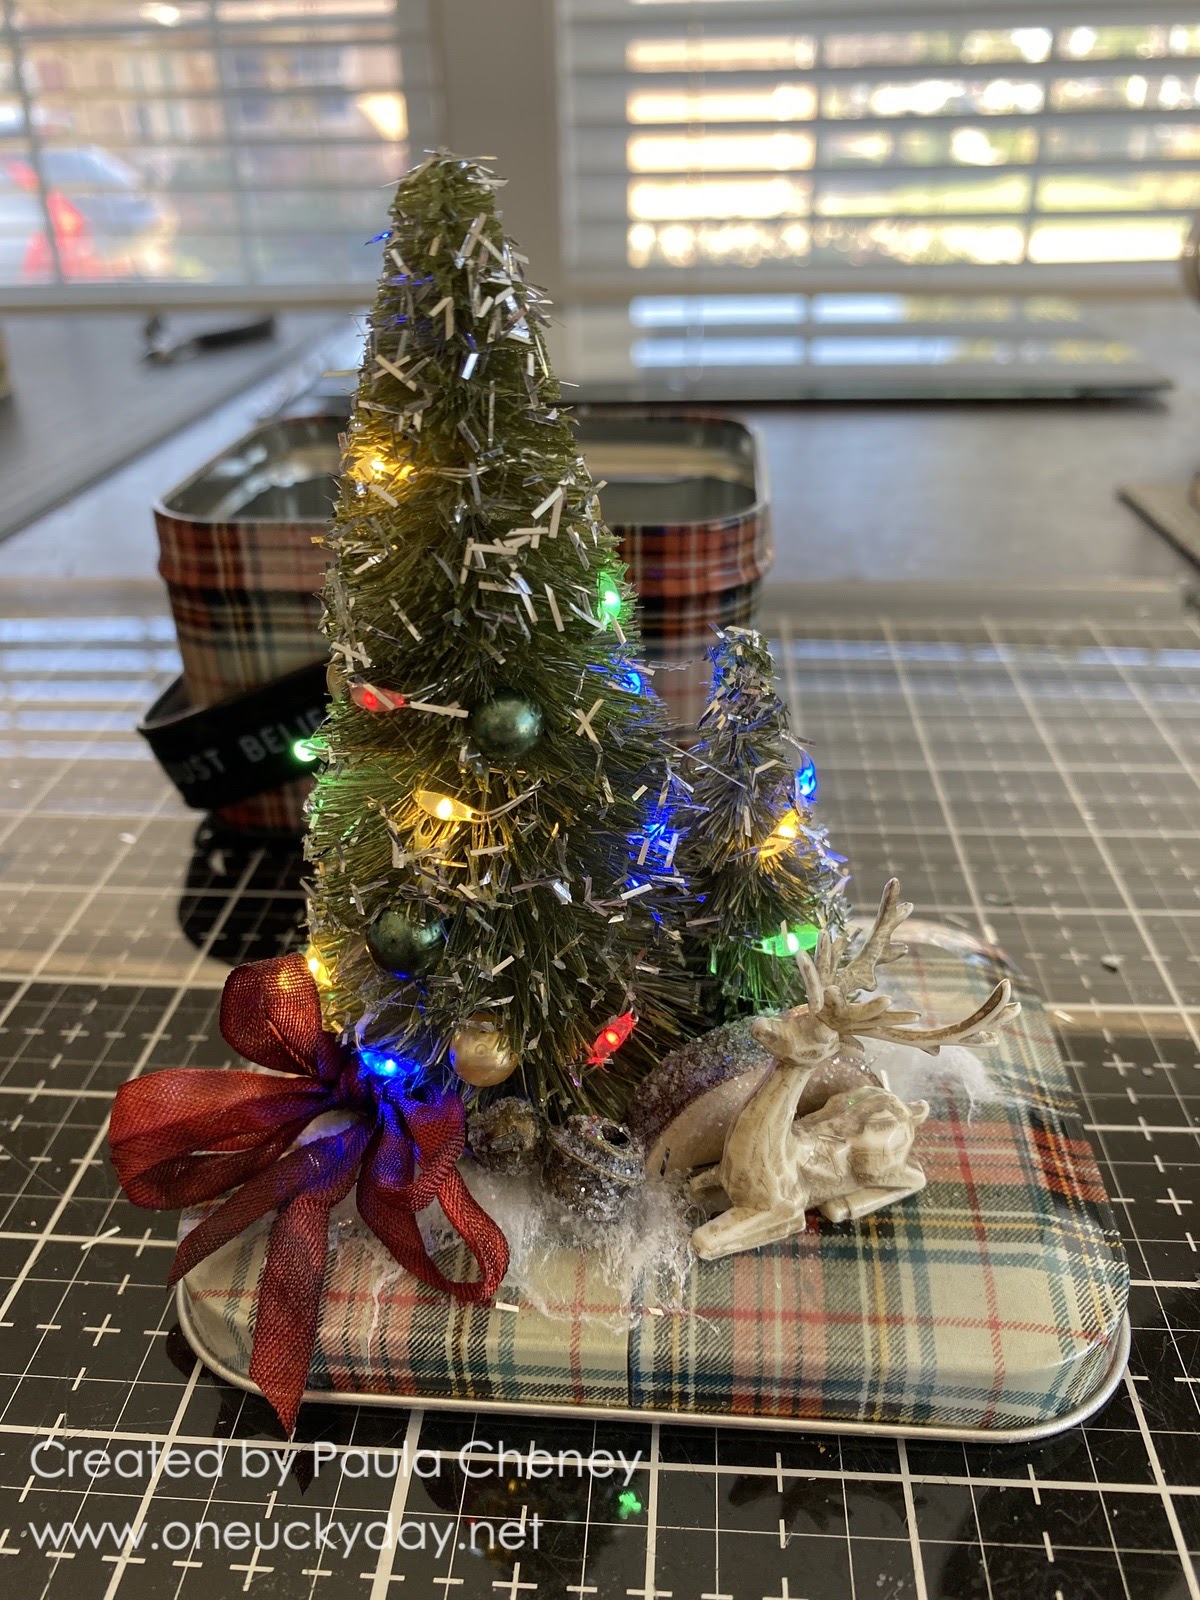
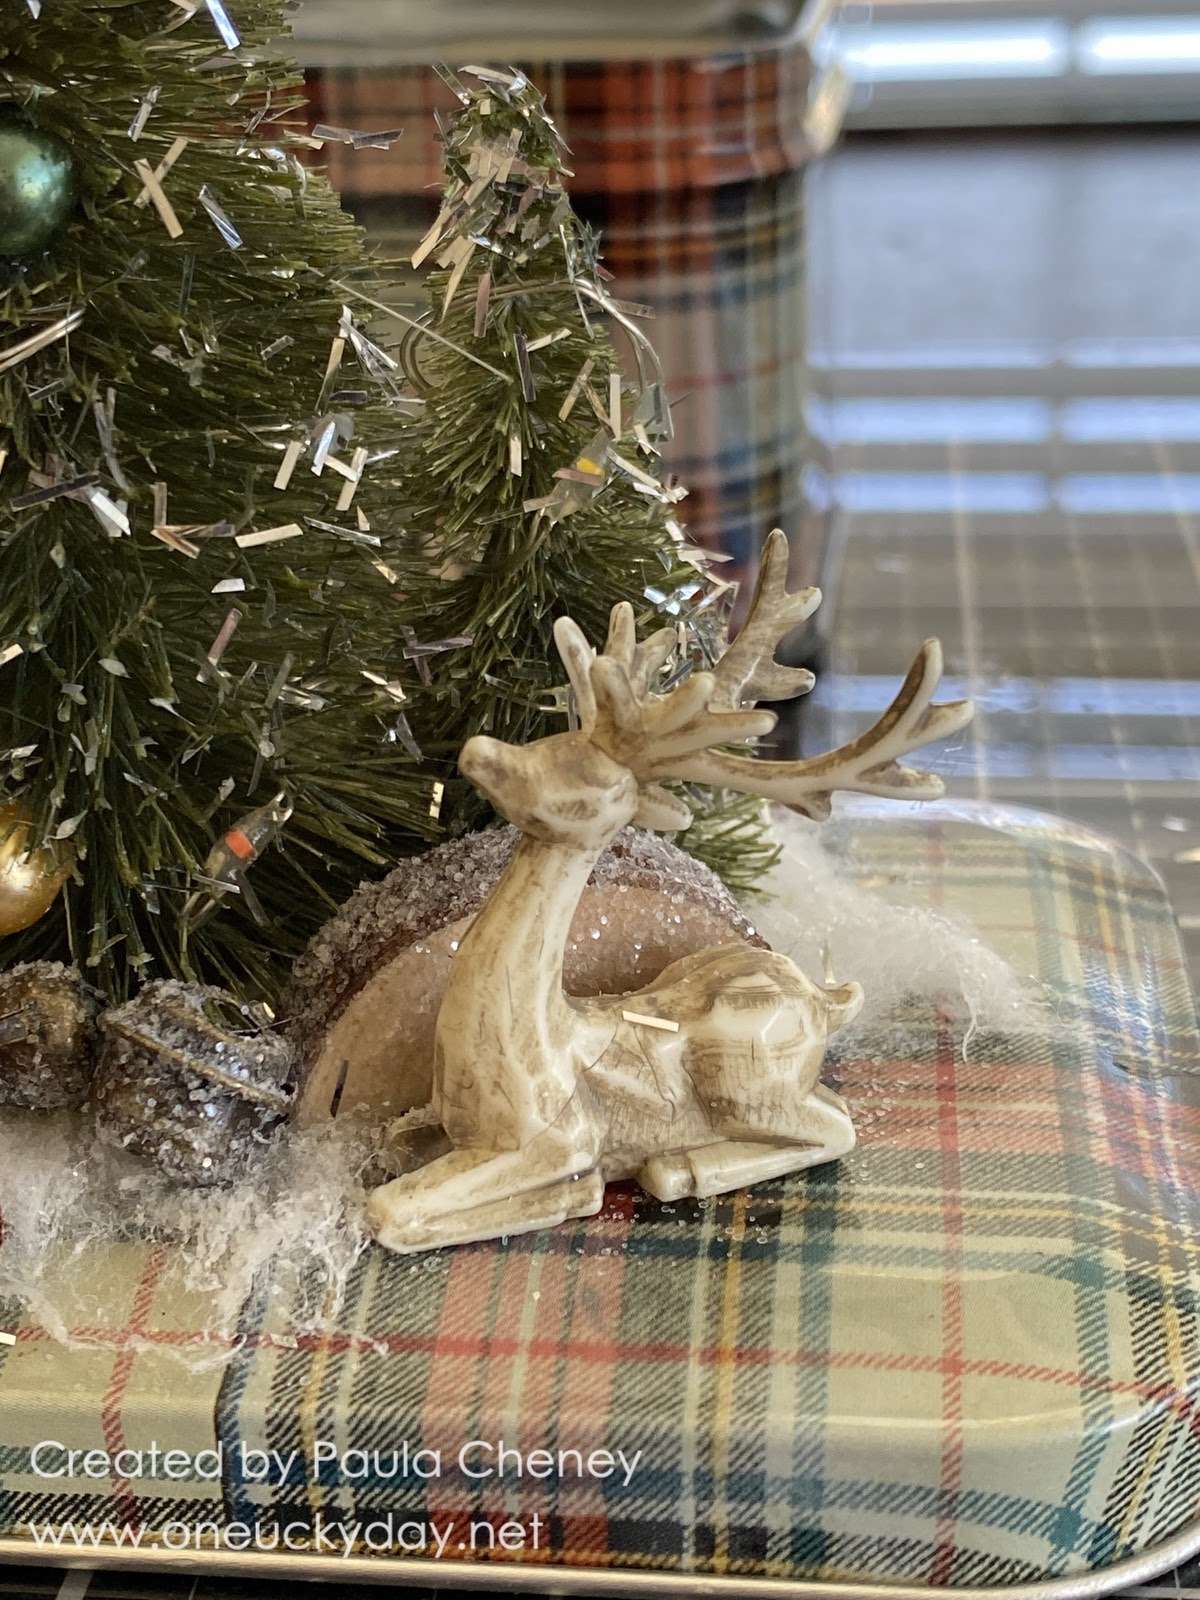
I used a damp brush and Distress Crayon Walnut Stain to color the Salvaged Deer. It is amazing the transformation of the deer with just a little bit of crayon. Once the crayon dries, it will not come off on your hands.
Cut the Wood Slice in half and sprinkle with Rock Candy glitter. Once dry, add to the tin with Collage Medium. Glue the deer as close to the Wood Slice as possible.
 Add old fashion Jingle Bells to the scene.
 The 1/4" ribbon has been sprayed with Aged Mahogany Distress Spray Stain. I made a double bow and hot glued it to the snow, tucking it into the tree.
 Peppermints were added to the right of the bow. You could add as many as you wish!


 Add the Remnant Rub 25 to a label from the Sticker Book, then add it to the tin.


I used Label Stickers to decorate the black handle. You will need to use Scor-tape underneath on the strips that go around the two corners.

Now just fill with candy and you are good to go. What a fun gift for a friend or family member. It would be a fun project for a"girls night" party, especially if you had all the holes punched, trees and ribbon pre-dyed, and deer colored with crayon!
Now carry on,
paula
brilliant and fun , paula cheney
ReplyDeleteVery cute and I love that it lights up!
ReplyDeleteLove that little tin and all of the elements you used! Another stellar make, Paula!
ReplyDelete