
Happy to be here today sharing a Vignette Shrine project. I absolute love this new substrate because it can fit so many themes. I also love that it comes with the two base pieces to give it more visual weight to the completed shrine.

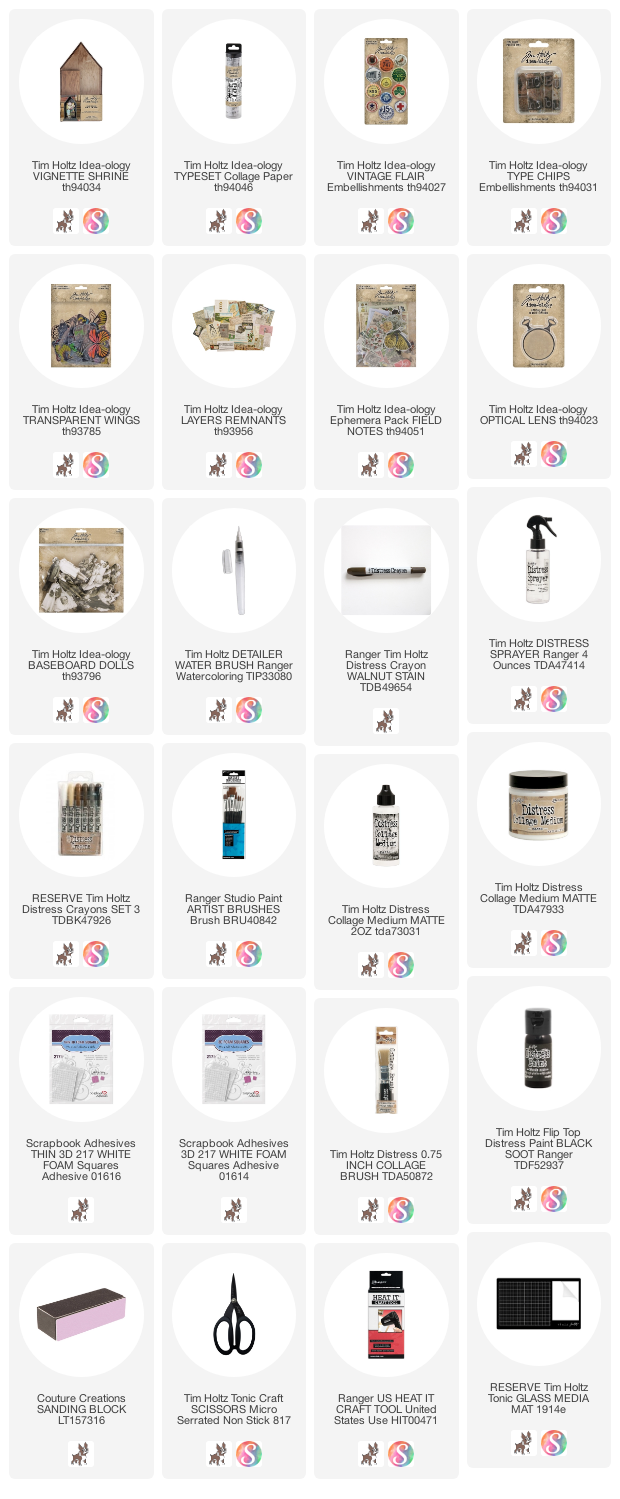
Gather the pieces that you will need for the project. From Collage Paper to a Baseboard Doll to Vintage Flair. This picture shows all the pieces (plus a few other design choices) and includes 4 bingo chips for risers, and foam squares in both thin and standard thickness.
(click to enlarge photo)

2. Once the paint is dry, use Collage Medium to cover the back and sides of the house with Collage Paper Typeset. Remember the key to Collage Paper is having glue both underneath and on top of the paper.


5. Use small scissors to fussy cut the flowers. Add a few foam squares to the back and adhere to the Report Card.


6. Spell the word LOST, then flip over to adhere together. I adhered a small piece of chipboard to the Type Chips to stabilize them, then added two thin foam squares to add to the shrine.


7. Add the Transparent Butterfly wings to the back of the Baseboard Doll, then add a riser. I used some small wood blocks (3/8") but you can use what you have on hand, like a double stack of foam squares.


9. And the last little detail. Cotton strings (kinda like a nest) surround her feet and ground her to the Shrine. Vintage Flair button added with Collage Medium.


now carry on,
paula
Your ability to layer all these goodies is just phenomenal. Thank you so much for always inspiring us and sharing how your process goes.
ReplyDeletethank you Freddie!
DeleteAnother inspirational project, Paula! Just fabulous!
ReplyDeletethank you Sue!
DeleteIs it necessary to paint a coat of gesso before painting the black? Or is gesso just for paper?
ReplyDeletePat, no gesso was involved here. I just painted the inside black and then sanded it down so I could see some of the work through the paint. I always paint a thin layer Collage Medium over the paint to give it a more finished look.
DeleteThank you. This vignette is beautiful and inspired me to work on a shadowbox I have. All of your work is so lovely.
DeleteWoww Your Artwork is absolutely Gorgeous Paula !! Great embellishments, and goodies, Amazing image and wonderful result !! Love it. Thanks so much for sharing.
ReplyDeleteHave a very nice afternoon, stay safe, and big hugs
Caty
thank you for stopping by!
DeleteSavoring all the details! I always enjoy seeing how you make the pieces come together, Paula.
ReplyDeletethank you Marcie!
DeleteYou do layers and details so very well!!! Wonderful project!!!
ReplyDelete