
The project today revolves around the new Tim Holtz Halloween die - Jack-o-Lantern. Follow along and I'll show you what I made!
I pulled all the burlap off a 6 x 8" Burlap Panel leaving the wood sides and masonite front. I painted all the edges (and a bit onto the front) with Black Soot Distress Paint.


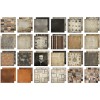
I adhered one of my favorite papers from the stash to the masonite panel, leaving a little black edge showing. I made sure to cover the paper with a thin coat of Multi Medium to seal it. I positioned the Jack-o-Lanterns on the surface (no glue yet) but I think it needs more interest....thinking...

Halloween Words Block is the answer. I cut a couple words from strips of manila cardstock and cut the ends to make them look like flags. I also inked additional cardstock with Twisted Citron for the background.

The bottom area needed visual weight so I added another great paper from the Regions Beyond Paper Stash. I sealed the new paper with Multi Medium before adding Black Soot Distress paint to the outside edges.


I am off on a trip today to teach at Stamp Asylum in Plano, TX - with an add-on trip next week for a little bit of fun. I am looking forward to seeing Monica at Stamp Asylum, the students (who are always so nice) and my sister (did I mention I love to go to TX?)...I will keep you posted on my adventures on Facebook and Instagram (@luckyday), hope you will join me...
now carry on,
paula
 |  |  |  |
 |  |  |  |
 |  |  |  |
 |
Hi Paul, what will you be teaching at Paper Tales in San Diego?
ReplyDeleteI meant Paula! sorry
ReplyDeleteOh, I can't wait for the Christmas Kits. I love the carousel - another year, another fun and creative project!
ReplyDeleteAnother fabulous project, Paula! Have fun in Texas!
ReplyDeletePaula, those jack o lanterns look so festive as dressed up in glitter! Never would have thought to remove the burlap from the panel. Ok, at first I thought my eyes were playing tricks on me but I see that you were playing some tricks with the title flags. Have fun in Texas!
ReplyDeletePaula - I went and snooped out your classes - that Merry and Bright tree - sigh - it's fabulous! Even better that the kit you had several years ago (a kit I just finished last month)! I hope this is your holiday kit or if you would sell directions! Keep Creating Beauty!
ReplyDeleteYou make it all come together beautifully, love those pumpkins!
ReplyDeleteMy first thought after seeing the teaser photo in my blog feed was, "Oooh, Paula made cookies! How silly is that? Have to say you are genius for repurposing the burlap panels and your project does look good enough to eat. Happy travels!
ReplyDeleteI love these happy, glittery pumpkins! Have a great trip - wish I could make it to one of those classes :)
ReplyDeleteSo made me smile ...( been a rough day ... with my brother), this cancer Journey is no fun ... too many changes too fast...
ReplyDeleteLove the jack-o-lantern ... especially the eyes , mouth, and nose inset !!
Soooo cute! Have a safe trip!
ReplyDeleteNew pumpkins are so cute! I love them! Your idea is amazing, as always! Love your project! BArbarayaya
ReplyDeleteThis is so cute Paula and I have no doubt that when you're finished with it...it will be totally amazing. Such an adorable beginning.
ReplyDeleteThis is so cute Paula and I have no doubt that when you're finished with it...it will be totally amazing. Such an adorable beginning.
ReplyDeleteSuper love this! Thanks for sharing:-)
ReplyDeletePlaying catch up Paula, sorry for the late comment. This is fabulous, love the Distress glitter on the pumpkins and how your Halloween flags were the perfect touch to this great home decor panel. The addition of the grounding strip of paper makes such a difference, it's little things like that that set your creations apart. Brilliant to use the burlap panel frame too, now what are you going to do with the burlap?! Hope you are having a great time in Texas, lucky students! Deb xo
ReplyDelete