Hi everyone!
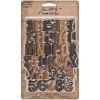
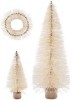
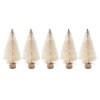
I'm here today sharing a kooky idea to manicure the Woodland Trees into something from Whoville. Woodlands come in a set like this, or in separate packs of 5 large trees or 5 small trees. Doesn't matter what set you have, just depends on how many trees you want. I'm gonna warn you now, this was a little additive.
Take your Kushgrip scissors (
because why would you use anything else?) to make a line in the tree, by spinning it while you hold the scissors in place. This will give you a reference point for cutting all the branches below. Now common sense would tell you not to cut your tree in half, right? I thought so.
Time to give your Woodland tree a haircut. Start by cutting the outer branches and working your way to the center. This is about as far as I could get before moving on to the next step.
The core of the tree is made from twisted wire. If you turn the base and untwist the wire just a bit, it will open the wire enough to allow you to pull out the little tufts that are left. If your base comes off when you are twisting (
mine didn't) you can just re-attach it with a hot glue gun.
Once the bottom of the tree is cleaned out, turn the base again to twist the wire and tighten it up like this.
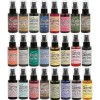
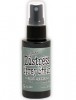
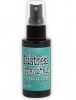
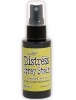
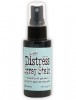
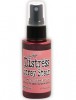
Okay, next up is to decide what color to dye your tree. This was a hard choice because the new Distress Spray Stains have so many colors to choose from! I had a few small trees saved from other projects so I had some fun testing a few colors. The trees here are Iced Spruce, Crushed Olive, Worn Lipstick, Evergreen Bough, and Tumbled Glass. Can you pick out which is which?
I ended up choosing a color pallet of Crushed Olive, Tumbled Glass and Evergreen Bough. Colors I never would have chosen to put together if I had not done the test run.
I like to spray trees on a paper towel to try and control the over spray. Mostly because my desk is messy when I'm working so control is good. I know I could use a box, but I never have one handy!
NOTE:
Remember to shake up the Distress Spray before use and wipe off the nozzle when your done to prevent clogging.
While my trees are drying, I decided to paint a Letterpress word for my tree display. Super quick to use the dabber top of the Distress Paint bottle.
I wanted a bit a variation to the gold paint finish so of course I used Alcohol ink. Just a couple pounces of the Blending tool = instant aging.
I can hear you thinking to yourself...does she ever use any other color of Alcohol Ink? Well...sometimes.
I also painted the wire and the base of each tree in the Tarnished Brass paint.
I decided to gather my little group of trees and make an arrangement in a glass dome I could keep out for Christmas (
and maybe a bit beyond). Since there is only one size large Woodland Tree (5"), I decided to raise the one in the back so it would be taller. You could use a vintage spool of thread or a wood block. I used a vintage rubber stamp wheel I bought at a flea market in Paris a few years back.
Just a side note -
I found the glass dome at a garage sale. It had an shiny wood base and a tired 80's flower arrangement that included a bird (enough said). I paid $3 for it (bird and all). Brought it home, painted the base black, sanded it and now it's like I bought it at Pottery Barn. Sometimes garage sales do pay off, you just have to look past some of that "80's ugly" to see the potential.
I started arranging the trees on the base. I decided to use a tape runner to adhere the trees so they could be removed at a later date.
I made a simple arrangement on the base and bent a couple of the trees to look a little whimsical.
In my Christmas stash I had a Wendy Addison Glass Glitter stand. Luckily the dome base fit perfectly. If you don't have a stand or even a glass dome you could use a vintage china plate, a silver tray or a small cake stand. None, of those? How about a stack of old books?
It's hard to photograph the display with the glass dome, but here it is. More items can be added...a sparkly little deer, small mercury glass beads...even silver ornaments in the trees would be darling. I'm keeping this one simple, but I can think of 10 ideas to change it up to look totally different, yet just as cute.
Addictive I tell you, addictive.
I gotta get some more Woodlands!
now carry on,
paula


Fun project with some great tips, thanks Paula!
ReplyDeleteHow fun! Love the way your little trees turned out!
ReplyDeleteFinding an alcohol ink you love and don't want to change is kinda like finding a husband. Once you've got a keeper, you just know it!
ReplyDeleteI LOVE your magical trees. So cute and festive!
Fantastic idea Paula. It does look like something you would see in a Pottery Barn catalogue. And LOL at "80's ugly" I couldn't stop laughing. Thanks for sharing. :)
ReplyDeleteWonderful idea, love your glittery stand, too.
ReplyDeleteSuper cute, Paula! I love repurposing those funky garage sale finds.
ReplyDeleteThis is a wonderful display Paula! Love those trees!
ReplyDeleteSo cool! Got to spend some time thinking on how to adapt this to my on hand stash!
ReplyDeletePaula - this project is quite cool - finally I feel the christmas spirit - you are amazing!
ReplyDeleteI am digging through my stuff; I know I have some of those trees I can spray! Next year I will be organized. I don't know how you had time to do this, but thanks.
ReplyDeleteJust what was called for some whimsical holiday fun to wash the Ba Humbug away! The trimming of the trees was brilliant & I'm doing this today sans glass dome but there's a few thrift stores nearby...thanks for the inspiration, Paula
ReplyDeleteThanks for the smile and giggles. For the fun project and funny commentary. Hmmmmm, wonder if I have something I could deconstruct and ink up . . .
ReplyDeleteYour whimsical trees look amazing...love this project...
ReplyDeleteWonderful idea !
ReplyDeleteLove your woodlands!!!
ReplyDeleteSo cute! I love finding those domes. I am pretty sure there is one in my garage with some dead flowers and a butterfly in it. You're right, you have to ignore the cheese and see the good bones.
ReplyDeleteFun idea! As Always your tutorial is absolutely brilliant!!! BArbarayaya
ReplyDeleteYou have such a wonderful gift! Thanks for sharing it with us! Your whimsical trees are darling. Amazing transformation of the Cloche, too. I love those babies!!
ReplyDeleteSoooo cute! How do you think of this stuff? You're so creative!
ReplyDeleteVery cool Paula! I love the Magic!
ReplyDeleteVery Whoville, Paula. Love the letterpress word.
ReplyDeleteSO cute! I think I love that Tumbled glass one!
ReplyDeleteWay way way awesome Paula!!!
ReplyDeletesimply lovely!
ReplyDeleteThis project is really magic! I never would of thought of altering the trees this way, and they are wonderful...with lots of possibilities, too.
ReplyDeleteBrilliant , love this idea and adore how,you trimmed and bent he trees, so quirky. Tracy x
ReplyDeleteTotally Whoville, Paula!! I think I can hear the Who's singing now and those trees are actually swaying along with the tune!! LOL!! :) Such a cute and festively fun display!! XOXO-Shari
ReplyDeleteI love what you did with the woodland trees, Paula! I always love your creativity and inspiration! :)
ReplyDeleteThese came out fantastic- I am ordering some tonight & make for next year! Loved the glass dome- Thanks for sharing, Paula
ReplyDelete