Hi everyone! For those of you that follow me on Facebook you might know I took a little vacation to Washington DC. Good to have some time away with Jay and our nieces to see our nations capital. Jay and I have been to Washington before, but we thought it was a good age to take the girls to see some of the things they will be studying in school this year. I thought I would share a few highlights of the trip before I get to today's tutorial.
The new Barnes Foundation Museum in Philadelphia - I saw part of the Barnes collection in Dallas about 10-15 years ago and was eager to see the new museum. It did not disappoint.
Baltimore - Ft McHenry, where we got to unfurl a flag, the same size as the flag Frances Scott Key saw in the morning, after the battle with the British in 1814. He then penned the words to The Star- Spangled Banner, our national anthem.
On to Washington DC - Mt Vernon (George Washington's farm). So worth the fee to get in...absolutely stunning gardens.
And then into the city - first time for all of us to ride the elevator to the top of the Washington Monument.
A day at the National Gallery.
So much I could write about this place. I love how the door frames of each room, frame one of our favorite paintings...4 rooms away.
Here she is from Maddie's view point...
Symphony in White No 1: The White Girl
We even rode the double-decker bus to get around to all the monuments...that was fun.
One of my favorite photos was taken in the Lincoln Memorial...the two of them, off to the side, sitting against a column waiting patiently for Jay and I to finish reading Lincoln's speech.
On one of our walks to the metro we found this heart shaped leaf on the ground. We thought it was a good symbol of the trip, since we loved Washington.
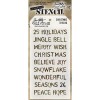
So today I have one more card to share that was created for Stamper Anonymous using the new Styled Woodlands Stamp set. I created a card front using Ranger watercolor paper, the Christmas Layering Stencil and a mini blending tool.
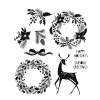
Once I finished the stenciling, I inked the edges of the card front and set it aside to prepare the wreath stamp. I used a variety of Distress Markers to color directly onto the rubber.
One tip I would give about coloring with markers - Don't be afraid to mix one color right over another. You might notice that some of the leaves are two colors of green. I thought this would add more depth to the stamped image, and it did.
Once you have the stamp colored (
my favorite part), spritz a fine mist of water over the top to reactivate the ink. Then stamp on card front.
The addition of the Wild Honey really made a difference in the final stamping.
I cut an extra piece of watercolor paper so I could make a second stamping (without re-inking the stamp). It is lighter, but it still usable so I have set this aside for another project.
I added the small sentiment to the center of the wreath with Black Soot Archival Ink.
Then stitched the card front to a red cardstock foundation.
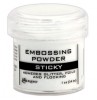
The stamp set comes with a bow for the wreath. I used Sticky Embossing Powder to add the Platinum glitter to the bow, then added it to the card with a bit of foam tape to raise it up. If you have never used Sticky Embossing Powder before and would like to know more, check out this "how-to"
post from 2012.
I also used the Distress Spritzer to add fleck of the Walnut Stain Distress Ink over the card front.
Super simple but one of my favorites. I love how easy it is to get this watercolor look. If you are by chance thinking about creating multiple cards it might be worth it to create a custom stamp pad. Tim created a great step by step
tutorial showing you how, as part of his 12 tags series a few years back.
Thanks everyone for stopping by and also enduring my vacation photos!
now carry on,
paula


Paula, Love your holiday wreath card. It's beautiful. I remember seeing Tim's video and I love that idea! And BTW, your vaca photos are awesome. Thanks for sharing :)
ReplyDeletethanks for sharing your vacation photos...looks like you all had a great time and as always I love what you've done with the Christmas Wreath stamp...hugs kath xxx
ReplyDeleteHi Paula I have only just found your blog via a link on facebook..I'm so glad I did. This card is gorgeous, such a great idea. I am now your newest follower. I loved your holiday photos too.Crafty hugs from the UK x
ReplyDeleteGreat vacation photos, looks as if you had a wonderful time!
ReplyDeleteAbsolutely adore your holiday card, a great and timely reminder about those water colour techniques. The little bow is such a great additional touch, as is the sewing on the red background! Thanks for the inspiration like always!
What a beautiful card! Why is it that I forget to ink my stamps with my pens? Always enjoy it when I see the effects you achieved. Thanks for sharing the vacation photos. Seeing a city from another's perspective is so inspiring
ReplyDeleteGorgeous card! Loved seeing DC thru yours and the girls eyes.
ReplyDeleteLove your water colour card Paula great to use the Distress Markers but also like your tip about using a custom inkpad I can see it would be perfect for this stamp. Thankyou for sharing your holiday pics , looks like Washington would be a very interesting place to visit so much history that has a lot of relevance to the current day x
ReplyDeleteLove the DC photos, Paula! It has been a long time since I visited there. Your card is so gorgeous - love using markers to ink stamps. The glittery bow is the icing on the cake!!
ReplyDeleteSounds like you had a wonderful trip, welcome back. Your card is perfect for the holidays Paula! Love the wreath!
ReplyDeleteGreat card & photos.
ReplyDeleteMy husband and I also rode on that Double Decker bus to see
the sights in DC. Brings back a lot of memories.
WOWOWOWOWOWOWOWOW!! I LOVE this Card and the FUN Colors and Design!! AWESOME!! Also your other pic are so FUN!! What a GREAT Trip and that Heart Shaped Leaf is just AWESOME! =) THANKS SO MUCH for sharing and for stopping by my Blog to leave me some LOVE!! You TOTALLY made my DAY!! =) I wasn't expecting it, and I REALLY APPRECIATE it ALOT!! =) THANKS again and I hope you have a FABULOUS WEEK/WEEKEND!! =)
ReplyDeleteOh how I would love to visit Washington DC, your photos are lovely. The wreath on your card is just beautiful, I really love the added stitching, a very nice touch.
ReplyDeleteI always enjoy the photos of your trips Paula. So glad you were able to have that time with your nieces. Great lesson using the markers, too.
ReplyDeletewonderful photos and wonderful card! You know i Love so much Christmas time ! The new stencils and some of new stamps will be in my hands within a few days....... Yuppie!! great inspirations as always! Barbarayaya
ReplyDeleteSo, so beautiful and loving the way all the stamps and stencils combine. Thank you for some more superb inspiration Paula. Great to see you getting some enjoyable time out too. Have a great weekend. Jenny x
ReplyDeleteBeautiful card, I bought the Christmas words layering stencil I foresee some beautiful and simple x-mass cards this year :) Thanks for sharing
ReplyDeleteNice photos, the gardens are lovely. Great card! Like the stenciled bkgrd and terrific colored wreath! Spritzing sure does add texture and interest to cards. :)
ReplyDeleteI adore Washington - there's so much to see and many of the attractions are free. Its definitely a place people should vacation. Glad you enjoyed your trip. Love the Christmas card! So easy and do-able. The holidays will be here before we know it! Thanks Paula.
ReplyDeleteHi Paula. Love this tag - the stencil, the colors, the wreath - all of it. One question- how did you get the words thru the stencil and onto the paper? Spray or using the markers??? thanks Jane Ellen
ReplyDeleteJane I used a Distress Ink and a mini blending tool.
Delete