Extra time has been in short supply this last week. I wish I could say I was off on a vacation
but no, just busy with work projects and meeting some upcoming deadlines. I
AM still on the stencil kick and have a layout for you today. I don't usually do layouts but I wanted to scrap a favorite picture that has been sitting on my desk for some time.
Today was the day.
To get started, I gathered some supplies along with a piece of cream cardstock.
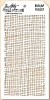
A little Evergreen Bough on a craft sheet.
Lay the creme cardstock into the stain and dry with a Heat it tool. Blot off any heavy spots with a paper towel.
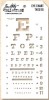
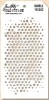
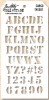
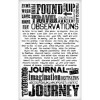
Once dry, use the Schoolhouse Layering stencil over the stain to add letters. I used Worn Lipstick Distress ink to color the letters of the stencil.
I stenciled the letters in a vertical pattern over the stain leaving some white space. I can always go back and add more later once the layout comes together.
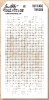
I wanted to mount the cream cardstock on patterned paper so I cut the cardstock a bit smaller, inked the edges and then picked a paper from the Destinations Paper Stash for the foundation.
Stitching it down added a bit of needed texture.
Now add the picture to the right side.
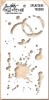
I used the pointing finger stamp from the Ringmaster Blueprint set to point to the picture.
Coloring the hand with Distress Markers and a water brush.
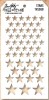
I used the Stars stencil to add a row of stars under the photo. I took the stencil off the ring and masked the stars right above the last row. Then I used Wendi Vecchi's new Translucent Embossing Paste (
more on that in an up coming post) to create the row of stars.
like this...
To give the stars a bit of pop, I used the new Distress Glitter...yes, I have it! I hope you can see the texture of this Glitter in the picture. Sorta like fine mica, but not. Sorta like glitter, but not. It doesn't fly around like glitter either. That is a plus in my book.
Look how cute these little stars turned out. I think the word "subtle" applies to this kind of glitter.
Notice that you can see the letters under the stars? that's because the embossing paste was translucent. Love that little detail.
Add a piece of Film strip ribbon and a Remnant Rub.
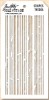
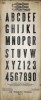
I covered a piece of Grungeboard with Core'dinations Kraft Core Cardstock in black, then ran it through the Vagabond using the Block Talk Alphabet die.
After I added the words, I decided to go back and add more stenciling on the left side to balance everything out. Super easy to do since I am using Distress Ink to stencil, no messy sprays today.
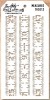
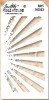
Only a couple more things...I cut Ranger Manila cardstock using Tiny Tabs and Tags die to get a nice group of shapes to work with.
I arranged the tags next to the title.
Then inked them with Distress Ink: Broken China, Vintage Photo, Mustard Seed and Worn Lipstick. I used the Dot Fade stencil to add some random dots over the tag shapes.
Next I added Mini Fasteners, Long Fasteners, Remnant Rubs, stamping, numbers from the Typeset Decorative Strip and a glittered heart. I wanted to see how traditional glitter (platinum) would work with the new Distress Glitter. I think it works great!
I decided I liked the stamped message I used on the tab (
Going Somewhere set) so much that I stamped it on the small tag (
part of the Tiny Tags and Tabs set) and hid it behind the picture. A Stencil Mark was used for the pull.
And there you go...super easy layout using the new stencils! Love the Schoolhouse letters, definitely one of my favorites.
now carry on,
paula


Wow! Love your layout! Thanks for your take on the glitter too! Loving the new stencils, too.
ReplyDeleteBeautiful - I really like the tab/tag embellishments - great use of the die!!!
ReplyDeleteFabulous - I love everything about it
ReplyDeleteYou are a scrap'n rock star! I kept wondering where you were going, and then BAM, the most gorgeous layout! I love how you think!!! Fabulous stenciling, awesome idea with the EP, and those letters...using the outsides and cutting around them...genius! Gorgeous work!
ReplyDelete*sigh* So going to have to have every.single.stencil. Really cool page--love how the stars and the hand turned out! Fabulous!!
ReplyDeleteGood Morning Paula. I'm really blown away by this. A fabulous tutorial, makes me want to have a go. Thank you so much for sharing. Hugs from Scotland. Rita xxxxx
ReplyDeleteSimply fabulous:-)
ReplyDeleteSimply fabulous:-)
ReplyDeletewhat a great piece , love how you have combined all the layers and colours , those tiny tags look fab! hugs trace x
ReplyDeleteFAB layout! Cute pic and all the stenciling, colors, designed die-cuts ... look great! :)
ReplyDeleteFabulous layout! Thanks for the tutorial!
ReplyDeleteLove you page. So very fun.
ReplyDeleteFab job Paula. You have inspired me to try an inky layout rather than a tag! Mind you I am just setting up for a tag as I haven't made my August 2013 tag yet! Thanks for sharing the inspiration and fabulous layout.
ReplyDeleteI just love how you used the different shaped tags. The whole layout is wonderful.
ReplyDeleteWonderful layout. Love all the details and close-ups. Always fabulous artwork from you!
ReplyDeleteLove the layout Paula!! I feel inspired.
ReplyDeleteAmazing layout! I may have to copy some of your ideas. ;)
ReplyDeleteI have to have those stencils! And I love how you used the little tags - and I already have that die - yay! Thanks again Paula for the inspiration.
ReplyDeleteThis is truly a beautiful layout. Love the step by step. I would love to give something like this a go... thank you for sharing ... love it.
ReplyDeleteThis is fantastic! love all the step by steps!
ReplyDeleteThanks for sharing this fun layout.
Love this--very balanced and pleasing to the eye!
ReplyDeleteLove this--very balanced and pleasing to the eye!
ReplyDeleteWonderful composition. Love how you included the tiny tabs and tags as decorative elements.
ReplyDeleteThis is a fabulous layout - and the photo is darling! I love your technique too - thanks so much!
ReplyDeleteGorgeous LO.
ReplyDeleteSuper LO, Paula! Love that fun pic and all the fun details, especially the rub on the filmstrip - fab idea!
ReplyDeleteVery cute!! Not only did the kids have fun but it looks like you had a blast with this LO as well!! TFS
ReplyDeleteDolly
Beautiful layout, and thanks for the tutorial!!!!
ReplyDeleteWow! Wonderful layout. I love how you used all the stencils, Distress Glitter, and stamps.
ReplyDeleteI love this layout. I too don't do a ton of layouts anymore but this one is AWESOME!! Simple yet so much detail! Great job.
ReplyDeleteThis is a very creative layout and I appreciate all the detailed steps. It is amazing to watch the page grow and evolve as you went along; quite a phenomenal experience. Thanks!
ReplyDeleteFabulous layout perfectly balanced with that lovely photo such happiness! X
ReplyDeleteNow if I could just get my hands on those stencils. . . Lol! Beautiful layout and wonderful step by step instructions. Thanks so much for sharing your creativity with us.
ReplyDeleteI love this and am signed up for your blog newsletter and saw it yesterday...never heard of translucent embossing paste...will have to add that to my list! I was one of the LUCKY peeps that won Tim Holtz Glitter selection after CHA on his blog! So going to try this technique! I love the 'see thru' feature! Thanks for sharing!
ReplyDeletePaula, Your step by step instructions are always so great. Love your finished picture and especially those cute little stars. Thank you.
ReplyDeleteABSOLUTE PERFECTION! I flippin LOVE your style & every little detail you added.
ReplyDeleteLOVE LOVE LOVE the combo of stencil, embossing paste & glitter. pure...MAGIC!
Oh, wow, what a page full of inspirational techniques! Thanks for all your pictures and explaining. The page is awesome!
ReplyDeleteWow what a great page! Love the glitter!!!
ReplyDeleteLove your layout, beautiful. Thanks for a great tutorial. I knew I wanted those stencils!!😉
ReplyDeleteAwesome page; i'll keep in file, to do something like this...(or inspired by..)
ReplyDeleteThank you!
Wow....you SHOULD DO more pages! This is wonderful!
ReplyDeleteYou are the QUEEN of details. I so enjoyed this project.
ReplyDeleteCan't wait to try out these stencils! Thanks for a great page full of ideas!
ReplyDeleteJust fabulous Paula, love every detail and of course the new products.
ReplyDeletehugs {brenda} x0x
Love all the layers!
ReplyDeleteHey there crafty, you got featured on DIY Print Studio (http://diyprintstudio.tumblr.com/)! We’re compiling all the most creative uses of our products and your work caught our eye. Wowzers! We'd like to give you a $10 Printstagram gift card for being so awesome. Just contact us through our tumblr and we'll take care of the rest.
ReplyDeleteDIY Print Studio is a new project we’re working on and if you have any feedback or things you think we should feature, let us know. And feel free to send our way anything else you’ve done with our products. We love you!
Also, if you don’t want your photos or links on our site please let us know and we’ll take them down.
Hugs,
SPS Team
absolutly beautiful! love all the detail.
ReplyDeleteSensational page. Thank you so very much for sharing the process step-by-step.
ReplyDeleteReally enjoyed all the beautiful layering!
ReplyDeletewhat a fun layout. they look like they are having fun.
ReplyDeletestamping sue
http://stampingsueinconnecticut.blogspot.com/
If Tim's the king, then you are 100% the queen of crafting, excellent page!
ReplyDeleteHello Paula! I'm back from holidays yesterday and now I have to take everything, even the comments! A wonderful layout, I love those stencils and I hope that soon arrive here in Italy!
ReplyDeleteHello Paula! I'm back from holidays yesterday and now I have to take everything, even the comments! A wonderful layout, I love those stencils and I hope that soon arrive here in Italy!
ReplyDelete