So today's post is on Framelit and Thinlit storage.
And trust me, it was born out of necessity.
I had Framelits that were released earlier in the year that were still in the molded plastic packaging, which is large. I work in a small room, where storage is at a premium, so when I saw that Sizzix had introduced plastic envelopes I wanted to try them out to see if I could recoup some storage space.
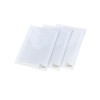
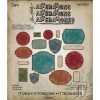
The envelopes come in a 3 pack. They fit both Framelits, which come with rubber stamps and the "frames" to cut them out, as well as Thinlits which are only the wafer-thin metal pieces. An easy way to remember the difference is that Thinlits cut a shape or word and Framelits always "frame" a stamped image.
I used my P-touch to add the name across the top. My Brother P-touch is about 25 years old and it still works like a charm!
Once I had all the envelopes labeled, I went to Home Depot to get a few packages of Magnetic Vent Covers ($4.50 a package). Each package 8 x 15" can be cut into pieces to fit the Sizzix envelopes.
NOTE:
In Home Depot they can be found right next to the metal registers or vents. I found them both on a lower shelf and hanging on a plastic 'clip strip' at eye level. They are also sold at Lowe's.
The magnet sheets are thin which is perfect to use inside the Sizzix envelopes. I used my roller cutter to cut the magnetic sheets, but a metal ruler and X-Acto knife would work also. I cut 2" off one side (
save this piece) leaving a piece 15 x 6".
NOTE: The roller cutter can cut at least two sheets at a time.
Turn the 15 x 6" piece and cut into three - 5 x 6" pieces. With each package you can get NINE 5 x 6" pieces making it about 50 cents per envelope. I don't think that's to bad!
For Framelits - the stamp is already on plastic. I faced the stamp to the front with the label.
NOTE: the magnet sheets are white on one side and black on the other.
Only the black side is magnetic.
Then added the metal Framelits pieces to the magnet sheet and slipped it into the back. Easy.
Tim's Framelits will
always fit onto one sheet. However, Thinlits do not come with the rubber stamps...just metal cut pieces and I found that many of the new Thinlits (that are being released soon) required more than one sheet. For instance the new Holiday Words has two or three words that will not fit on the one sheet. This is where the 15 x 2" piece of magnet sheet (
the one we saved after cutting) comes into play. Just cut to the size you need and slip it into the plastic cover.
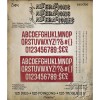
Alphanumeric is one of the new sets that starts shipping in August. I found it to be the hardest to control. Once you open the package all the letters have to be removed from the backing. If I moved them to the envelope it would be a nightmare to find the letters you need quickly. Enter the magnet sheet - problem solved.
It took 2 magnet sheets to hold all the pieces but well worth the effort. I can now easily find the letters I need.
Now if you are smart, maybe you saved the picture packaging and you can skip this step. I did not. So I created a document on my computer to print the images for the new envelope. Drag and drop or right click until you have 4 pictures per page. Then print and cut the images apart. You can see I just pulled these images from
Tim's blog post about the new product.
Once cut apart, I used a small amount of adhesive to adhere the image to the front of the magnet sheet.
I currently store my envelopes in a
turquoise bin that I already own. These are made by See Jane Work, found at Office Depot.
If you're looking for something that can stow them away, out of sight, I would suggest the linen covered box Sizzix makes for Bigz dies. The box is super sturdy and the plastic envelopes fit right inside.
I hope this post gives you some ideas on storing your Framelits and Thinlits. I know I am super happy I took the time to add mine to the envelopes. I cut all the magnet sheets to size, then worked on them while I watched Project Runway. That's a win-win situation in my book!
It just so happens that Linda Ledbetter's
happens to be Framelits!
The challenge is open till Friday Aug. 29th
so you still have plenty of time to join in on the fun
(and maybe win a great prize).
now carry on,
paula