Hi everyone...counting down the days to Christmas and the time is getting short. I can't believe it is already the 14th! Christmas vacation starts in 2 days at my house so we are hoping to kick it into high gear around here! (
to be honest, my husband will probably take a nap or two...)
For today's project, I had the idea of using Vignette Boxes to create miniature shadowboxes that could be used for decor or even an ornament. Follow along and I'll show you what I made...
I grabbed the
Sizzix Window Box die and found that it worked perfectly with one of the Vignette Boxes (4" tall). I adhered the wood look paper from the Tidings Paper Stash to a piece of heavy chipboard, then ran the piece through the Vagabond machine. You might notice I switched up the direction of the wood on the window box because that just made more sense to me.
One of my favorite Tim Holtz products from Ranger is Grit-Paste. In years past I have used other methods to create the look of snow...some with more success than others! Grit-Paste has just the right consistency (
kinda like a gritty face scrub) to get the right look and feel of snow. Once I added it to the window pieces I sprinkled Distress Clear Rock Candy over the Grit-Paste for a sparkly effect. Drying time depends on how thick you put it on.
When I tested the window over the box, I knew right away I had not added enough snow.
So I went back and added more "snow" to the sides of the window box. I love that since the window box is a separate piece from the window frame (
and I used heavy weight chipboard under the paper), it created a ledge for me to easily build up the snow. I also went back and painted any grey chipboard that was showing behind the snow with Picket Fence Distress paint.
I cut a couple Holiday Greens for decoration, repeating the same "snow" technique on the greens.
You can see in the close up shot how cool the Grit-Paste and Clear Rock Candy look on the greens.
I wrapped a little present (3/4" wood block) with more paper from the Paper Stash then tied it with Eclectic Elements Craft String.
Bingo chips were used to raise up the present and the tree so they would show better in the window. You might be saying,
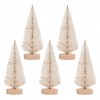
how did you get such a tall base on the tree? Well, I had a base from a large Woodland Tree sitting on my desk (
I frequently pull the base off the trees when they are used in a natural setting, like this piece), so I just glued the bases together and then wrapped it in a piece of Ephemera from the Christmas Ephemera pack. Easy fix.
I added a Holiday Talk Metallic Sticker to the front...always believe.
Multiple layers of Red Pepper Alcohol ink (
dry between layers) were added to a few small Baubles to use as berries on the Holiday Greens.
The same wood look paper was added to the sides of the Vignette Box.
Rock Candy was added to the tree after it was sprayed with Mowed Lawn Distress Spray Stain.
Hope you will try adding something over a Vignette box. I think there
are so many opportunities to make a cute decorations with these little
wood boxes, from decor to ornaments...maybe a teacher or co-worker
gift. Sky is the limit!
Now carry on,
paula


This is wonderful Paula! Love the rustic window with the snowy greenery!
ReplyDeletefabulous project!
ReplyDeleteThis is wonderful Paula! I love everything about it, it's a bit of Christmas magic!
ReplyDeleteThis is fantastic Paula, as always! Love the rustic mood ! Barbara
ReplyDeleteGorgeous!!!! x
ReplyDeleteThis comment has been removed by the author.
ReplyDeleteSo. Dang. CUTE! I love how your mind works. But there is NO LINEN!!! ;)
ReplyDeleteI ADORE this idea Paula. Love the window over the box like that. But hey, I'm sidetracked by that cool plaid drawer thingy behind it. Love that!!
ReplyDeletethat plaid thing is my PRIZED possession Annette. A friend messaged me on Instagram that it had been posted for sale on Etsy and I bought it!! MY favorite thing EVER!!!
DeleteSo Christmasy and beautiful! This idea just helped me out a lot. Thank you.
ReplyDeleteIt's gorgeous and I love how you displayed it too ! The greenery and the baubles <3
ReplyDeleteSo this why I needed those boxes! :0) Now to find although today is tamale making day for me!
ReplyDeletemichelle they sell them at Michaels if you need them right now.
DeleteThis is simply adorable!!
ReplyDeleteMany brilliant ideas in this project! Fabulous Christmas decoration!
ReplyDeleteI just love your work Paula!
ReplyDeleteAwesome Paula! I love that window die and I'm always looking for different ways to use it!
ReplyDeleteFabulous project, Paula!!!!!!!
ReplyDeleteoh, that is sooo cool! I love it!
ReplyDeleteSo cute! And I'm sure I can make that. Thanks for sharing Paula. Enjoy the holidays!
ReplyDeletePaula, that is so charming...it perfectly sets the mood for Christmas.
ReplyDeleteWhat a wonderful project! I can't wait to try to make one. :)
ReplyDeletePaula you have a beautiful blog and love love the box tutorials..
ReplyDeleteAre the installers reliable? This is one of the first questions you should ask the references. After all, you don't want to hire a contractor and pay for new windows only to have the materials sit for a long time without being installed. window replacement company
ReplyDelete