Hi Everyone! I have seen so much activity using the Distress Crayons lately that I feel like I'm falling behind if I'm not using them everyday!
Well here at my house, I'm still exploring Crazing Medium (see last post) - this time I'm using a Dina Wakley Media Board. Dina's boards come in a large pack (two 9 x 12" boards) or a mixed pack that you can see here. One thing I really like about Dina's Media Boards is that they are pre-gessoed so that saves me a step plus drying time. So right from the bag I can use it!
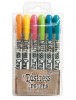
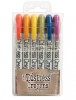
I'm using the 5 x 7" size for today's project as well as Distress Crayons Set 1 (the bright set).
A palette knife was used to spread the Distress Collage Medium Crazing over the Mini Stencil from Set 7. If you haven't seen the Mini Stencils yet, they are the 3 1/8 x 6 1/4" or the size of a #8 tag (and they are "mini cute").
I picked a few random places to add the crazing medium over the stencil, then left it to dry completely. Remember to wash the palette knife and stencil right away.
After drying - the crazing appears in the circles (just like it's suppose to). What I like about using the stencil is that it controls how much of the medium you can put on with the knife, so it never gets too thick.
I scribbled some Twisted Citron over the crazing and rubbed it with my finger.
It moved a little bit but not like on a slick surface. A damp wet wipe is the answer here...I found that it spreads the color into a nice light background wash.
So I just started adding colors, working back and forth between scribbling, rubbing, and wet wipe.
I went back over places that I felt were too light giving a beautiful mix of colors.
Mustard Seed...
Picked Raspberry...
Love how the
damp wet wipe (yes a wet wipe can be too wet) really helps get the color of the crayon into the crazing.
I used another Mini Stencil and Ranger Pearl Metallic Paint to create a fun layer over the Crayon. I just put the pearl paint on the craft mat and used a clean mini blending tool to pounce the paint over the stencil.
The pearl paint leaves a nice sheen over the crayon. They work together beautifully!
Now what to do with it?
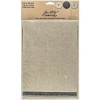
I've decided on a white 5 x 7" frame and a little message. I use the chambray Textile Surface mounted on chipboard (remember, it's self adhesive? so it's super easy). I used the Sizzix Block Talk Alphabet die to cut the letters I needed for the sentiment.
Big Chat, which is larger than Chit Chat serves as part of the sentiment also. I added it with crazing medium (under and over) to secure to the sticker and give it a slick finish. That allows me to use the crayons and wet wipe with ease. If you look really close you can see a bit of crazing in the corner of the sticker.
It's a simple sentiment and I like that it didn't cover up the beautiful color of the canvas board. Dina's Media Boards are going to be a staple in my craft room right along side the Distress Crayons. They work together beautifully! I hope to do more exploring and learning because I know I'm just scratching the surface.
(lilacs from my garden)
Choose Happy! and have a great holiday weekend!
I'm running off on a little adventure - I'll post next week and show you where I end up!
now carry on,
paula


Love it, Paula! Looks amazing!
ReplyDeletethanks Audrey!
DeleteI've got to get some of those boards. Thanks for sharing Paula. Have a wonderful adventure!
ReplyDeleteThey really are wonderful Deb. I love that they are pre-gessoed!
Deletebeautful as always...I love that the crazing is so subtle xxx
ReplyDeletethanks Kath. I feel like I learn something every time I try it. Still not perfect but trying my best.
DeleteBeautiful project! Have fun on your adventure!
ReplyDeletethanks Sue!
DeleteThis is beautiful Paula. I used a wet wipe on my Tim tag and it worked brilliantly (I thought I wasn't rubbing properly) so it is a great tip! xx
ReplyDeleteI find it sure does matter what the surface is and how slick it is. That damp wet wipe is a great tool for me.
DeleteJust stunning!! Love the colours X
ReplyDeletethanks Kaz! appreciate you stopping by.
Deletebeautiful and inspiring!!!
ReplyDeletethanks Diana!
DeleteA wonderful tutorial for a beautiful piece of art... x
ReplyDeletethanks Emma! xx
DeleteLove how you "scratch " my dear ! I so love the texture and technique of the background !
ReplyDeleteYou are always so kind Rea'
DeleteHi Paula - thanks for a great tutourial, with all the top-tips and hints.
ReplyDeleteLove the finished project! :)
thanks Christine. Glad you liked the post!
DeleteGorgeous, gorgeous, gorgeous! Love how you applied the crazing medium through the stencil and the layers of Distress crayon are soft and beautiful, perfect for this time of year! The pearl stenciling is a wonderful accompaniment to the pastel effect colouring, just a lovely canvas and a wonderful sentiment, thanks so much for sharing it. Deb xo
ReplyDeletethanks Deb!
DeleteThis comment has been removed by the author.
ReplyDeleteOh my gosh Paula, the color you achieved is just stunning. Stunning! It is indeed happy and reminds me of Spring. Thanks for sharing your Distress Crayon discovery. Have a fun trip.
ReplyDeleteBeautiful. Love the technique.
ReplyDeleteBeautiful and inspiring
ReplyDeleteBeautiful & looks so easy!!
ReplyDeleteVery cool project, Paula! I love how it turned out! You never disappoint!
ReplyDeleteSuch a gorgeous effect!!! I love the colors and the subtle texture of the crazing..I must try this.
ReplyDeleteSo, SO pretty Paula! I love your BG it's gorgeous. :D TFS
ReplyDeleteLove the stencilled crazing and gorgeous colours you laid down together, such a beautiful background. Lilacs from your garden? How wonderful, I so envy your warmer climate.
ReplyDeleteHappy Easter.
Hugs Brenda xxx
What a nice spring fun project! Thanks for the inspiration!
ReplyDeleteGorgeous, love it!
ReplyDeleteI so love this! I have seen many examples recently where the Distress Crayons have been whacked on, with huge colour, but I love the subtlety of your colouring, and then the pearl paint, which again gives a gentle, gorgeous look. Thank you so much! XX
ReplyDeleteGlad you liked the subtle colors - I too noticed that so many examples are really deep colors - I figured there has to be another way to use them.
DeleteThis is fabulous!! Thank you for sharing the steps!
ReplyDeletethank you!
DeleteThis is fabulous!! Thank you for sharing the steps!
ReplyDeleteThis looks amazing! I'm so inspired right now :D The tools used are going in my wishlist...
ReplyDeleteLovely - the colors are gorgeous together! Can't wait to hear about your adventure. In the meantime, have a wonderful Easter!
ReplyDeletethanks Heidi! Happy Easter to you too.
DeleteI love this tutorial on the crayons and the crazing...both of which I have, but have not explored. Love the colored ones, but only have the neutrals so far. I needed the crazing instructions, because nothing was happening with mine. Seems a thicker layer is necessary. What a lovely reminder to look at the bright side of things!
ReplyDeleteI had the same problem with the crazing medium - just a little thicker and it works beautifully.
DeleteThis is so cool! Can't wait to try it Paula!
ReplyDeletethank you Kriss!
DeleteI'm excited to give this project a try. Thanks for the inspiration Paula!
ReplyDeletethanks Karen for stopping by!
DeleteThat looks like a lot of fun!! The colors and textures are gorgeous! TFS and have fun on your trip!
ReplyDeleteI'm in late!!!!! Sorry! As always a wonderful project , a wonderful tutorial, thanks for sharing your art! New Medium Crazing and Distress crayons are a spectacular combo! Barbara
ReplyDeleteSTUNNING!!! First of all, the crazing has worked so brilliantly here and then the effect of the crayons with the damp wipe, yummy! Beautifully finished too, really, really love this piece!!! Thanks for the inspiration!!
ReplyDeleteBeautiful as ever and a real burst of inspiration for me. Thank you for sharing your genius Paula xx
ReplyDeleteGorgeous!!!
ReplyDeleteI love the way this turned out. Thank you for sharing the details.
ReplyDeleteGreat project! I have a question though. I just purchased the crazing medium and when I tried it out it did not do the crazing thing. I tried it pretty thin then went a little thicker, and with both nothing happened. I a see from above that the thickness of a stencil works great, so I'll thy that thickness next. How long does it take to dry completely? Also, I used a heat gun to speed things up. Does it crack better if left to dry on it's own? Thank you ;)
ReplyDeleteI think starting with a stencil it will help you know how much to put on. I did a blog post called Crazing 101 - I think that will answer your questions... just scroll to the bottom half of the post. http://www.oneluckyday.net/2016/03/crazing-101.html
DeleteI have used the heat gun to dry but only at the very end after it had already dried for at least 45 minutes on its own.