Hi Everyone! It's been a busy week around here with lots of deadlines and projects being finished.
Today I felt like it was time to "think SPRING!" even though part of the country is still under a foot or two of snow! Here on the Central Coast we have already been experiencing some spring like weather (
meaning wind!) But this weekends forecast calls for shorts and flip flops! Crazy weather all around!
I wasn't sure what I wanted to make today, but I did know I could grab a few items that could help me get started.
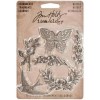
1. Two cute kids from the Found Relatives - Occasions pack
2. Spring Flashcard from the Elementary pack
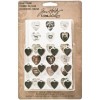
3. Small Talk Sticker book (
a must have for everyone)
Tips on Found Relatives...
1. When I cut out a Found Relative that I am going to be mounting onto something, I peel off the back layer to make it thinner and easier to cut.
2. Use Pumice Stone Distress Ink and a Mini Blending Tool on the white, cut edges. It's the perfect color ink to take away a multitude of cutting sins.
I used a Distress Marker to tint the girls coat. I may go back a color the eggs in the baskets later but for now I will leave them as is.
I will set the kids aside while I work out what to do with them!
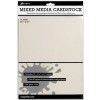
I need a background so I reached for the Mixed Media Cardstock. I am really loving this cardstock. As I have explained before, the Mixed Media Cardstock is thinner than the Ranger manila but seems to be just as durable for layers of wet medium. I like that.
I pounced Distress Ink directly onto the craft mat, sprayed with water, then swiped the cardstock though the ink. Drying, then repeating the process until I was satisfied.
Once dry, I used the Sizzix Texture Fade - Plaid to create the raised plaid pattern over the paper.
As you know from last weeks project, I have been experimenting with the new Transparent Gloss Texture Paste. This week I'm trying it with Clear Rock Candy Dry Glitter. Let's hope this works!
I used a pallet knife to spread out the Transparent Gloss Texture Paste over the pattern. This paste is very creamy! Super easy to spread over the card, filling the nooks and crannies.
Now for the Clear Rock Candy. I use a vintage salt shaker to control the amount I put on.
The card needs to be set aside while the Translucent Texture Paste dries. Once it's done, it looks beautiful and glittery! Success!
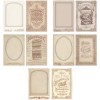
I'm going to use a Cabinet Card with the oval shape. Can you figure out why?
I used the Sanding Block to scuff the "shiny" surface away (
do not skip this step).
After sanding, ink the Cabinet Card with Gathered Twigs Distress Ink to create a vintage look. I used the Distress Marker Spritzer and a Gathered Twigs Distress Marker to create the speckles over the surface. Dry with a Heat it Tool.
NOTE:
by sanding off the shiny surface of the Cabinet Card, the spray from the Distress Marker will soak in and become permanent over the surface. I do recommend using a heat tool to heat set. It is worth the effort!
Slip the glittery plaid cardstock into the Cabinet Card.
So, does it look like an big Easter egg to you? (
it's supposed to!)
Next let's add the kids. I used some very, very thin foam dots behind the children and Glossy Accents under their feet.
Here's where the sanding comes into play yet again. Draw around the children's feet with a dark Distress Marker, then smudge with a q-tip or your finger. The marker will once again embed itself into the areas that have been sanded, leaving some darker marks. You may have to go over it a few times to get the right depth you are looking for, but once done it creates the best drop shadow...they look like they are walking right off the card.
Next I used Distress Stain Spray to color a piece of Mixed Media paper.
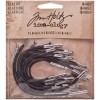
Once dry, I used the Butterfly Frenzy decorative strip to cut about a million butterflies (
WAY more than I need for this project).
Along with the Flashcard and the Small Talk Stickers I already had on my table, I added a few of the butterflies (
"few" being the key word), some Remnant Rubs with the new Remnant Rub tool (love it) and a couple of corners from the Industrious Stickers - Gallery.
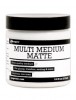
Of course I could stop there and be done with the Cabinet Card but I wanted to make this a lasting Easter decoration. To so that I felt I needed a foundation for the Cabinet Card. Out comes a 6 x 8" Burlap Panel. It's the perfect size for the Cabinet Card. I used Multi Medium to cover the Burlap with Tissue Wrap.
Then I added the same colors I used on the cardstock, only this time in Distress Paint.
Sprayed the paint liberally with water to make the colors run.
Then dried it with my Heat It Tool. As it is drying, I like to use the airflow from the heat tool to move the paint around, blending the colors even more.
I decided to use the Picket Fence Distress Marker (or as I call it, the Magic Marker) to add white splatter over the painted canvas. The Picket Fence Marker can be tricky because it goes on clear and dries to white. Meaning that when you spray it over the canvas with the Distress Marker Spritzer it will look like the tool is not working, but as soon as you leave it to dry for minute (or instantly with the heat tool) it turns white. Serious magic, I tell you!
I need a Clipboard Clip to hold the Cabinet Card in place. But not silver...
Paint it white, let it dry for 10 minutes and rub some of the paint away. Once dry, ink with Distress Ink Gathered Twigs. Easy fix.
So I could go out to the garage and get the drill for the holes but an old ice pick will do. I keep this little baby in my crafting supplies to make holes when the Crop a dile won't reach, or make small holes larger, etc. Total old school, but it it never fails me.
A couple swift hits with the little hammer and it punches right through the hardwood panel. Done in less time than it takes to even walk to the garage.
A little bit of wire holds it in place (
you could use ribbon or string too).
Use some needle nose pliers to twist it tight on the back.
I added more of the Industrious Stickers along the front edge.
What is Easter without a little ribbon and netting?
(crinkle ribbon was colored with Antique Linen Distress Spray Stain )
Now just add the Cabinet Card under the Clipboard Clip (say that three times fast!). I did decide that coloring the eggs in the baskets was a must!
One last thing...the Cabinet Card and the Clipboard Clip could use a bit of blue paint. I had Peacock Feathers on my desk so that is the one I picked to give it some pop. Worked like a charm. No brush needed, just my fingertip.
And there you go, a sweet little spring time project. I know this one used lots of product and there were lots of steps to get to the end, so change it up to the colors and products you have on hand. More importantly try a new technique, add some glitter, and have fun!
These two may be the cutest Easter kids though! You probably can't substitute them!
Have a great week and I'll see you back on Friday with another project!
now carry on,
paula