Hi everyone!
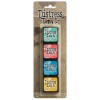
I've got the new set of Mini Distress Inks (
set #13 if you are counting) on my work table today and that makes me happy!
I always like to give them a test run by creating a monoprint using a stencil. Looks pretty good, right?
Today I'll take it step further, creating a card using the new mini's. I chose the Layering Stencil Tiles and I'm working on a piece of Ranger Watercolor paper. I used three minis in today's project, Cracked Pistachio, Abandoned Coral, and Fossilized Amber. As you can see, I have laid the stencil over the Watercolor paper and have randomly added the Distress Ink using Mini Blending Tools.
I love how the Abandoned Coral and Fossilized Amber mix to make the perfect sunset!
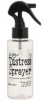
I decided to add Distress Glaze over the Distress Ink because at this point I'm not sure what my next layers will be. Adding the Distress Glaze over the "
water-reactive" Distress Ink will allow me to keep this pattern/color, even if I use a wet layer like water or Multi Medium over the top.
To add the Distress Glaze to the card surface (
which has a creamy chapstick consistency), rub onto fingertip and then onto the card surface (
a little goes a long way).
Buff away any excess with a soft cloth (
okay, I used a paper towel).
I thought a test sample would really show you what Distress Glaze does. The side on the right has a coating of Distress Glaze. The side on the left does not. You can see that when sprayed with water, the Distress Ink runs on the un-coated left side...(
just like Distress Ink is suppose to).
Distress Glaze is not a product you need to use every time you use Distress Ink. It is used when you want the ink to remain stable. Simple as that.
Now back to the project...
I used the Blossom Stencil, a palette knife and Ranger Texture Paste to add a bit of dimension.
The Texture Paste dries pretty darn quick...maybe 15-20 minutes depending on how thick it is put on.
I colored the flowers using the mini blending tool and Gathered Twigs Distress Ink.
Then spritzed it with water to remove some of the ink.
Once dry, I trimmed up the sides of the paper to get it ready to mount on the card.
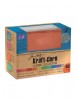
I'm using a Kraft Core A2 card for the base (
they come pre-folded with kraft envelopes).
A lot of great colors that go perfectly with the Distress Inks that have been released this year.
Using the Sanding Grip, I sanded away some the color, revealing the Kraft Core underneath.
I adhered the front to the card foundation.
Then stitched it along each side. Yes, I was able to stitch over the Texture Paste but I have a machine that can stitch on Heavy Duty surfaces. If you don't, then I would just stitch down the one side.
I also used Abandoned Coral Distress Marker to color the edges of the blossoms, then added Fossilized Amber to the center. The Detailer Water Brush helps to blend the colors together.
Fossilized Amber creates the most beautiful warm sunshine yellow Crinkle ribbon!! Just ink, spray with water and dry with a Heat It tool.
Tie Crinkle Ribbon around the card fold. Trim ends.
Choose a Typed Token to convey your message (I added the white paint to the letters).
Secure to the card with a Mini Fastener.
I also added a Flashcard to the inside
(lots of words to choose from in the pack of 72 cards!).
Well I hope you have enjoyed our little experiment using the new minis and Distress Glaze. I know I will be experimenting with this product in the future so stay tuned for that!
I am off to Florida this weekend to teach at She Scrapbooks. I'm hoping for a freak snow storm in north Florida this weekend since this California girl is not used to that kind of heat and humidity! I might need to bring my own fan! lol Wish me luck!
now carry on,
paula


Love it Paula ! Such a fabulous mix of colours - just stunning x
ReplyDeleteI would say that this experiment was a success. TFS Paula!
ReplyDeleteGorgeous as always!
ReplyDeleteI keep trying to tell myself I don't need more Distress colors. Your projects keep telling me I do!
ReplyDeletePAula this is one of my fav mini distress set! I love your card , great inspiration and great tutorial! BArbarayaya
ReplyDeleteI'm loving this color combo. So fun to follow along as you experiment. Keeping my fingers crossed for that freak Florida snow storm, hee, hee. Have a great time!
ReplyDeleteI so LOVE how you play ... so very pretty !
ReplyDeleteStunning card Paula and really great to see the effect of some of those new products! Thanks for this fab tutorial. I am so in love with the new colours and can't wait for the new set of minis to hit the UK!
ReplyDeleteWonderful creation and thanks for sharing your steps.
ReplyDeleteBeautiful card and great tips, thanks so much for the tip about the glaze, I just got mine and have been wondering how to use it properly and now I know! x
ReplyDeletePaula, this is gorgeous! I love the pastel look, and that stencil is the best! I didn't think I would need the distress glaze, but now I do want it!
ReplyDeleteI always learn so many fun, new ideas to try from your blogging--thanks for sharing!
ReplyDeleteFabulous tips here, Paula. I wish I could see you while you're here in Florida. Maybe next time. Definitely bring your fan. Sorry.
ReplyDeleteYou have inspired me to get crafting again. Love these colors and the tutorial. Have a great trip and get a handheld battery fan at Walmart!
ReplyDeletePaula, I seem to remember some posting you did about decorating for a wedding...a long while back. I loved your ideas and was hoping to find them on the blog to copy for my granddaughter's wedding. Do you remember what I am talking about?
ReplyDeleteHelp! Please!
HI Judy,
DeleteI will see if I can find the post for you. You are right that was probably 4 years ago!
Don't worry till you are done with your trip. Thank you
DeleteYet again an awesome tutorial! So glad my glaze is on it's way. I love how you've treated the stencilling on this one too. Thank you for the continuing inspiration. Jenny x
ReplyDeleteThese little mini sets are definitely how I'm going to buy all the new colors this year!
ReplyDeleteso beautiful! I'm headed to The Crafty Scrapper tomorrow and have this set on hold for me:)
ReplyDeleteLove your card! Thanks for the great tutorial. I love how you used the Distress Glaze...I will have to be on the look out for it. I just received the Tiles stencil and I love it!
ReplyDeleteBeautiful Paula, love how you've blended those lovely new colours through the stencil!
ReplyDeleteAll the new colors sure do look pretty together!
ReplyDeleteThis is so pretty Paula.
ReplyDeleteVery pretty. I love how the colors blended together.
ReplyDeleteHappy Crafting!
Creative Crafting Designs
How do you keep your stencil in place when applying the ink? Also, would Oxide inks work? Thank you
ReplyDeleteDoes texture paste dry really hard or does it chip away easily? Thank you
ReplyDeleteI just hold onto the stencil with my left hand - you could tape it but I have never felt it necessary to that.
DeleteYes, Oxide inks would work.
The texture paste dries very hard Deb - Have have never had it chip off.