
I have a fun project to share today for the Tim Holtz Media Team using Distress Stains. I have to say, when the Distress Spray Stains were first released a few months ago I thought, why do I need spray stain when I have Distress Stain in a bottle? Well, I have come to understand that each have their own purpose because of the way the bottle dispenses the liquid. And YES, I do need both! Follow along and I will show you what I created.
I cut a couple sheets of Ranger Watercolor Cardstock about 3 /1/2 x 8 1/2". You will get three strips per page.

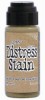
1. Distress Stain - any color (I'm going for a Christmas theme so I included Peeled Paint and Festive Berries. I also included some colors that might not scream Christmas like, Salty Ocean, Pumice Stone and Iced Spruce.
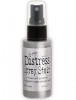
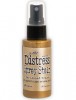
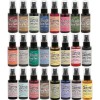
2. Distress Stain Spray - Brushed Pewter and Tarnished Brass
3. Paint brushes in varying widths
4. Two craft sheets (optional)


Remember to shake before use - and clean the nozzle after use to prevent clogging. No one likes clogging.
NOTE: This is where the second Craft Mat comes in handy. I painted the stripes on one Craft Mat and sprayed on the other (because we all know, sprays go everywhere - even on your camera that you might be taking photos with, to document the process).


I die cut the strips to create shapes for tags and cards.
I used Sized Ovals, Sized Circles, Stacked Stars, Ornamental, Mini Baroque and even Tarnished Trophies and the Festive Gent. Really, any die is fair game.


I added a Vial Label at the bottom. The 25 comes from the Botanical Remnant Rubs. If I was going to make these in bulk, I would replace the 25 with a small stamp.
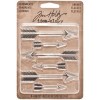
I also colored a mini Arrow with gold Alcohol Ink and added it to the card with Multi Medium.

And if you hadn't heard, 24 new colors of Distress Spray Stain were just released by Ranger last week! I'm gonna need a bigger Craft Mat.

paula
 |  |  |  |
 |  |  |  |
 |  |  |  |
 |  |  |  |
 |  |  |  |
 |  |  |  |
 |
What a fun way to get more use out of all your dies! TFS Paula!
ReplyDeleteI knew I needed both when I wrote my letter to Santa! ;)
ReplyDeleteLovely tags and such a simple technique. Lovely that you can easily colour co-ordinate with whatever gift wrap you have. Thanks for sharing Paula. :)
thanks igirlzoe - It ws simple and it was really fun...loved seeing how all the colors came out. If you have different stamps you could really change up the colors!
DeleteWhat a great way to make some background paper! Never would have thought about creating stripes! Now I wish we weren't having company for a few days so I could get in my room and try this for myself! Thank you for more inspiration!
ReplyDeleteWhat an effective idea! Love it Paula! x
ReplyDeleteLovely, lovely idea....love the simplicity, colors and technique. You are quite the enabler; now I have to go shopping.
ReplyDeleteI love this stripeyness--so fun!! (I was a little worried at first b/c it looked a bit gruesome with that red puddled stain.) I'm looking forward to giving this a try :)
ReplyDeleteRenee - funny thing I thought the same thing when I was doing it!
DeleteHow fun is that ! Simple but so very cool !
ReplyDeleteYes you are so right about the spray my tweezers and spray bottle are speckled !
Love what you've done Paula. Now I think I need them too. How very effective those tags look and the Christmas card is fabulous. Hugs from Scotland. Rita xxxx
ReplyDeleteI felt much the same as you about the sprays but now that I have a few, I am totally in love! This is a great technique - quick and easy tags but they look so professional.... Anne x
ReplyDeleteYou had me at stripes! I love anything with big fat stripes. What a fun and easy way to make cute tags. I can't wait to try this. Thanks for sharing!
ReplyDeleteGreat ideas! Makes me want to try this!
ReplyDeleteOh what fun! TFS Paula!
ReplyDeleteCool idea!
ReplyDeleteOh I love this thank you for sharing
ReplyDeleteTeri
Genius idea! I'm SO stealing...er, going to try...this technique!
ReplyDeleteI was on the fence with those sentiment stamps. But the more I see them used on various projects, the more I like them. Your tags are awesome and now your ready for gift giving! Yes, we need larger matts. I like to spread out!! Thanks for the wonderful tag ideas, Paula.
ReplyDeleteQuick and easy peasy! Definitely going to make a few (probably more) this weekend :) Thanks again Paula!
ReplyDeleteSomehow when they were handing out all the creative genes, you got a bazillion more than me! ;)
ReplyDeleteBrilliant and always inspiring Paula! Thank you! :)
dawna that might be the nicest thing anyone has ever said (totally untrue, but nice just the same) :)
DeleteWhat a wonderful, classic impact these stripes have. Perfect partner for the handwritten holiday stamps. Bravo! Love the tags and card.
ReplyDeleteIncredible idea PAula!!!! Your stripes are wonderful, lovely works! Barbarayaya
ReplyDeleteOne could color coordinate these to matchy-match ones gift wrap if one were so inclined! Such a clever idea once again, Miss P!
ReplyDeleteSo simple but so much impact. I LOVE the stripes and must admit it never crossed my mind to do that. Thanks for all your awesome Christmas Ideas and I miss you.
ReplyDeleteYou made that look so simple and easy.
ReplyDeleteI miss my tag making this sure encouraged me to get down in the studio and make some this weekend
Janice
Hope Jay is making progress on new shelf...!
ReplyDeleteGreat idea, Paula! They look wonderful.
ReplyDeleteI forgot to say how much I like these tags and the card gives me lots of ideas . Thanks Paula.
ReplyDeleteAnother great tag idea Paula! My Christmas Wish List keeps getting longer (between you and me, I think Santa just snagged me a holiday merriment clock kit from Tim Holtz so I can cross that off my list!).
ReplyDeleteLove your simply format for creating these beautiful tags!!! Fun stuff. Thank you.
ReplyDeleteWhat a great technique! Thank you so much for sharing this with everyone; I will definitely use this and pass along to my stamping/creative friends.
ReplyDeleteYour brain just works so differently from mine ... thank goodness! That's why I love your blog, you make me see things from other angles, and the view is always good! Thank you, Paula, for the constant inspiration.
ReplyDeleteWonderful project Paula!! I love those stripes.
ReplyDeleteI so, so, so, love this. It's so simple, yet festive.
ReplyDeleteWhat great colorful accent pieces, thanks for the technique!
ReplyDeleteSo much fun!! LOVE all of the colorful stripes!! XOXO-Shari
ReplyDeleteI'm loving this project Paula, how creative! Thank you for the inspiration!
ReplyDeleteFabulous tutorial Paula! So many lovely colours - so hard to choose.
ReplyDeleteThis is fabulous Paula and so easy to do a batch of tags. Will be trying this for sure since I already have the mini holiday stamps. thanks for sharing.
ReplyDelete