Hello again! Time for phase three of the big flower series. I am finally ready to put all the components together to finish the project.
I have a little metal tray in my
workroom I keep old pictures on. Out in the open and ready to use!
Sometimes I stop by the tray and mix them up so different photos are at
the top of the stack. Sometimes, I line them up along the
wood sorter that
sits on the counter top so I can see more than one at a time. But in
either case, the pictures just wait till I find a use for them.
Today was her day.
For me, the center of the frame started with this small picture I bought for $1 at Junk Bonanza back in March. Follow along and I will show you how I incorporate a really big flower, a crackle frame and an old photo.
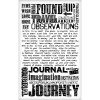
My frame was ready to go, so I started with a small sheet of music from very old book. I opened the book and the first song was "Brightest and Best". I thought that sounded perfect. I adhered the music with a tape runner to another piece of chipboard to give it a sturdy base, then added it to the Lost and Found Subway paper with foam squares to give it dimension.
Next up, a left over scrap of Wallflower. I just ripped the two ends and added it directly over the page of music.
I wanted a bit of femnine color so I used the Latticwork Stencil and Victorian Velvet Distress Ink to add a subtle layer in the background.
Now the focal point, the picture. I painted a small piece of manila cardstock with Tarnished Brass Distress Paint. Once dry, I used the Edge Distress tool to age the edges of the card. Then I just added the photo.
Again, I used foam squares to raise the photo and create dimension.
I folded some May Arts ribbon and wired the pieces together at the center to create folds in the wide ribbon. I used a glue gun to add the ribbon to the frame.
Next up, the really big flower.
L.O.V. E.
I took a piece of ephemera from the Thrift Shop Ephemera Pack and inked the edges. I crumpled it into a ball, then unfolded it and ripped it in two.
I added the ephemera under each side of the flower (really, just a substitution for a leaf).
Words.
Need words.
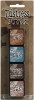
Hummm...Facets on my desk for another project...I think I can use one of those. Remnant Rubs love acrylic. I flipped the Facet over and added gold Alcohol Ink to the flat side of the Facet.
Once dry, I added some words to the front side of the Facet.
NOTE:
there is a small hole at the top of each Facet for securing or hanging. I added a Mini Fastener to the hole so it will look like it is secured to the frame with the fastener (but I really secured it with Multi Medium).
I also colored some buttons from the Accoutrements sets and a keyhole from the Locket Keys pack. Iced Spruce Distress Paint (
of course). Not sure if I will use them all but I painted up a few to work with.
Here is how they ended up being used in the composition. Not too much, just enough to make it look interesting. The Facet with the gold Alcohol ink worked out so well. I think I will be using that idea again.
The piece really needed one more thing.
I was going to add a easel to the back but then I thought, what about an old clipboard? I picked this one up at the last Remnants of the Past show back in November. I had no plan at the start to use this, so the fact that it looks like it was meant to be, makes me happy. I love when new and old can come together to create such a nice piece.
She has been added to my hallway so I will see her everyday when I walk to my work space. I think she fits in quite well if I do say so myself.
Now carry on,
paula


Wow! you certainly made her shine Paula!! Your work of art turned out lovely as Always! TFS
ReplyDeleteThis has turned out to be one of my all-time favorites. I think it is the brightest and the best! Just love that big flower and your old clipboard really shows it all off.
ReplyDeletethank you Judy! I think that old clipboard was the key element in balancing the flower. I'm sure glad it worked out since I really had no idea what I would do with that flower once I made it!
DeleteBeautiful project !!! The big flower is so pretty !
ReplyDeleteFabulous finish!!! Love it!
ReplyDeletebeautiful, I love it.
ReplyDeleteSwooon ......... love this !!
ReplyDeleteBeautiful! Amazing how a few found pieces from here and there fit together lije they were made to be that way!
ReplyDeleteI just love big flower and your girl pic. Soooo pretty
ReplyDeletetotally...in love with this piece. every detail works together to make it perfect!
ReplyDeleteps...my birthday is in December...
Absolutely and incredibly amazing.
ReplyDeleteI love watching your process and how you describe your thoughts as you go. As always, a beautiful and inspiring creation.
ReplyDeletePaula your project has touched me for its beauty, simplicity, class! Every time I visit your blog, I know for sure that I will learn something new, I will learn what it means to have your own style, I will learn how to make combinations of colors and mix different materials, I will learn what it means to be really an artist and a great person! For these reasons, you are one of my guiding lights!! And excuse again for my terrible english! Barbarayaya
ReplyDeleteMiss yaya you are so nice! I don't think of myself as an artist, just a girl who likes to make things. Vintage is my roots and it sure was good to get back to that with this project!
DeleteBeautiful!! Now I'm going to have to dig out my old family photos and do something like this for my hallway. Would make great gifts for my mother and mother-in-law too!
ReplyDeleteI think the clipboard brought just a tad more balance to the flower. But you knew that! Hah. I love it when things just work. You did it again dahling.
ReplyDeleteI love this! I would have to overcome my reluctance to use the actual vintage photo. It's like cutting up books, it just feels wrong somehow lol.
ReplyDeleteGorgeous project - perfect for the big flower
ReplyDeleteWhat a super edition to your hallway! Love the way the flower looks layered over the bow and ephemera. The idea of altering the faceted piece is wonderful, and the subtle stencilling makes a huge difference to the music score. LOVE this. Jenny x
ReplyDeleteOh this takes my breath away! Love how all the pieces came together. And yes, she fits right in. You are so fearless when it comes to using your photos and emphemera. The stenciling on the sheet music and the facet are stunning additions. Love!
ReplyDeleteI really love the way you have layered up the elements and your flower is positively stunning on the finished piece. Anne x
ReplyDeleteOh Paula I'm in tears... Why? It just "moved" me that way ! :) LOVE the process... gonna try the facet thing ... I was just looking at mine this at 1:00 A.M. ; trying to think of something creative ... LOVE it ALL; the stenciling ( been playing with mine on quite a few backgrounds) for as you say subtle color... it's amazing !! Thanks for the fabulous share :)
ReplyDeletethanks so much Rea'. You are too, too kind!
DeleteAbsolutely stunning!!
ReplyDeletestunning~
ReplyDeleteAbsolutely beautiful.
ReplyDeleteJust beautiful!
ReplyDeleteI love this piece! The alcohol ink on the facet is a tip I hope to remember. And, I love that you used the clipboard to hold this fabulous creation. Your photo wall is to die for!
ReplyDeleteAll I can say is WOW! I love the piece and all the little touches.
ReplyDeleteVery Vintage. Love the entire project. Absolutely beautiful. Love those old clip boards.
ReplyDeleteBeautiful Paula! Love how she came together - that huge flower is awesome but what I really loved is the facet with the gold AI and rubs - hmmm I have some facets that haven't seen any love it a while - I think you just inspired me! Create on!
ReplyDeleteKat, I loved the facet too. Really, why have I not been using them in projects? Who knows, but I will now. Just loved how the gold changed it so much.
DeleteI can only think of one word to describe this- L.O.V.E.!
ReplyDeleteLove every single element in the project and how it all came together.
Sometimes, things are just meant to be.
Fabulous!!! I love your Vintage Wall Hanging with the big flower! You have the imagination to take all sorts of stuff and turn it into something beautiful♥
ReplyDeleteIt's a masterpiece, Paula! Love the idea of showcasing a picture of a long lost relative. What a special gift this would be. I have some old family photos in very old fragile frames. Maybe I could transfer both to a canvas or a sturdy substrate and decorate with beautiful embellishments, like the ones you've created. You always inspire me so :)
ReplyDeleteThanks Laura! Glad you liked the final result!
DeleteLove this! Going to try the painted facet, it looks cool!
ReplyDeleteLove this project! I especially love your quick explanation of your process and thoughts....Often when I look at a gorgeous piece like yours, I am so taken with it s a whole...Then I wonder how each piece made its way into the project. No wonder your blog is one of my favorites!
ReplyDeletethank you so much Brooke. Such kind words from you! Glad you liked the project. It is one of my favorites as of late!
DeleteLOVE this! So gorgeous! And I love the wooden sorter as well.
ReplyDeletethanks Heidi. Even after a few years now, that sorter is still one of the best piece I have even purchased.
DeleteFabulous!!
ReplyDeleteG-O-R-G-E-O-U-S-!! Love how you've brought all of your elements together, Paula!! Stunning and so pretty!! Just Lovely!! XOXO-Shari (hope you're feet are keeping up with you @ Farm Chicks!)(I really wanted to go this year..I'm only 3 hours away, but just couldn't make it happen..)
ReplyDeleteSo beautiful, Paula, and I love the way you explain the process and how it all comes together. So clean, clear and inspiring. Roberta
ReplyDeleteYour project is just wonderful - love it!! Thanks for showing all the steps - beautiful work!
ReplyDeleteBeautiful work!! Love your creations!
ReplyDeleteYour piece turned out just fabulous! That flower is gorgeous and you made the whole piece come together beautifully! Great, great work!
ReplyDeleteThanks for sharing the process!
Love the vintage clip board!
Awesome piece Paula. The clipboard worked beautifully and it looks fantastic on the wall.
ReplyDeleteThis was a fun project to follow and I enjoyed the anticipation of each day's progress. You've found a lovely place to hang it, it's a wonderful affirmation and I think using real ephemera imparts more meaning and power to the piece. And that clipboard it sooo cool!
ReplyDeleteThanks Paula for allowing me to follow you through this incredible journey of your creativity!!! It has been a blast and the final piece is amazing!!!
ReplyDeleteI didn't comment! So sorry! This turned out beautiful with so many good ideas. The facet, the one sided bow, the crumpled ephemera torn in half and used like a leaf. Fantastic. I have wanted to use the facets with stamped tissue paper behind. Have you done tut on that?
ReplyDeleteOh, man... that is COOL. I love the way your wall looks with all of those pieces forming a collection. Super project!
ReplyDeleteYour project turned out perfect. I just love it.
ReplyDeleteIn a word....Perfection!
ReplyDelete~Linda
Beautiful... love how you combine the vintage ephemera with modern day craft goodies to create your amazing work of art. Gorgeous crackle, gorgeous giant flower, and a wonderful photo given a perfect setting!
ReplyDeleteAlison x
I like every LOVING detail you used to craft this fabulous, framed picture! :) Wow.
ReplyDelete