It is hot here today, so I've got the windows open and the music playing...best time to get the creative juices flowing!
I know
Studio L3 has a challenge going on using Distress Glitter, one of my favorite products! So, I thought I would create a project today to support the challenge. Hoping that if you like what you see here, you might be inspired to make something yourself using Distress Glitter (and even enter the challenge!).
Follow along and I will show you what I created...
I cut a piece of chipboard using the Sizzix Alterations - Tarnished Trophies die. The die has two different trophy shapes. I am using the smaller of the two today (it is about 3 1/2" tall).
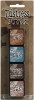
Once cut, I always paint the surface the same color as the glitter I am using, as it always looks better once finished. I decided to use Pumice Stone to create a traditional trophy color.
I might mention a few facts about Distress Glitter:
1. Distress Glitter mimics the look of glass glitter or mica, so resist the urge to press it down into the glue...it
should be a bit uneven so the light can catch the layers of glitter.
2. It is heat stable, meaning you can dry it with your heat tool and it will not melt.
3. Distress Glitter is totally inkable, so once dry, you can ink the edges just like cardstock.
Seriously cool stuff.
While the trophy is drying, I cut four, 3 x 4" pieces of Wallflower paper (these are scaled down papers at the back of the Wallflower paper stash).
I used the zigzag stitch on my sewing machine to sew them together, creating a patchwork effect.
Then a bit of edge distressing and ink with Gathered Twigs (you will find it in pack #6 of the Distress Ink Minis).
Stitch the paper patchwork to a card front (I used a gray cardstock for my card).
Add the glittered trophy with thin foam tape.
NOTE:
this is the part where I should have showed the trophy with Distress Ink on the edges. Please note this step in the final photos.
I used some light pink cardstock to cut TWO strips of the Tattered Floral Garland, then sprayed each with Perfect Pearls Mists - Heirloom Gold (
remember to shake before use).
I quickly dried it with the heat it tool...
then lightly inked the edges of the flowers.
I made little stacks of flowers, leaving the large sizes for another day (
too big for this project). I ended up making 5 medium flowers and 3 really small ones.
Once I have the stacks made, I lightly sprayed each side of the flower with water and crumpled each in my hand. It does take a bit of crunching and smashing to break down the cardstock.
The water helps to break the paper down as well as "puff" up the cut edges. If your flower is too damp, just dry it with the Heat it tool to stabilize it.
I cut some Ranger Manila cardstock using the Tattered Curvy Banners decorative strip. I chose a small sized banner for this project and added ink and added a phrase from the Remnant Rubs sheet - Words.
Just a tip here - since the words on the Remnant Rubs sheet are in a straight line, I cut the words apart. I added
"with", and then
"heart" on the other end. Then I went back and filled in with
"all my" to get the spacing right.
Okay, so time to fill the trophy with flowers.
I added a bit of French lace with a hot glue gun (I was impatient), then just started adding flowers one at a time.
Like this...
Add the banner made previously with foam tape in only the center section.
I used Peeled Paint to ink up the pink leaves. I like the way the Distress Ink saturates the cardstock and creates a good rich green color.
Crinkle the leaves and add to the bouquet (gosh they kinda look real, don't they?).
Love the way this turned out. The lace just peeks out in between the flowers.
I know I could have added more rubs or other embellishments but part of creating is also editing. Knowing when it is enough. And this is just enough for me.
The Distress Glitter does not disappoint...looks like vintage glass glitter. Just a wonderful effect.
Compendium of Curiosities Challenge
Have you heard about the Compendium of Curiosities Challenge
over at Studio L3? Linda is working her way through Tim's new book, A
Compendium of Curiosities III and challenging everyone to follow along. A new challenge is posted every 2 weeks and of course someone is going
to win a prize at the end of each challenge. If you are interested in
participating, you can read all about it here.
Well, I hope you will pop over a check out the challenge. Maybe even enter to win!
now carry on,
paula


Gorgeous!!!! Love the look of the Distress Glitter....so vintage and your flowers are beautiful!!!
ReplyDeleteWell, this is just flat-out magnificent, Paula, which is not at all surprising since everything you touch turns out wonderfully! I'm so happy you joined us!!!
ReplyDeletethanks Linda! Glad to be part of the challenge!
DeleteWonderful trophy display Paula. Love what you've done with the papers and those flowers are so beautifully distressed. Really looks amazing. Hugs from Scotland. Rita xxxxx
ReplyDeleteSo, so pretty. Who knew trophys could be so lovely?!
ReplyDeleteJess
Paula wonderful inspiration as always!!! Distress glitter Pumice stone is my favourite color, patchwork effect and the flowers are incredible! BArbarayaya
ReplyDeletethanks Miss yaya!
DeleteI absolutely adore this!
ReplyDeleteI just love every little thing about this. Bravo!
ReplyDeletethanks Sharon!
DeleteWho would think to put flowers in a trophy cup? Not me :-) But you did, and now I like the trophy die. What beautiful flowers, too! Thanks for the tutorial. Lovely card.
ReplyDeleteMarci, I love trying to figure out what to put in the cups! This is the first time I tried flowers! I love it!
Deleteso beau~~~~ti~~~~ful~~~~~~~~~~~~~~~~!!!!!
ReplyDeletethank you Miyake!
DeleteOh Paula this is completely brilliant and such a great tutorial!! Love everything about it! The stitching of the papers is such a great touch and I LOVE what you did with those new banner dies,yikes, yet more items for my every growing wishlist. This is a truly stunning make!!!
ReplyDeletethank you Astrid...thoes banners can be a little tricky to fold but once you get the hang of it, it's easy (and very forgiving). They are a nice touch on any project.
Deletethanks agin, paula
Hello Paula,
ReplyDeleteWow this is such a wonderful creation, love how you pieced your Bg with such pretty papers, your flowers look great as does the folded banner, all in all a most beautiful make.
Smiles:)
Sue
Corrr, this is stunning! Love the flowers, they are so realistic
ReplyDeleteAwww it came out beautifully, I love the stitched paper background, looks wonderful xo
ReplyDeleteAmazing...Love it ♥
ReplyDeleteThe flowers are just gorgeous...wow!!
FABULOUS, creative design, Paula! I resisted the temptation to scroll to the end and just read it from top to bottom allowing my anticipation for the finished project to build. Hee. It was worth the wait ... WOW! The concept of the quilted papers behind the heavy metal (glittered) trophy and the contrast of the beautiful, delicate flowers with the lace peeking throughout. FABULOUS! :)
ReplyDeletethanks Gabby! I always like that build so I never put the finished result at the top. Glad you like the card.
Deletepaula
Simply gorgeous. As always!
ReplyDeleteWow! That is just fabulous!! love your flowers!
ReplyDeleteWow, this is so beautiful!!!!
ReplyDeleteGorgeous! I love every detail from the trophy to the flowers!
ReplyDeleteso very gorgeous!
ReplyDeleteAbsolutely fantastic!!! Thank you!!!
ReplyDeleteSuch a nice surprise to see your CC3C creation. I love everything you do, Paula, and this is yet another fabulous, gorgeous piece!
ReplyDeletethanks Annette - you are too kind!
Deletepaula
A beautiful card! I love the patchwork stitching and filling the trophy with flowers.
ReplyDeleteStunning!!!! I could give you my mailing address...hint hint! lol Can't wait to get into my art room and see what transpires for this challenge.
ReplyDeleteI can't wait to see what you do either Susan! Sending you some creative wishes!
DeleteThis card is stunning...very beautiful!!
ReplyDeleteWow, I didn't think that Tim's dies could turn something beautiful, just kidding Tim, Paula you did a wonderful job making this card that is so feminine. Thanks for sharing.
ReplyDeleteWelcome back! I enjoyed your guest posts last week and also the photos of your trip. Your stitching on this project made me wonder if the wallpaper stash may be part of the new fabric release. This is a terrific flower technique, your bouquet is charming and, even though I promised not to buy any more craft goodies for awhile, a little distress glitter couldn't hurt. Thanks Paula, for permission to go shopping!
ReplyDeleteThis is just gorgeous! I didn't think the trophy die was for me but I've seen some fabulous creations that have used it .... This one however is my favourite ! Xx
ReplyDeletebeautiful. Don't have any vintage glitter. After seeing this makes me have to put it on my wish list. love the finished product.
ReplyDeleteThis is so beautiful Paula!! Love the patterned paper background and what a great idea to fill the trophy with flowers - and such pretty flowers too! Antique Linen Distress Glitter is a favourite of mine too.
ReplyDeleteOooooooooh this is sooooooooo beautiful. I absolutely love this card here.
ReplyDeleteLove, love, love this Paula!
ReplyDeleteSo beautifully vintage!! I love everything about it!
ReplyDeleteOh my Paula, This is so pretty! The Wall Flower Paper is truly one of my favorite media Tim has ever released in a collection. You do it justice every time you incorporate it into your work. Love that Trophy Die, too. I can think of so many ways to use it. Thanks for another wonderful Tutorial and CC3C Challenge hook-up. It is loaded with inspiration.
ReplyDeleteLove everything about this beautiful creation! The stitched papers, the glittered trophy, the crinkled flowers, that bit of lace - just fabulous!!
ReplyDeleteI love the way you did this and I would love to copy it! I like the whole vintage look , the zig zag stitching and the flowers you made.
ReplyDeletePretty! I love how you made the flowers.
ReplyDeleteOh be still my heart!!!!!! So much loveliness in one post! LOVE LOVE LOVE
ReplyDeleteJust gorgeous Paula, absolutely love it... the stitching on that wallflower paper... you gonna make me did out my sewing machine LOL !! And the flowers so real looking !!
ReplyDeleteThis comment has been removed by the author.
ReplyDeleteWhat a Wonderful card, Paula! I Absolutely LOVE those flowers!! Gosh, what a bit of pinching and squishing can do!! And what a GREAT inspiration for Linda's CC3 Challenge. I'm so lucky that I won my copy of CC3 from You!! I'm off to get more inspiration from you, from a previous post of a canvas that you made :) Thank You for all of your inspiration! Us simpletons need all the help we can get ;) XOXO-Shari
ReplyDeletePretty gorgeous card! I was interested in how you folded the banner. Now why didn't I think of doing that? :)
ReplyDeleteSo glad Tammy T pointed me over this direction. What a beautiful card! Love seeing how it all progressed.
ReplyDeleteVery pretty Paula!! TFS
ReplyDeleteSo pretty Paula! Love the glittery trophy and beautiful blossoms!
ReplyDeleteI love it… and I also love the piece in previous post! Flowers are awesome and I didn’t know that you can ink the glitters..you open so many options…thank you so much for sharing the processes with us!
ReplyDelete