Showing posts with label holiday cards. Show all posts

Tuesday, September 26, 2023

Wonderland Cards

Hello Friends,

Today I thought I would share the three cards I made using Wonderland Fabric.

To start I cut three card bases 4 1/2 x 6 1/4" from Distress Watercolor paper. I love this paper as a base because the weight of the cardstock makes a great base to build on.
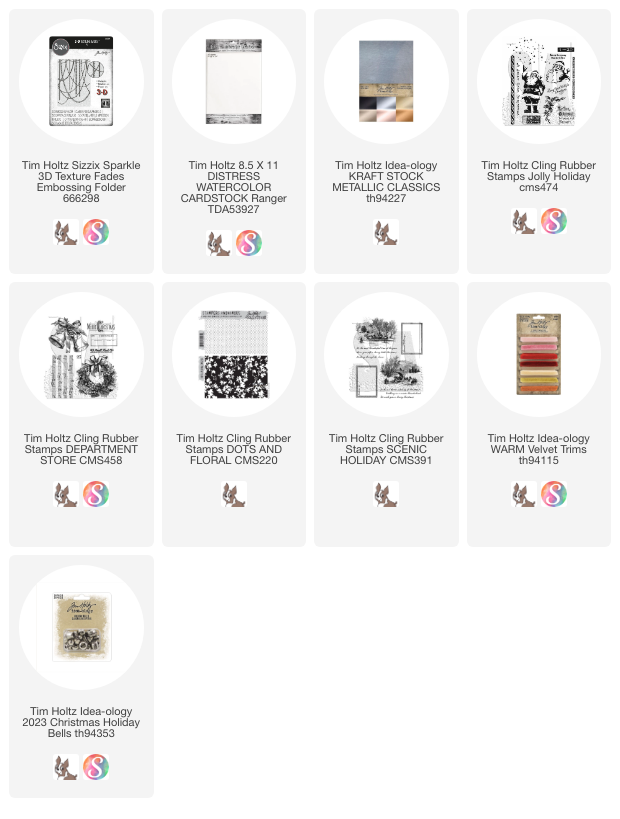
For the first card, I cut another piece of Watercolor Cardstock slightly smaller than my base so I could use the new Sparkle 3D Embossing Folder.  It worked perfectly as a backdrop for the flannel fabric strips.
I mounted the embossed paper to the card base using thin foam tape.  

To prep the flannel, I added heavyweight iron-on interfacing to the back, then cut the strip with my rotary cutter. The flags at the bottom were hand-cut with scissors that have a sharp tip.  I topstitched each strip, then added them to the card front with wide Scor-tape (only at the top half).
I bet you can guess that I had to add the string and the painted bell BEFORE I added the Scor-tape to the back.
I cut a couple sizes of circles for the focal point. One in Watercolor cardstock and the other in silver metallic Kraft Stock (I also sanded it lightly). I stamped the sentiment with Archival Ink then sprayed the circle with Frozen Fog Mica Stain and drying before slipping it under the strip.

 CMS 474 Jolly Holiday 


For card two, I used the collage fabric, "25th".  With this fabric you can chose smaller prints from the group the work well together for size and scale.
I cut the blocks using the same process as the last (adding heavyweight interfacing to the back), but this time I used the square wafer dies I have from Simon Says Stamp to cut the shapes. I just placed the die over the image I wanted and ran through the die cut machine. I had all 6 squares in no time. I love that the dies works like a little window to see exactly what you are cutting.
I adhered each square to gold metallic cardstock with a light coat of Collage Medium (the interfacing helps to keep it from soaking through the flannel).  I did all the machine stitching before adding the red layer and mounting it on the card front that I had already stamped with a saying from a favorite stamp set, Scenic Holiday.


And for the last card, again, I went back to the "25th" fabric, repeated the interfacing and the cutting before adding the blocks to the stamped card front. I stitched around each block to add some interest, then added the ribbon and tag.
The velvet Ribbon is from the idea-ology pack.  I used a strip of 1/4" Scor-tape on the back of the long strip, then added the bow with hot glue.
The small tag is from my junk drawer.  I just stamped my very FAVORITE #25 from the Department Store Stamp set. I just love this card!
ps) If you open the card, there is a sentiment on the inside.

CMS458 Department Store


I hope you have enjoyed these cards as much as I did making them. It is amazing to me how even just a hint of fabric can make such a difference. Maybe it's the texture of the flannel or the colors of Christmas...whatever it is, I love it!

If you missed the Wonderland Fabric live, you can watch the replay HERE
Now carry on,
paula
Tuesday, November 13, 2012

I'm gonna need another shelf...

Some of you may have already heard...but if not, these were just released on Friday.  You already know how much I love these Stains and now 12 more...all the seasonal colors.  Lucky Me, a box of all 12 were delivered to my house on Saturday.  I have only scratched the surface of the new colors...I can't wait to try the two on the left, picked raspberry and festive berries.
I decided to do a seasonal project using 3 of the new stains and the Tattered Leaves die that Deb used to make her spectacular arrangement in the last post.  I picked ripe persimmon, iced spruce and squeezed lemonade.
Before I get to the stains, I cut a few pieces of Sticky Back canvas in natural, the size of the leaf I wanted to die cut (about 2 x 4").
I squeezed a bit of each color onto the craft sheet.
Then spritzed the surface with water from a mini mister.
Then just started swiping the Sticky Back Canvas through the stains.  Gosh, I love the bright colors and the Iced Spruce is perfect to keep the brights from overwhelming.
Once dry I cut the same leaf pattern in each.  Love how random the colors are and the texture of the Sticky Back Canvas is great.
Now what to do with them?
I picked up three of these dishtowel sets at Target to use as napkins on Thanksgiving.  I believe it was $3.99 for four, two of each pattern.  The towels are not large, just 14 x 14" so good for a napkin.
I peeled the backing off of the leaf and stuck it to the dishtowel.  I stitched the leaf starting at the top of the stem and sewing to the bottom, then put it in reverse to get back to the top.  From there I stitched each part of the leaf, back and forth until I had worked my way to the bottom again.
This is how it looks stitched to the towel.  I purposefully picked a thread that was a different color than the leaf so the stitching would stick out like the veins in the leaf.
Remember,  Distress Stains are reactive to water so the most important step is to heat set the leaf.  I used a dry iron (no steam) and heat set it for 45 seconds or so...then I probably did it again for good measure.  I tested this napkin under running water and rubbed it quite a bit.  No color washed out, not even the thread was discolored.
I tied the top of the napkin together with Crinkle ribbon dyed with Frayed burlap stain and a Trinket Pin.

Then I thought, what if you have napkins already or you don't want something so permanent?
Here is how you can do it...
Adhere the leaf to a piece of muslin and stitch the leaf down.
Cut out the leaf.
No need to be perfect...a little of the muslin showing is good.  Just use your fingernail to fray it a bit.
Use your paper piercer to make a small hole a the the base of the stem.
View of the back side.
This time, tie the leaf to a napkin with paper string.  I also added a Seasonal muse token.
 
And one more idea for the leaves...a fall card.  A great time of year to tell someone how much they mean to you.
I used the mini baroque die to cut a piece of old book paper (inked the edges with Vintage Photo Distress ink).  I glued it to a District Market Notecard from the Merriment set.  I tied the stem of the leaf with a bit of leftover Crinkle ribbon.  Then glued the leaf to the card with a bit of glossy accents.  Finally, I added the word "simplify" from the chitchat sticker book.
Love how that turned out.
NOTE: if you wanted to skip the stitching part of this one, just adhere the Sticky Back Canvas leaf directly to the book paper.
Well, I love how the leaves today turned out and I love the new distress stain colors.  Glad that I mixed a dull iced spruce with two very brights like squeezed lemonade and ripe persimmon.  Can't wait to experiment more.

Be sure to pop by on Thursday for another tutorial using Sticky Back Canvas (and don't tell anyone...a giveaway).

Cheers for a good productive week...looking forward to experimenting with more distress stain colors, watching a new episode of Masterpiece Theater Upstairs Downstairs waiting for me on my DVR (such a great series), and a date night to see the new James Bond movie.  It's gonna be a good week.
paula