So the question today is...can you mix Found Relatives with real ones?
The answer - yes.
And I'm gonna prove it.
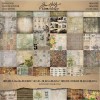
Enter the new large Collection Folio...a huge hit at CHA.
Super heavyweight kraft colored "chipboard" (
for lack of a better term) that can hold up to multiple layers of paint and multi-medium without warping. The kraft color is awesome, so no need to cover it with paper unless desired. And the spine inside?...so many ideas for that (
this is only the start). I
will mention that the elastic band on the Folio is removable in case you want to slip something on to the elastic, as I did with the Wordband, or you wanted to replace it with ribbon, jute, etc.
I used Wallflower paper on the cover, my favorite Found Relative (love the polka-dots!), and a couple new dies, Frameworks - trellis and Curvy Banners. It's all about the details here, from the color to the texture. The metal bird is part of the new Adornments - Nature set.
Frameworks continues into the inside of the folio, this time I used Sticky Back Canvas and paint.
There are at least 5 layers of paint and Multi-medium over the (much anticipated) Layered Butterfly. This die comes in a special pack - one Bigz die that cuts the Butterfly shape and a texture folder that gives you the detail of the wings. I have used the butterfly die to cut and emboss Ranger watercolor paper, chipboard and Grungeboard...every single one looked amazing. I believe the new Layered dies are a June ship, so time to save the money to get one or two!
I used the new Industrious Stickers to add quotes throughout the project. This one was printed on a transparency so the Wallflower paper could show through.
Inside the project, the layered spine becomes a gallery of sorts, one layer leading to another. Since I used the words "Precious Things"on the cover, I gathered a few quotes that would support the theme. I printed them either on paper, as you can see here, or transparency. It always amazes me when using a transparency over paper how it will remain in place without tape...in fact it can be difficult to even pick it up to adjust it.
I used layering stencils and Distress Ink on each section of the spine. Lots of stamping, Remnant Rubs, Ephemera and even some glitter. The layer with the heart on it is a piece of packaging plastic I cut using the Ornamental die. I also colored the plastic with Alcohol Ink - pool before adding the heart and Remnant Rub - Love.
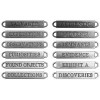
In this section about travel, I used Vial Labels to record dates of trips taken over the years. You can see I also used my sewing machine to add a #8 tag that has been stamped (Words For Thought CMS132). Notice the quote next to the picture? Looks like it is printed on the Wallflower paper, but it's printed on a transparency and laid over the paper.
Here you can see I used a 4 x 4" picture as a pocket. I have my Instagrams printed at
Printsagram (say that 3 times fast). A super user friendly website to choose your photos...cons: the shipping cost. $7 to ship any quantity so the more you buy the better. In the end, it will cost you about .80 cents a piece for the 4 x 4" but the matte paper is ultra heavyweight and I LOVE that, so I keep going back despite the shipping cost.
The cut leaf shape is from the Decorative Strip Spring Greenery.
You can see in this section the spine is now wide enough to journal on (loving that heart layering stencil). Again, another Instagram used as a pocket for hidden journaling.
I ended the project with this last quote:
“Your problem is how you are going to spend this one and precious life
you have been issued. Whether you're going to spend it trying to look
good and creating the illusion that you have power over circumstances,
or whether you are going to taste it, enjoy it and find out the truth
about who you are.” - Anne Lamontt
I loved working on this project just because it gave me time to reflect on what is precious to me. Things that were more personal, like thoughts about my husband, were written inside cards and tucked away in a few places.
I hope this gives you a bit of inspiration for a project on precious things.
What would be on your list?
now carry on,
paula


This project just blew me away! Your creativity is amazing. I do learn so much from your tutorials and can't wait for the next one to inspire me - and they do!
ReplyDeleteThanks Marilyn! appreciate your comment!
DeleteThis is fabulous! My favorite though is still "Alice Meets Downton Shadowbox". These folios do look very interesting. When are they going to be available? And the ephemera packs?
ReplyDeleteMarci, The ephemera packs should be one their way to retailer as we speak, the collection folio will be available in a month - so about the 2nd week of March.
DeleteI am WILD for this!!!! This is absolutely GORGEOUS!!! I can't wait to try my hand at something similar!!!!!
ReplyDeleteSimply, wonderfully, beautifully fabulous. I can't wait to get my hands on my own folio ~ thanks so much for the inspiration ~
ReplyDeleteOh this is just wonderful. These folios are ones of the new things from CHA that I'm most looking forward to . Great use of the transparencies . On my precious things list would be my husband and my friends and wonderful memories of my parents.
ReplyDeleteLove the details and the little peaks at life moments! These folios are fabulous! Can't wait to get my hands on one! Hmmm maybe this could be a kit from you?
ReplyDeleteThank you, Paula, for the answer to my questions.
ReplyDeletePaula this is incredible! Looks like it took a lot of time to do! Please come to Texas again soon and teach this as a workshop!!
ReplyDeleteOMG --- GORGEOUS!!!
ReplyDeleteI´m waiting for this great big Butterfly it´s such amazing!!!
Oh Paula, this is such an amazing project, I spent ages and ages looking at it trying to take in all the wonderful details of it.... stunning! So much to love, and it's the detail that makes this so special, - the subtle shading and stunning colouring of that butterfly on the inside, the way the trellis is arranged over and around the found relative on the front cover, the way all the tags and ephemera are layered around your beautiful photos, - I could go on and on.... I am just so happy you came to visit my blog, as it made me visit yours.... I will be back again and again!! I believe you are going with the "master" to S. Africa? Hope you have a fantastic trip! Those people are so very lucky. Thank you for all the inspiration this morning. I so can't wait for all this wonderful stuff to hit the shelves in the UK!
ReplyDeleteYet another fabulous tutorial! I think I even saw a bit of Iced Spruce on there!
ReplyDeletePaula, your work is amazing and inspiring. Love everything you create.
ReplyDeleteThis project must have taken hours and hours of work - I am in awe of your perseverance, first of all, but also of your wonderful way of creating such a wonderful collection of ephemera in one fabulous "folio". Thanks for the inspiration!
ReplyDeleteThis project is exactly why I love the folios. A perfect spot for little snippets of life. Beautiful Paula!
ReplyDeleteGorgeous work! Just stunning :)
ReplyDeleteWow, this looks gorgeous !!! I hope this will be avaible in the Netherlands very soon !
ReplyDeleteBest regards,
Berdien
Utterly amazing... so many brilliant and beautiful details: I love the framed quote printed on the transparency to reveal the wonderful paper, the painty layers on that glorious butterfly (June? how will I bear the wait?!), lovely use of the papers and the trellis die (hope that's coming before June!)... and all those amazing ephemera, personal and Idea-ological! It's just fantastic, and I'll probably be back for another look later...
ReplyDeleteAlison x
Oh wow - this is seriously stunning! Thank-you for sharing so many fabulous ideas. Nicola x
ReplyDeleteAgain fabulous Paula! Of course I LOVE it and I could spend hours looking at it…so many beautiful details and stunning colouring! You are very talented lady and I always love to visit your blog! Greetings from Slovenia
ReplyDeleteGorgeous! And what an amazing product. I love what you did with this Collection Folio. There are so many wonderful details and techniques (transparencies are so cool!). It is so incredible to find a surface that will hold up to all the mediums and embellishments. Absolutely fantastic layers Paula. Sweet way to keep cherished memories and make new ones :) -- Mary Elizabeth
ReplyDeleteThis is so beautiful! thanks for sharing how you layered the elements. It gives me lots of ideas.
ReplyDeleteThis is fabulous. You provide so much inspiration. Thank you!
ReplyDeleteOh this is just wonderful and beautiful.
ReplyDeleteThank you and greetings from Germany
WOW...you are so talented! First time at your blog, I am impressed! :)
ReplyDeleteHi Paula, goes without saying this is beautiful. Tim's video of this piece is why I bought one of these to try myself. Wondering how you attached the waterfall spine? Also, where on the cover, in the middle or on either side of the pre-creased "gusset"? Thanks.
ReplyDeletehi Emily,
DeleteThe spine is held in with 1/2" Wonder Tape (Ranger). I secure the spine on the back of the folio just to the right of the thickest fold line. All pre-creased lines are on the left side or front of the folio.
Thanks so much for the info Paula (c:
Delete