Hi everyone! A group of us are creating projects this month using the new idea-ology Halloween release. Four amazing projects have been posted so far and I'm hoping to add another good one to our growing list of Halloween inspiration!
Today I'm working with the back side of a Burlap Panel. It is the back so it doesn't look too great, but I promise it will get better!
NOTE:
I did trim any burlap hanging over into the center.
What better way to transform something than paint!
I added a piece of paper from Regions Beyond paper stash to the center using Multi Medium. This year the holiday paper pad is 8 x 8" which I love because the paper is scaled down. Perfect for smaller projects.
I cut four 3/4" strips of paper from the same paper stash.
I stitched down one side of each using block thread and then inked each piece with gathered twigs and black soot and a blending tool.
I folded each strip along the stitching line and roughed up the edges, tearing and bending the paper.
Then added Glossy Accents to the back side of each strip...
The strips were added one by one to the frame of the burlap panel. The folded edge wraps right around the edge.
When I got to the corner, I just ripped the end of the strip (and inked it) to make it blend into the one on the bottom.
I dug through my Letterpress to spell CURIOUS. You can use any word but one that is 7-8 letters long is the perfect size to fit in the center. Rusty Hinge is the perfect color of Halloween orange!
Side Note:
the word frightful is a great word for this project. It fits perfectly if you leave out the T (which in my excitement I did).
Serious.
I painted it.
Waited for it to dry.
Took pictures.
Then I realized I spelled it wrong. #truestory
back to the task at hand...
If you have Letterpress, then you know that vowels are sometimes hard to come by. I needed an O and I didn't have one, so I used a sharp X-Acto knife to pop off the tail of the Q to make and O. This worked for me because in order to get a more cohesive look, I painted the "base block black" (say that three times). This made it virtually impossible to see where I removed the tail of the Q.
NOTE:
Letterpress blocks are created using different colors of black and brown stain - in my case I ended up needing to only paint 3 blocks black (R, S, and Q) from varying shades of brown to match the other black blocks.
When you open the Regions Beyond paper stash you will find lots of great Halloween papers to work with, including this one that has a menagerie of small images. You can use the paper as is or cut the images apart (
that's what I'm going to do).
This is a great time to pull out the Tonic shears to cut up the squares. Nice long blades to easily cut through the paper in one shot.
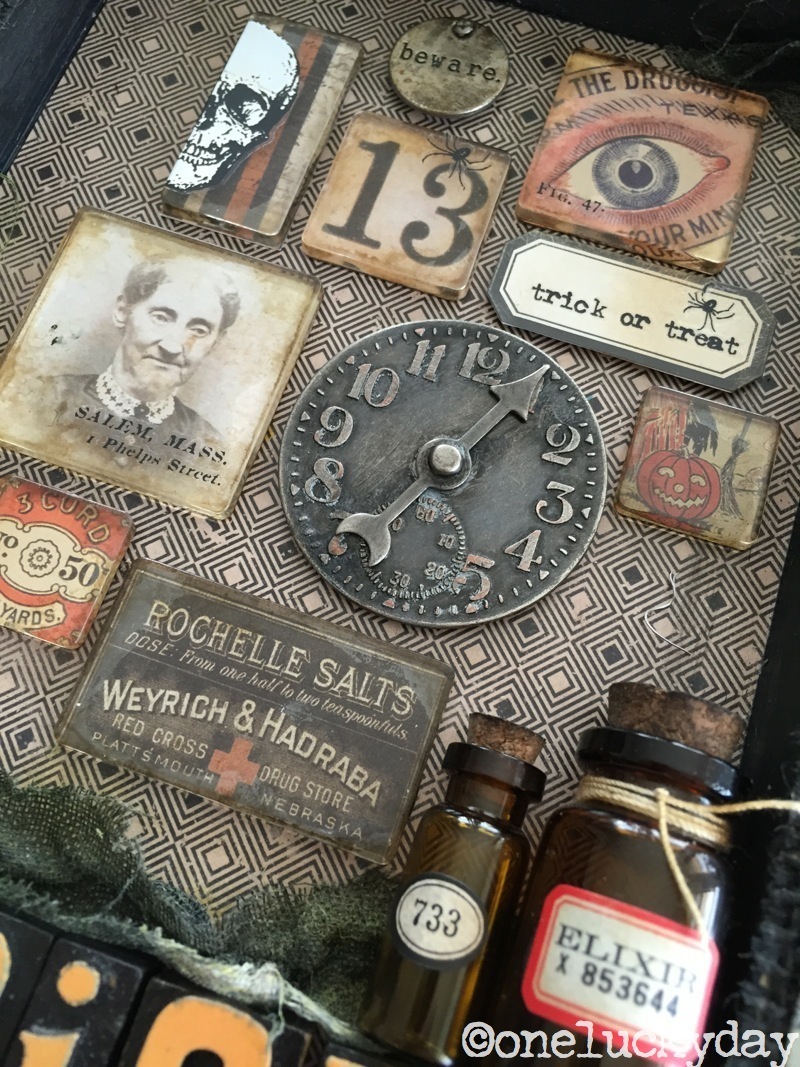
The reason for cutting the paper apart is that the images on this sheet are scaled to match up with the idea-ology Fragment pieces.
Since this is a Halloween piece, I'm going to add Mushroom Alcohol ink to the Fragment pieces. I dripped a bit onto the felt pad (
you don't need a lot).
Hold the tool in one hand and the Fragment in the other to add the Alcohol ink to the flat edges. You almost push or
"squeeze" the ink from the felt onto the Fragment.
You can finish by pouncing just a bit of more onto the face of the Fragment. Remember there is going to be printed paper underneath so you want to still see
through the plastic. If you get too much Alcohol Ink on the face you can remove it with a q-tip and a bit of rubbing alcohol. The processes is very forgiving.
You need a small amount of Glossy Accents to glue the paper. I think the one mistake people make using Fragments is using too much Glossy Accents. If you put too much on the Fragment, it will squish out from under the paper, which can easily get on your fingertips and leave glue fingerprints on the face. You can avoid that mess by just using a small amount of GA (as shown).
Once you have your Fragments complete, you can go back and add Remnant Rubs using the Remnant Rub Tool. The new
Curiosities Remnant Rubs are awesome. So many great images in a mix of black and white on each sheet! Love that.
Here you can see one of the white Remnant Rubs. The skull was big so I just cut it down the center and used it on the narrow Fragment piece.
I need a few more things before I put this together:
1.
Wordband - for the top of the project. I used Picket Fence paint, Alcohol Ink in Mushroom and Lettuce to color the band. I also used black soot Distress Stain to color Linen Ribbon for the ends.
Wonder Tape helped me secure it to the frame.
2.
Apothecary Bottles - The new amber bottles come with these darling labels. Just choose one!
3.
Oddities Adornments - this is a great pack of trinkets with spiders (
up next), a bat, skeleton, a darling pumpkin and 5 word tokens.
4. Oddities Adornments + Timepiece -
Is this not a great spider? I painted the Timepiece and spider (
with added chain) in Black Soot and let them dry.
I added the
Letterpress to the bottom of the frame as well as some dyed cheesecloth (black soot + crushed olive Distress Spray Stain). I rubbed Multi Medium into the cheesecloth until it is malleable (
it doesn't take much). Then it's easy to manipulate into place with the end of a skewer or tweezers.
Now it time to start adding the pieces. Apothecary Bottles first, then the Fragments, etc.
NOTE:
I did use foam squares under the Timepiece and Vial Label.
I added a Screw Eye at the top to hang the spider on a chain.
NOTE:
the frame is hard wood so you will need a pilot hole to get the Screw Eye started.
I also cut a few flowers using the
Tiny Tattered Florals + Black Kraft Core cardstock. I think I may be addicted to making these flowers!
And one last step to add a bit of detail...I found this tiny strip of vintage book paper on my desk (
I have no idea where it came from) so I inked it and stuck it in behind the cheesecloth. Love the challenge of using things I find on my desk!
Love the hanging spider!
Well I hope this gets you into just thinking about Halloween. The next couple months are pretty packed for me so I'm happy I could get this fun project done early!
If you missed any of the Halloween projects this past week there are links below to see what each of the designers created. If you are not a follower of these girls, be sure to sign up because there is more to come!
And three additional designers this week! Can you guess who?
Remember, you can check
Tim's blog for new projects every Monday, Wed and Friday throughout the month!
Thanks Everyone!
now carry on,
paula