Thursday, March 31, 2022

idea-ology Matchbox Tray

Hello Friends,

Today I am sharing one of the projects I created for the new idea-ology release.  This is a project that I created on a whim! I had a basic plan in my head, but was not sure it would work or not till I really got into the project.  I wanted to use the house (I cut it out by hand) from the Snapshots pack as my centerpiece, since I was envisioning the lives of the people who had lived in the house surrounding it.

TRAY
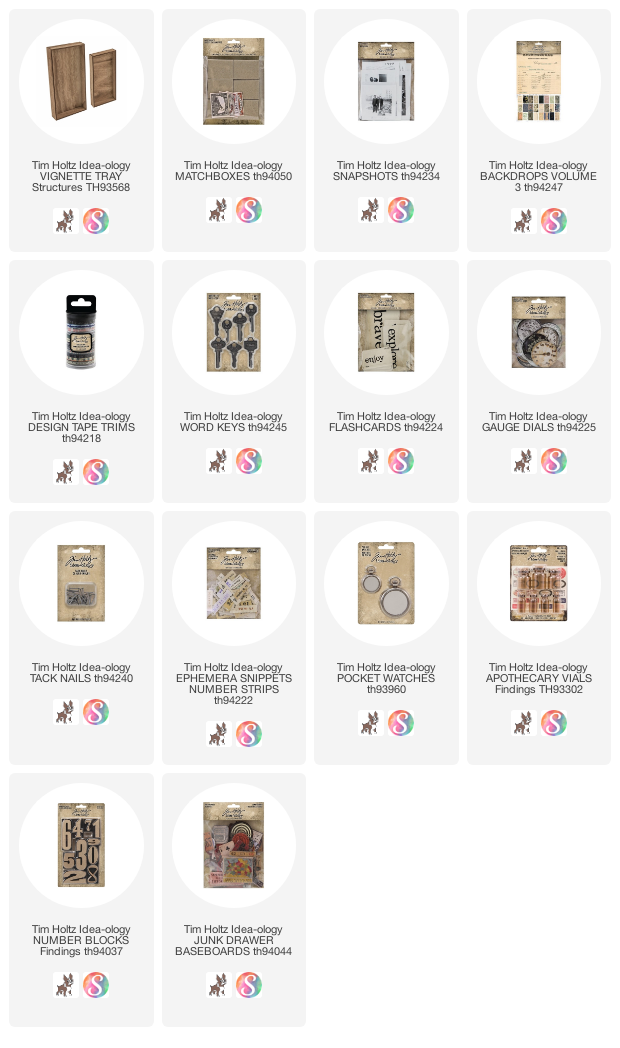
I started by painting the large size Vignette Tray black. I painted the entire outside and the inside walls of the box. This gave me a good vehicle for the pink map paper that is in the new Backdrops 3 paper pack. The black paint makes the pink map really pop! I knew that I was going to be using neutral photos so I needed the pink as my backdrop.
The black tape that wraps around the lip edge of the tray is from the new tape pack that has 12 different, 3/16" tapes.  This was specifically made to fit the lip edge of Vignette boxes.  You can see the one I used right at the top.

MATCHBOXES
I used the idea-ology Matchboxes for the collage. I wanted something that I could open and add things to the drawers. The size worked perfectly with the large Tray to so this. I used all 6 Matchboxes that came in the package. The arrangement of the Matchboxes came from testing what worked. I knew I wanted the house in the center, resting on top of a Matchbox...everything else went in around it. I had the arrangement in place BEFORE I started cutting the Snapshots since I needed to know if a photo should be cut vertical or horizontal.

I removed the drawers from each box, painted the inside of each with 2 coats of Weathered Wood Distress Paint and set them aside to dry.  Once dry, I wrapped the outside of each drawer with Marbled Tape.

Snapshots are a new addition to the idea-ology line.  It is an entire bag of snapshot photos.  The paper is the same as Paper Dolls - thick and slick to the touch.  You can color them with Distress Crayons if you wish and they are very easy to stitch through if you were wanted to sew them to a surface.
For this project, I decided to add the photos to the Matchboxes, but of course they are way too big for a Matchbox.  That wasn't going to stop me.  
I cut a piece of velum the size of the front of the Matchbox.  I used the velum to help me find the part of the image I wanted to cut out.  I could move it around and up and down till I found the right place.  Then I just hand cut that part of the photo with scissors.
I had a vision of old photos found in a box so I decided to only color with Gathered Twigs Distress Ink. I pressed the ink onto my glass mat and spritzed it with water. Once I decided which photos I wanted to use (and cut them to fit the matchboxes), I pressed each into the ink and dried it with a heat tool. Just that simple.
You can see that I have added things to the drawers.  You can use whatever you have in your stash.  New or vintage...it does not matter.
I used Collage Medium to adhere all the parts and pieces, from Flashcards to bottles to Number Bocks...all Collage Medium.


All the string work was done after the boxes were in place. I started with the nail at the top, then worked my way around the tray till I came back together. I used a needle that was big enough for the string.  It would be helpful to have a thimble (if you have one) to push the needle through the boxes. The tray could also be created without the string.

I blackened the Pocket Watch with black paint, then sanded some if it off again.  The center is from the new Gauge Dials pack.  It fits perfectly, you just have to open the back and pop it in.  I added some chain from my stash and a tag from the new Ephemera Snippets.

DRAWERS
Word Keys
Number Block
Apothecary Bottles
Junk Drawer Baseboard pack
Gauge Dials and Pocket Watch
Flashcard


I hope you like my Matchbox Tray!  I know it is kind of an unusual piece but I love it.  The new idea-ology products are so fun to work with and I can't wait to use the Snapshots in more projects.  
now cary on,
paula

Wednesday, March 30, 2022

Somewhere in Time Kit

 Hello friends,

Some of you may recognize this as one of the projects that was shown on the idea-logy Live. Well it is!  I have put together a kit with all the necessary elements to create one for yourself.  Details about the kit can be found below. 

Click on the link below if you wish to purchase.  
The link will take you directly to PayPal. 
If you would like to purchase more than one kit, this is also where you can change the quantity. Three dollars will be added to the shipping cost for each additional kit purchased in the same order.

If you wish to pay with debit or credit card, click on the box at the bottom of the PayPal login page (you do not need a PP account). 
*Please contact me directly for international shipping.  
There is an added cost to ship internationally (any other taxes or customs 
duties are the sole responsibility of the buyer).

Instant Purchase Link:


SOMEWHERE IN TIME
$85 + $10 US domestic shipping 
Kit includes written instructions + 
four pages of color step-out photos

Create a vintage inspired 9 x 9” wood vignette panel that speaks to anyone with a just bit of grunge at heart.  There are options included in the kit for the paper background, flashcard word, and Word Plaque, so each panel can be unique to you.

Kit includes a 9 x 9” Square Vignette Panel, full packages of Adornments Flourish, Word Plaques and Adornment Deco Frames.  Also included are 20 Flashcard words to choose from and full pack of 24 new Backdrops papers. 

This kit is easy to create and gets better with every added layer. The kit include a supply list, comprehensive written instructions, as well as detailed, color step-out photos. 

 *Machine Stitching is optional.


As always, if you have any questions, don’t hesitate to send me an email.
Now carry on, paula

Monday, March 14, 2022

"My Heart" with Saltwater Taffy

Hello friends!

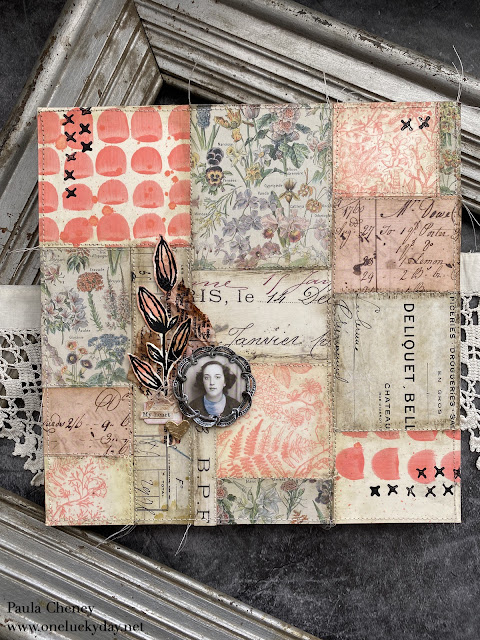
Nice to be here today sharing another Saltwater Taffy project.  This is a really easy mixed Media project that any one can do.  I used a 9 x 9" wood Panel which to me is just the perfect size for this project. I used a sewing machine but that is absolutely optional if you do not have one. 
I started by creating a few stamped and painted pieces using Saltwater Taffy over Mixed Media Heavystock.  I created one or two cards of each so I could use as is or cut them into pieces.

Painted cards - I used Distress Paint in Saltwater Taffy to freehand paint the splotches on the Heavystock paper.  I used a paintbrush that had a rounded shape so I could get the unique pattern.  I literally just painted the shapes on the card and dried it with a heat tool.  I went back and added a few splatters after the fact.  This card was larger so I cut it on half and used on the bottom left as well.

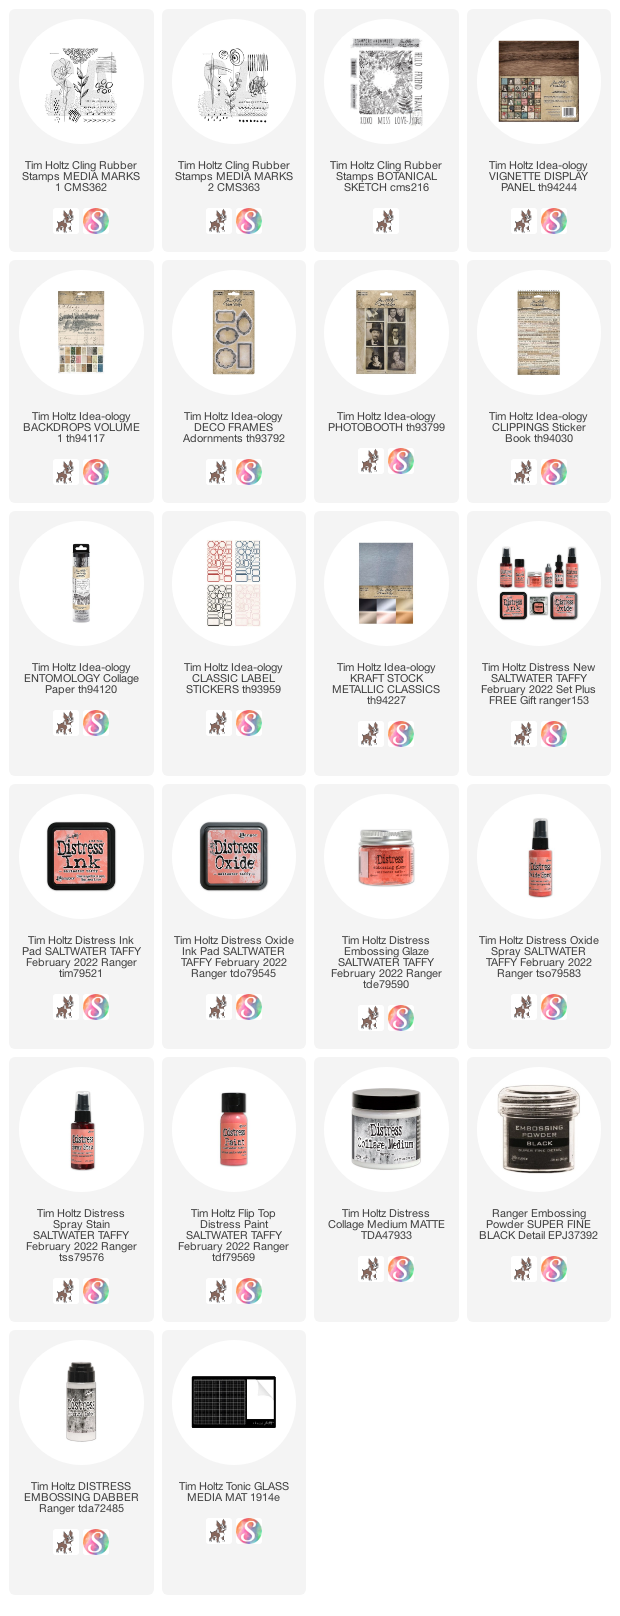
Stamped cards - I used an old stamp I had called Botanical Sketch (CMS216).  This stamp is very large with an open center.  I used my stamp platform to stamp the image in Distress Oxide, then cut it into smaller pieces.  I love the delicate botanicals of this image and was happy with how it turned out here.
Normally, I would just adhere the papers to the wood Vignette Panel with Collage Medium, but I wanted to add stitching, as if the pieces were stitched together to create the patchwork.  So I cut a piece of cardstock 9 x 9", the same size as the front of the Vignette Panel, and adhered the patchwork to the cardstock without overlapping.  You don't have to use much glue/tape runner since they will all be secured by the stitching.
*All other paper pieces are from idea-ology Backdrops 1.


I wanted to add Crayon to give it an aged look but if you like the clean lines, just skip this step.
To add the crayon, you need a slick surface which means adding Collage Medium.  Distress Paint dries permanent, but Oxide Spray does not.  It is still reactive to wet/water, even though it feels dry to the touch.  With that said, just be cautious when you drag the brush over the botanical images.  I have found that the longer they dry (say over night) they less they are likely to smudge.  So this is a great project to do the stamping one day and the "putting together" the next.
Once I had the surface covered with a thin coat of Collage Medium and it was dry, I added the crayon to the seams for more depth.  I always go back a pounce over the top with a wet wipe to remove the excess.
Next step is optional.  I love sewing on paper, so that is just what I did. I sewed most of the seams, either right on the edge or in the ditch between the papers.
Once I was done at the sewing machine, I used 1" wide Scor-Tape to secure the paper to the wood Vignette Panel.
I used a different set of stamps, Media Marks 2 to make the X pattern on surface.  I needed the X marks in black to tie the stem to the rest of the panel. This time I used black acrylic pant so it would look more distressed.  If you were going to use ink - you would need Archival since the surface is sealed with Collage Medium and of course you could used more embossing powder.
For the focal point, I placed a Photobooth Photo into a metal frame (Deco Frames).
I also embossed two sets of stems from the Media Marks 1, stamp set. Once embossed, I hand cut the stems, then pressed them into Saltwater Taffy Distress Ink (with a little Gathered Twigs added).
The text paper in the background is just Collage Paper that I pressed into the leftover ink puddles and dried with a heat tool. Once dry you can rip the paper into any shape.
Placement is up to you.  This one could have gone on the right side as well.  You could extend the collage elements, adding as many as you wish.


This is the last of the current Saltwater Taffy projects but there will be more in the future.  The color just resonates with my aesthetic!  If you missed the other projects, you can find them here:

now carry on,
paula


Saturday, March 12, 2022

Foundry Wax

Hello Friends,

What an exciting day celebrating the release of the new Foundry Waxes to the Distress line!   Tim's live demo on YouTube live was epic!  If you missed it this morning, please take the time to watch the replay!  He really does answer all the "what if" questions about using this new product.  I have included my own notes as part of this blog post. 

There are two Foundry Wax kits:

Kit 1- gilded + mined

Kit 2 - sterling + statue

I created a project using Sterling, Statue and Gilded over a black background.  Lets get started!
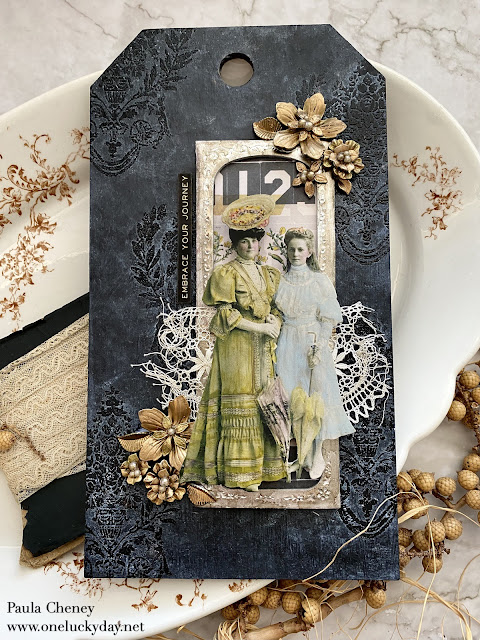
Today, I'm using a small Etcetera Tag for the foundation.  I painted the tag with two coats of Black Soot Distress Paint.  You could also use a black acrylic paint if that is what you have on hand. Once the paint is dry (leave it at least 30 minutes), use the Embossing Dabber to coat the stamped image.  I chose a medium sized damask from the Distress Damask stamp set.  One by one, I added the ink to the stamp, stamped the tag, then embossed with my embossing gun (concentrated heat compared to the Ranger Heat Tool). When it was done, I had created a pattern over the painted surface, leaving lots of room between the stamped images.
I sprayed the surface of the tag with Distress Oxide in Speckled Egg, then rubbed it in with a paper towel.  I added more Oxide Spray to my craft mat, then picked it up with my fingertip so I could rub it randomly into the the embossed images.  It was amazing how adding it to the surface created a chalkboard effect.
If you get too much on, you can always remove some with a wet wipe. Please keep in mind that as it dries, you will loose some of the white that is shown here. You can reference the main photo of the finished sample of how it dries.

These are my personal notes on using Foundry Wax.
Please refer to Tim's YouTube demo for more instruction.  
You can find the link on his blog www.timholtz.com

Foundry Waxes

Fluid in the bottle

Bottle needs to be shaken before use.  Each has a mixing ball but some mix easier than others depending on color.


Becomes a cream when exposed to air (adding to a craft mat)


Permanent when heated 

The bonding to surface is VERY quick, like 10 seconds quick.

It will not come off, flake off and you can’t scratch it off.   It is not plastic like embossing power so you are not melting it, you are creating a chemical change with heat.


Please Note:

  • Foundry Wax is flammable (like Alcohol Ink) so use in a ventilated room.  
  • DO NOT  point the embossing gun towards the bottle or the heat could cause the liquid to solidify in the bottle - literally become a solid.  So when in use, just place away from heat source.
  • Work directly from craft sheet, not the bottle.
  • It is important to recap the bottle when not in use.  I like to wipe off the nib after I drip the dime size puddle on the craft mat.
  • Use a small brush to apply.  You could also use your finger tip for application, but since it's a solvent based product, you need to make that personal decision due to possible allergic reaction.  
  • Clean brush with 97% Isopropyl Alcohol NOT Blending Solution. 
  • It will NOT stain the silicone craft mat and can be easily cleaned up with Isopropyl or hand sanitizer and a paper towel.
  • It can be used on paper, like die cuts or embossed paper, as well as metal or wood.
Now lets go back to the project!
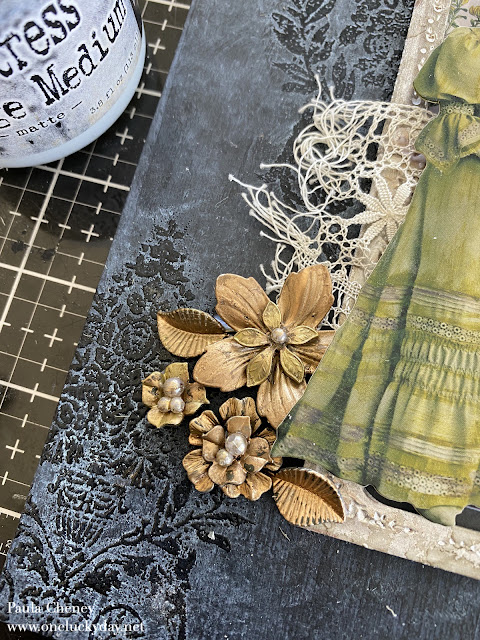
Once shaken (and I hear the mixing ball moving), I dripped a puddle of Foundry Wax on my silicone craft mat. I just picked up the liquid wax with a small brush and painted the metal Adornment Florals.  You can see they come only in silver so having the ability to paint them with the wax was intriguing! 
This is what they look like once I heated them for about 10 seconds.  I kept the embossing gun moving until the pieces start turning bright gold.  Admittedly, it was quicker than I thought it would take.
I decided to color more flowers using another color and even adding a few touches to the ones I had already finished.
I added some Walnut Stain Distress Crayon to make the flowers a bit more vintage.
Collage Medium secured the flowers into stacks. 
Glossy Accents was used to add pearls to the centers of the flowers.  
Again, clean up is extremely easy. I squeezed out a puddle of 97% Isopropyl Alcohol onto the silicone mat and just rinsed the brush it till it came clean.  I did change the Isopropyl puddle a couple of times.
These are idea-ology Curio Frames.  They only come in this gold color so I decided to use Sterling to change them to silver.
This time using my fingertip, I wiped the surface with the Sterling Foundry Wax.  You can see these Curio Frames have a recessed pattern.  The wax filled up the recess when I wiped over the top. 
Once heated, the silver really stands out!
I ended up making two frames for this piece.  One taller than the other.
I also added a bit of Mushroom Alcohol Ink (because I can) just to age the silver a bit.
Next, I taped the two frames together (just scotch tape) so I could get an accurate cut for the background. This paper piece is one of the new Pocket Cards that was just released last week.
It worked perfectly for the Curio Frames.  I used 1/4" Scor-Tape to add the paper to the frame.
I used six 3D foam pad to secure the frame to the tag.
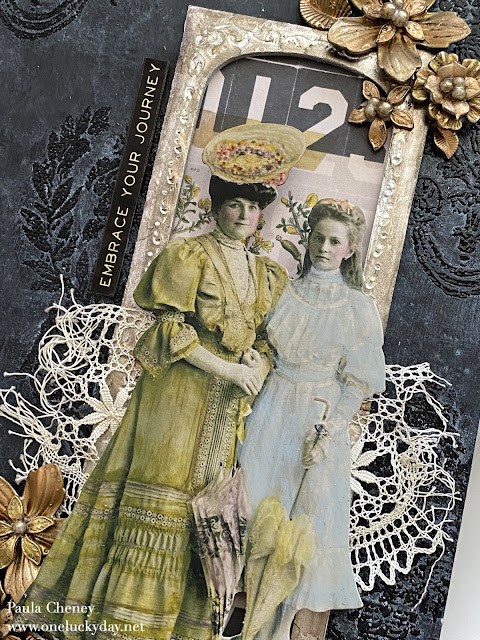
A couple bingo chips and some vintage lace was added with Collage Medium. You could also use 2 double stacks of 3D foam pads in place of the bingo chips (I just happen have them in a dish on my desk).
That focal point.  
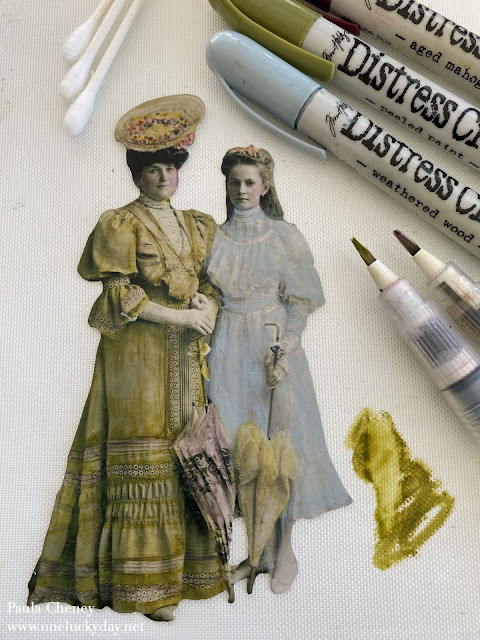
I colored (as I love to do) a mother/daughter from the Paper Doll Groups pack.  Her dress in Peeled Paint and the daughters in Weathered Wood.  Aged Mahogany on the cheeks.  I scribbled the Peeled Paint over the dress until it was heavy.  Then I used my fingertip to smooth it out as much a possible (removing any coloring on arms and face with a cotton swab), but the dress still looked very one note.  At that point I used a damp (not wet) cotton swab and a water bush to start removing the crayon, leaving only a slight color in certain spots.  I love coloring paper dolls, so for me this was relaxing to figure out how to make the dress come to life.  It probably took me 30 minutes, start to finish to get the result I wanted.
The Paper Dolls were added to the bingo chips.  I used a UHU Glue Stick to add the Paper Dolls to the bingo chips.  I find that if too much Collage Medium is used on the bingo chip it could give your Paper Doll a slight bend because of the excessive wet medium. 
Time to adhere the metal flowers.  Here Collage medium is the best glue.  It takes a bit to dry but left alone it will dry, even heavy pieces, like cement.  I like that.

I added a Metallic Sticker to the side of the Curio Frame using some cut up 3D foam pads.  And with that we are done!
Here are some closeup photos of the finished project.


Hope you like this one as much as I do! I love the contrast of the gold and black!  I love the new Foundry Waxes and I am quite sure you will be seeing more projects using them.  
now carry on,
paula