Wednesday, March 31, 2021

Start with a Grateful Heart


Hello friends,

Just a short blog post today sharing a Etcetera Mini Tag I made using Sizzix dies.

I painted the Mini Tag with Picket Fence Distress Paint and let it dry completely.  

While the paint was drying, used Distress Watercolor paper and my Vagabond machine to cut TWO of the Flowery Thinlits to create a background for my tag. I chose the white watercolor paper because it is white to match the background I painted perviously. The string was added and some frayed cheesecloth (colored with Peeled Paint Distress Spray). I also added an Antiqued Gem hanging off the string.
I adhered the two die-cut pieces, one above the other, with Collage Medium matte. I bet you would have a hard time even seeing where the two pieces meet up? Look closely, the seam is hidden right below the string.
Once the Collage Medium was dry, I cut off the top corners that were overhanging the tag. Then the most important step...paint a layer of Collage Medium over the surface to seal the Watercolor paper to the tag. If you get too much build up in the flowers and leaves, use an old brush to wipe the excess away. It does not have to be perfect (and the Collage Medium with shrink as it dries) but there should not be any mounds of Collage Medium. Once dry, this slick surface will allow you to color over the paper with Distress Crayons.
I chose Crackling Campfire, Fossilized Amber, Evergreen Bough and Bundled Sage Distress Crayons but any color combination would work. Scribble the crayon over the raised portion in color "patches", then using your finger tip, rub the the patches of color so just the edges mix with the color next to it (wipe off your finger tip when changing color). Your goal is to keep true color in some parts, blending into the next color to fill in. At this point everything is water reactive so you can wipe the entire color story away, dry the surface, then start again. As you can see, I "colored in" the orange flowers and green leaves just by rubbing the excess crayon directly onto the surface of the tag.
Once I was happy with the finished result, I sprayed the surface with a clear fixative (Krylon or another brand).  It just takes a light spray over the surface to quickly seal the crayon in place.
The Long Stem 2 flower was cut from Watercolor paper and painted with Distress Inks.
The Sizzix 3D Floral Frame is also Watercolor Paper that has been embossed with Speckled Egg Embossing Glaze.  Once the Embossing Glaze is melted, scribble over the top with a Walnut stain crayon and rub into the design with your fingers to age and give definition.
I cut out a girl from the Photobooth pack (so you would be able to see the color in the background) then added a tiny hand-cut heart to her chest.
I finished up by creating vellum band with embossed words from the Tiny Text stamp from Stampers Anonymous. I used the Deckle Cutter to create the "torn" edge effect. The vellum was adhered on each end with Score Tape which seems virtually invisible when used to secure to the surface.

I hope you liked this fun tag and the technique that can be used for so many things.  I love the vibrant colors for Spring and the message that says it all.
thanks for stopping by..

now carry on,
paula


Tuesday, March 23, 2021

The Liverpool Three

 Hello friends,

Thought I would share a fun project using another of the new Paper Dolls GROUPS.

As I thumbed though the pack of Backdrops 2, I spotted a vintage map of Liverpool.  I loved the colors of the orange and blue together and knew I had found the catalyst for the project.  Next I went to the bag of Paper Doll Groups and picked these three young men I could see working at the docks.  Of course here they are on their day off!  Well lets get started so I can explain more of the details!

I started with the small Vignette Tray as my substrate. It was the prefect size for the three young men.  I covered the outside of the tray, including the lip edge, with Backdrop paper that looks like an old piece of crackled wood.  On the inside, I added the Liverpool map making sure I centered the word, Liverpool, at the center top.  Once the tray was fully covered with paper, I painting a thin layer of Collage Medium over the top to seal the surface.

Backdrops are smaller than the paper we have produced in the past so I did not have enough of the crackle paper left to cover the entire back of the tray.  That was not a problem as I just chose a couple other papers from the pack to cover the back.  The Backdrops work together so seamlessly, crackle can go with typography which goes with pattern.  It's just that simple.
The next step is to add the shelf. I used one of the Eclectic Elements Pinked trim pieces since they can be easily cut to size with Tonic Scissors. I cut the trim piece and glued it into the tray with Collage Medium, leaving it to dry for while I worked on the Paper Dolls and some of the metals.  Once it was dry, I added a strip of the same crackle paper that I used on the outside of the tray.  I brushed Collage Medium over the top of the paper to seal so I could use my Walnut Stain Distress Crayon (with a damp paint brush) over the the surface - especially in the corners.  I also took a little bit of Speckled Egg Distress Paint on my finger tip and ran it along the pinked edge so the blue paint would skip along the surface.
You might be asking how I knew where to glue the shelf?  Well I placed the Tin Top (the thing with the star on the front) into the bottom of the tray.  I knew the shelf had to be just above the Tin Top - just that easy.
I wanted to add the wood Number Block 3 to the right side using the new Hook Clasp.  The Hook Clasp is the same one that I used as the closure on my Shrine project in my last post.  I added an eye screw to both the top of the Vignette Tray and the Wood Block. The eye screws are easy to twist into place if you start with a pilot hole made with an awl. 
I colored some string with Walnut Stain Distress Ink and dried it with my heat tool.  The string was looped through the eye screw then evened up.
I had previously glued a Hitch Fastener to the left side of the tray.  Once it is was secure, I was able to wrap the string around the Hitch Fastener and secure it with Collage Medium on the backside.  Once it's set, it's not going anywhere.
The new Paper Doll Groups have some wonderful characters to work with.  The three boys were colored with Distress Crayons.  I only colored one of boys suits - obviously it's the suit on the right.  I used the Chipped Sapphire Distress Crayon directly on the suit, then rubbed it with my finger till I could see the details of the coat.  The flowers were colored using a dry Water Brush (I like how the stiff bristles of the Water Brush move damp crayon onto the Paper Doll surface).  The Paper Doll Group was added to the tray with small wood blocks to give them the needed height over the string that runs behind them.
I grunged up some Mini Sprocket Gears with paint and Alcohol Ink and added them beneath the feet of the group. The string is just some cheesecloth I added to mimic straw.
For the bottom portion of the tray, I created a grungy bottle using Distress Crackle Paint Clear Rock Candy.  To do that, coat the Corked Vial with Collage Medium and let it dry.  Rub Distress Crackle Paint over the surface and let that dry.  Drip Mushroom Alcohol Ink over the Crackle Paint to color the bottle.
I also added Remnant Rub numbers to a Metallic Sticker and a bug to the tiny tag.
To complete the bottle, I rubbed some paint into the recessed portion of a Machinery Head and added it the top of the cork.
On the right side of the lower section, I added the Tin Top, Mini Flair and two of the new Industrial Gears. Both the Tin Top and the Industrial Gears have a wood block behind them for support. I used a small amount of shredded cheesecloth to disguise the wood block that sits right behind the center of the gears. I bet you can't even see it. I just glued the block in place, then added the gears with more Collage Medium to the Tin Top and wood block.  Once set, the Collage Medium holds everything like cement (those gears are not going anywhere).

I liked the idea of an industrial handle at the top of the tray.  I used paint and Alcohol ink, Distress Crayons to grunge up the handle and the added Hardware Heads.  Once glued with Collage Medium, I kept the tray in a standing position until it was set.
As you can see this tray is easy to create.  You just need to include some drying time to add the Hitch Fastener, the shelf and the Industrial Gears.  Other than that, it moves along quite easily.
Thanks for stopping by to read my post...I really appreciate it!

Now carry on,
paula


Thursday, March 18, 2021

Just Keep Swimming

 Hello friends,

Just a short post today sharing a very easy card I created with the Chapter 1 Sizzix dies.  I am not a card maker so I have to keep things simple when it comes to cards and this is just that.

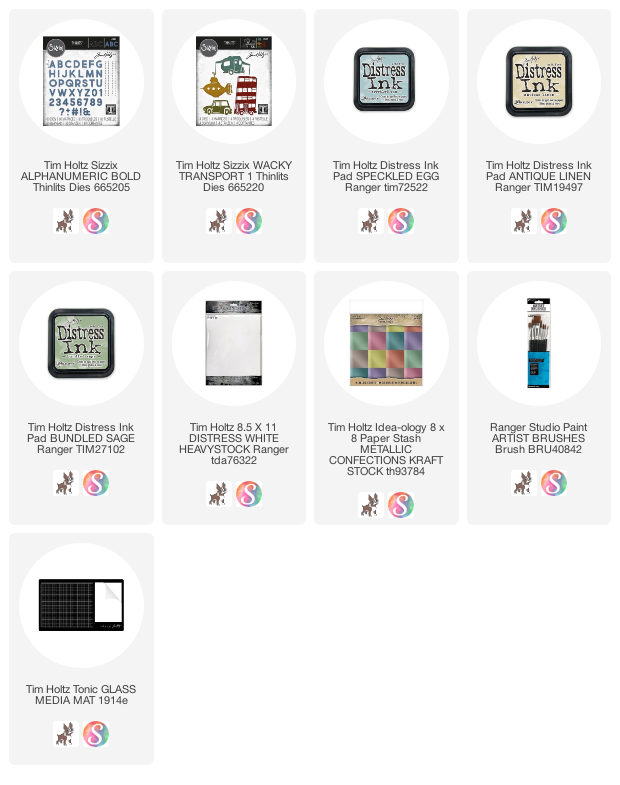
The entire white card front is cut from Distress White Heavystock, including the center rectangle that I watercolored over.  I cut the center rectangle 3 x 4 1/4" to fit the words I wanted to use. Then I cut the white card front and about 8 - 10 submarines using the Wacky Transport Thinlits.  Once I had them cut I adhered them to the card front in a staggered pattern.

I cut the letters for the saying using Alphanumeric Bold (one of my favorite alphabets ever.)  It seems to be the perfect size for every card I make!

I created the watercolor card by pressing 3 different colors of Distress Ink (speckled egg, antique linen, and bundled sage) onto the white portion of my glass mat.  I picked up each color with a flat wet paintbrush and ran it across the card.   Once dry, I added the letters to the card front using the lines on the glass mat as a guide.  You can see here I taped my clear ruler to the glass mat so it becomes my straight line when I am glueing the letters to the card.  When I am ready to move to the next line, I just pull the card up and reposition the card according to the lines on the glass mat.
Making multiples of this card seems like the smart thing to do since I can think of about 10 people that could use this message right now.  Really, couldn't we all? 
Now carry on,
paula

Monday, March 15, 2021

Believe In Yourself

Hello friends,

Hope your week is going well! Things are looking up in California as some restrictions has been eased in our area. Although, we are still staying put and not doing things that involve travel or leaving home unless necessary.  Good thing I can work from home (as I have done for many years) and that my husband can teach school in his classroom via Zoom.  

Today I am sharing information/tips on another idea-ology project I recently created.  I used a Vignette Shrine as the housing for a zig zag book I created from chipboard.  This was a fun project because I've never done anything like this before.  And I like the "figuring stuff out" part.
So lets start with the Shrine itself.  I painted the interior with Speckled Egg Distress Paint and let that dry before moving on to the outside paper portion.  Some of the new Backdrops paper was cut into strips and added to the outside of the Shrine.  I just butted the pieces right up against each other rather than overlapping (but that is fine too).  There was no rhyme or reason, I just picked paper I liked - large scale like the butterflies and small scale like the print below.  That is what makes Backdrops so fun to use - the mix of scale helps to make almost every print to work with another.  I saved ever single scrap from my projects and put them in a Plastic Storage Envelope for later use.  I have found that even the smallest scrap works for something.
You might notice that I did not use tape for the lip edge of this piece.  I used Backdrops again.  You need about 1/4" of paper to cover the lip edge in any paper you wish.  It was easy to do, I just used my Tonic Guillotine Trimmer to cut the 1/4" strips from a small print.  The Trimmer can precisely cut paper that narrow because of the sharp blade and the plastic guard that holds the paper in place while you cut.  I also cut enough strips to use on the two levels of the base.
Lets talk about the closure - 
To begin, I cut off the top and bottom stitching of the Ruler Ribbon to make it narrower and give it frayed edges.  I sewed a loop at one end with the Mini Book Ring inside the loop (you don't need to do anything to the other end).  To test placement, I wrapped the Ruler Ribbon around the Shrine, then marked where the Ruler Ribbon goes around the corner.  I was able to add Score Tape to the Ribbon then add it to the Shrine just where I wanted it with no wait time for liquid glue.
You can see here I used a tack nail to secure the Hook Clasp to the Shrine.
When you want access to the book, you just open the Mini Book Ring and let the Hook Clasp fall away.
The book consists of 5 house shapes I cut from a chipboard.  I made a test book to get the right size and shape before I cut the final that is in use here.  I could have used the original but I decided to keep it as a template in case I wanted to re-create the book another time.  One thing I did find in the process was that you have to test how the book opens inside the Shrine, so you can make sure that each house flows out easily and does not get caught up in the roof line.  I also know that if you make each house the same width, it would be a much easier job, since it has to fold back on itself.

There are MANY way to connect the house pieces.  I decided to hide the mechanism under the paper but I could have easily used the new Linen Tape.  It would work perfect as a hinge detail.  
Once I had cut my house shapes, then tested them to see if they worked in the Shrine, I was ready to start.
  1. Cut Backdrop paper to fit each house shape, set aside till chipboard is connected.
  2. Use 1" Score Tape to connect each shape, leaving a 1/16" gap between the houses so they can fold over.
  3. Adhere the pre-cut paper to each house with Collage Medium.  Be sure to go over the Score Tape in the "crack" between the houses with the Collage Medium.  This will seal the tape so it does not stick to itself when you fold it over.  Could you use something else to bind the house shapes?  yes!  you could use the idea-ology Linen Tape, a muslin/fabric strip or another kind of tape for book binding.  Remember it will be hidden in this method.
For the book, I chose to use some of the new Paper Dolls that were just released last month.  I picked 4 to work with but you can add as many as you wish.  The cover has one of the new Curio Frames with a Paper Doll over the top. You may be wondering why I tied her to the frame? It was really from a feeling I wanted to convey...that when we lack belief in ourself it can hold us back from doing things we are meant to do.
I have used one of my favorite new products, Mini Marquee, for the emboldened words, LEAD and LIFT.  The letters are a heavy plastic (they do not bend easily) and perfect over the paper.  I just used a bit of Collage Medium to glue them down since it dries clear.  That might not work as well over solid paper but it sure worked over patterned.
I added one of the new Stitched Scraps 2 to make the ephemera piece (idea-ology Remnants) look like a pocket.  I also added a heart charm from the new pack of Adornment Hearts and a sicker from the new Metallic Stick Book (same book as the word strips).
The stitching here is faux, meaning that I stitched the card (idea-ology Keepsakes) and then used Score tape to make a pocket that I added other ephemera into.
The last decorated page has one of the darling Mini Flair Embellishments (don't you love that dog?) with some crinkle ribbon sprayed in Rustic Wilderness Distress Spray Stain.
I found that I needed one more house shape to make all the decorated pages pull from the book - this one I just used Backdrops and some ephemera.
You can see when I turn the book over,  I have cut a 1" strip of chipboard and secured it to the book with idea-ology Linen Tape.  The 1" strip has Score Tape on the back so it can be adhered to the inside of the Shrine.


I hope this project might spur you on to trying something new or look at an old structure in a new way.  

Now carry on,
paula


Tuesday, March 9, 2021

Better Together

 Hello friends,

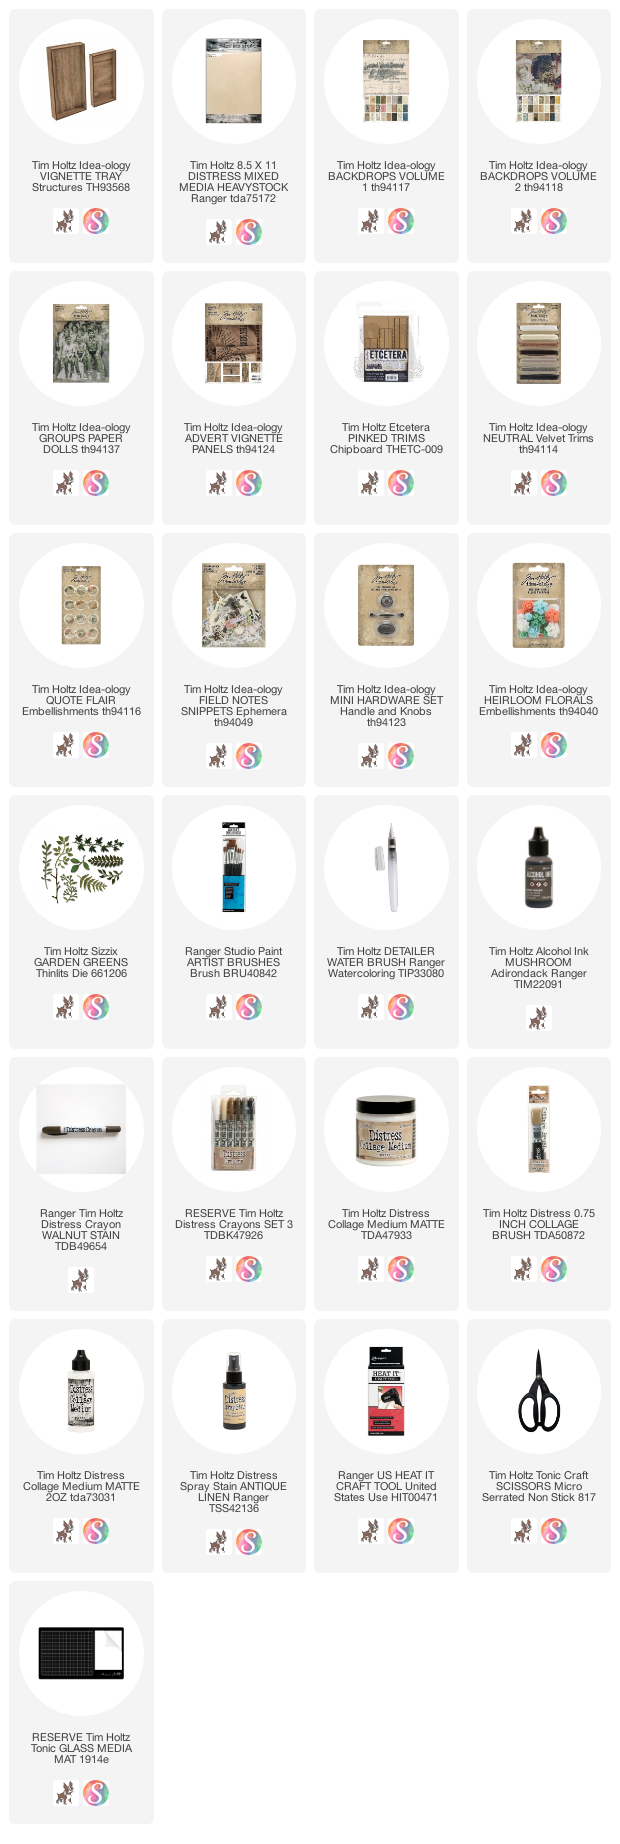
Today I am sharing one of the projects I made for the idea-ology release last month. This one is a favorite (okay, I liked them all) because I just love the three girls from the new "Groups" pack of Paper Dolls. They fit so well on the back of the large Vignette Tray!

I began by painting the sides of the tray with Pumice Stone Distress Paint, wiping away excess so that the grain of the wood tray still comes through.  
While the paint was drying, I cut used my Tonic Guillotine Trimmer to cut eighteen, 2 x 2" squares of Heavystock paper.  There are three squares across the Tray and 6 squares running down = 18 squares.  I found that once I had the squares cut I could easily add the Backdrop papers to the front with Collage medium, then trim them with scissors.  
Some squares have only one piece of paper, like the marbled book paper right in the center of this shot.  Then others have two, even three pieces (scraps).  No matter what I did to the square, I always kept to the 2 x 2 pattern size.
Once I was ready to adhere the squares, I did have to trim a few of the squares to fit the tray perfectly. I started with the bottom row of three and worked my way up to the top. Once I had them in place, I added the flowers, labels and stamps that crossed the borders of the 2 x 2" cards (like the blue label below). I also painted a layer of Collage Medium over the whole surface, rubbing it in with my hands to get rid of the brush marks. Once dry I was able to add the Walnut Stain Distress Crayon.

The next thing to work is the Vignette Advert Panels.  These are new wood panels that can be added to projects, or in the case of the the two largest, they can be use to fit the top of a Vignette Box to create a lid or hinged door.  I used the one marked with a red arrow.  

In the finished piece I combined the Advert Panel with an Etcetera Trim - Pinked to create the shelf.  I painted the pinked (sawtooth) trim piece with Black Soot Distress Paint (both sides) and set it aside to dry.  

The Vignette Advert Panel is a light wood and I wanted a very rich looking finish so I used an easy technique to make that happen.  Rub any brown distress ink color directly over the surface of the panel (it won't look very good at this stage) then with your finger, rub Collage Medium over the surface to allow the ink to "bloom" and become very rich in color.  Set aside to dry.  It's just that easy.
NOTE: I tested ink colors on the backside of the panel to I could find the right one before starting on the front - Walnut Stain was my choice with Vintage Photo as the runner up.

I drilled a hole on each side of the Panel just big enough to push eyelets from my stash into the hole (no glue needed). I added 3D Foam Squares to the back of the Advert Panel to raise it from the surface of the Tray, then ran the Velvet Trim into the holes. Once this is done, you can adhere the panel to the Tray.
I evened up the Velvet Trim and pulled it to the back side of the Tray where I used a hot glue gun to secure it to the inside back.
Use Collage Medium to add the black Etcetera Trim to the top of the Advert Panel. Once this is secure, you are ready to add the Paper Dolls and embellishments.

The Paper Dolls were tinted with multiple colors of Distress Crayons.  I kept them light and airy.  I love how the scarf of the girl on the right is blowing in the wind!  Since the original picture has their names listed, I know they are: (L to R) Helen, Nola May, and Wilma.  So welcome to the Paper Doll family, glad you are here!
The rest of the blog post today will focus on the Heirloom Florals and how I transformed them for this vintage piece.  The loose pieces are the ones I used for this Tray.
First of all, this is a recreation I what I did originally so the amount of ink will be a bit different than the finished piece. I dripped Mushroom Alcohol Ink over the flowers.  I would do this two or three at a time not all at once.
Then I took the felt that is normally on the tool and rubbed some of the Alcohol Ink away.  You can always wipe more away with Blending Solution added to the felt (I did not have to do that when working with 2 or 3 at a time).
Just as a reminder, you can easily get Alcohol Ink off your fingers using Hand Sanitizer.
Next I decided to cut up the resin flowers with my Tonic scissors. I cut the base off the tiny flowers so they would not stick up as much when using them in the garden. I'm going to be honest, this is the first time cutting them up and it worked out better than I even hoped.

I placed the tiny flower into the scissors and made a cut...turn the flower, make a cut, turn the flower, make a cut...until I had gone all the way around.  Little by little is the key!!

This is what it looked like once I cut through the flower.
For the larger one, (this one is admittedly harder to cut into the center because of the thickness) I cut a V shape pulling out three flowers.  After this cut, it was easy to split the larger piece in two.  My goal here was to get individual flowers.
Using the one piece, I cut each flower apart.  I only used two of these flowers in the finished piece.
You can see here that I used cheesecloth (Mummy Cloth will work too) to cover the top of the black Trim.  I added the Paper Dolls with a double stack of foam Squares, then filled in around their feet with a bit of shredded cheesecloth.  I also added a new Quote Flair, six sets of leaves (Sizzix Garden Greens) and the resin flowers, in that order.  I used hot glue to add each element.  It was especially helpful with the layers of leaves since hot glue gives dimension between the layers.  
I used tweezers to add the small flowers over and under the leaves.
The last item I aded was one of the new knobs from the Mini Hardware set.  I just dabbed it with a bit of Mushroom Alcohol Ink and glued into place with Collage Medium.  At that point I hung the Tray on the wall to give the glue time to set.  Easiest way to NOT knock it over.

I hope you liked the tray enough to give it a go even if you use a different substrate or size. I loved creating the patchwork and know I will do it again!

If you missed the Live with Tim showing all the new products and projects you can watch the replay here on Tim's blog: idea-ology release  You will not be disappointed!

now carry on,
paula