Busy times around the house this week. It's that time again when we start ramping up toward CHA. On one hand I hate to think it's only 5+ weeks weeks away (
so much to be done). On the other hand, I love CHA; there's nothing like transforming the booth into something magical, talking to the retailers, and seeing old friends. It's hard work and a lot of hours but I seriously love it all.
Well, on to today's project, Fabric Flowers:
I found the fabric flower idea on Pinterest a while back and wanted to
try it with Tim's fabric. The original tutorial was created back in
2010 by Anj, you can see it
here.
I started with a few strips of Eclectic Elements fabric, cut 5 x 44".
Fold the 5" strip in half and iron so that you have a strip that is 2 1/2 x 44".
Move to the sewing machine and run a
basting/gathering stitch right along the fold (
you will gather this later).
Since I am making a lot of flowers I created an assembly line by cutting all the fabric, then ironing, then sewing. It makes for a whole lot less thinking rather than completing one flower start to finish, then starting over.
Once the strips are stitched, I marked the
raw edge of the strip every 2 1/2". I used a fabric marking pen but you can use whatever you like as this part will be cut away.
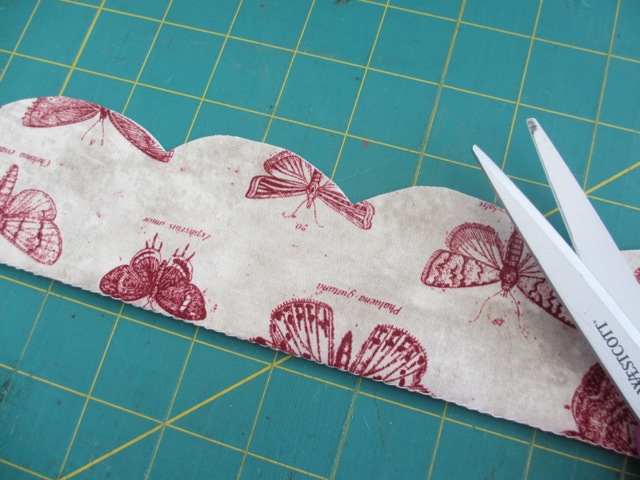
Pick up the strip and hand cut scallops between the marks. The cutting does not have to be perfect. I promise, when finished you will never be able to tell which scallops were wonky and which were perfect.
On one end of the strip you will need to leave a 4-5" tail, just like this.
Once one strip is cut you can either mark the next one or just lay the first strip on top of the next and use it as a pattern.
Cut all the scallops on all the strips. Remember, they do not have to be perfect scallops.
Next is to go to the machine and stitch the scallops closed. I stitched some in black, creme and red depending on the fabric color.
Once stitched, gently pull one string on the gathering stitch to gather the strip.
Cut a stick or dowel to use as a stem. Tie the "tail" to the stick with the skinny strip heading towards the end of the stick.
Wrap the "tail" around the end of the stick to create a sharp point and glue into place. I used a low temp glue gun to secure the fabric to the stick.
Add a bit more glue and begin wrapping the gathered fabric around the stick.
Adding glue just a bit at a time (
about 1 1/2" at a time)
Once you go around the stick once, position glue so that it is at lest 1/2" below the gathering stitch. This will make your flower much more open.
Keep gluing, little by little, until you run out of fabric.
To cover the unsightly bottom of the flower, I cut wool flowers using Tattered Floral die. I just cut a hole in the center for the stick then slid it into place.
Once the wool piece was close to the flower, I added a bit of glue, and adhered it to the bottom. It worked perfectly to not only cover the bottom, but it looks like it's part of the flower. Of course you could cut these in green to make them more "natural"; but I figured what the heck, my fabric is untraditional, why do the petal have to be?
finished flower
And from the side
I ended up making 5 flowers for my vase. This is a really easy project and they came out great. Again, thanks to Anj for a great tutorial to begin with.
Today is the last day of school for my husband. That means he's making pancakes and bacon for all his students today while they finish up some last minute work (
insert Alice Cooper singing, "School's out for Summer!"). It's going to be a happy day around here...
cheers for a great weekend!
paula