Showing posts with label framed panel. Show all posts

Monday, October 31, 2022

Merry and Bright Panel

Hello friends,

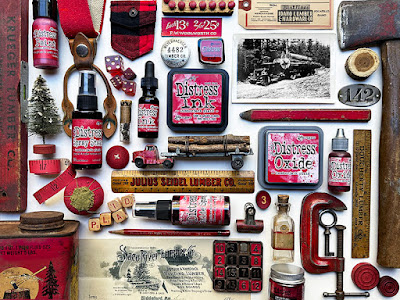
Saturday was a very exciting day due to the release of the new Distress color, Lumberjack Plaid.  I have been waiting for this color red for so very long...probably since I started working with Tim over 10 years ago!  It is a rich cherry red or as I would call it, "a good red"!

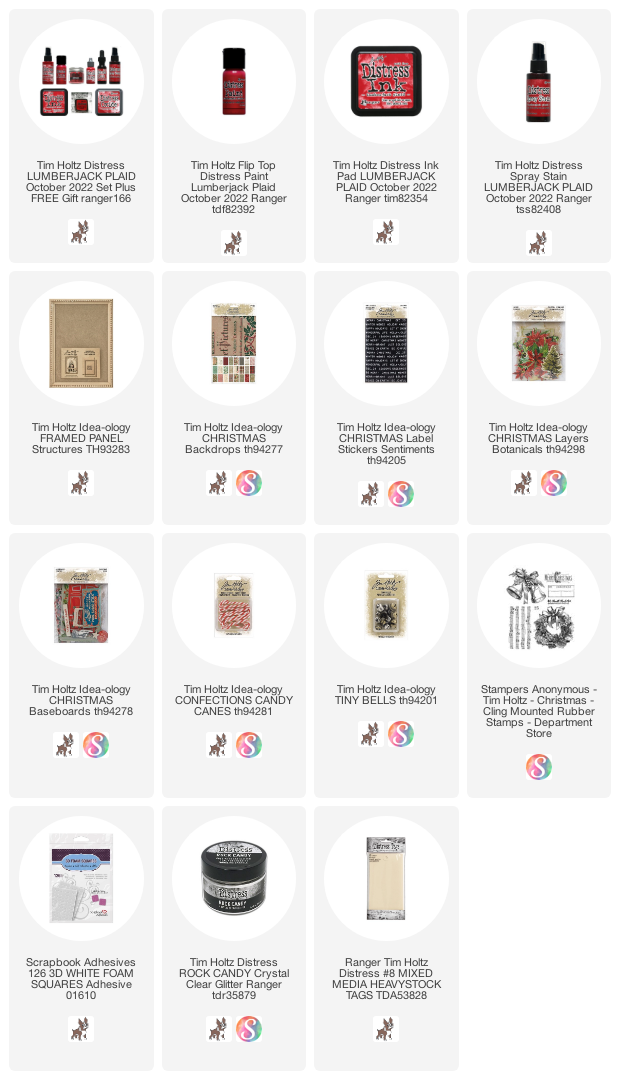
The project I'm sharing today is my Framed Panel. It was easy to create using lots of layering pieces from idea-ology and featuring the Layers Botanical that is so good as the centerpiece of the panel.

Start by painting a Framed Panel with Lumberjack Plaid Distress Paint.  Once that is dry, add a bit of gold Mixative to the raised dots around the edges.
Add Christmas paper from the Backdrops (I love this print), then glue the Frame to the base.
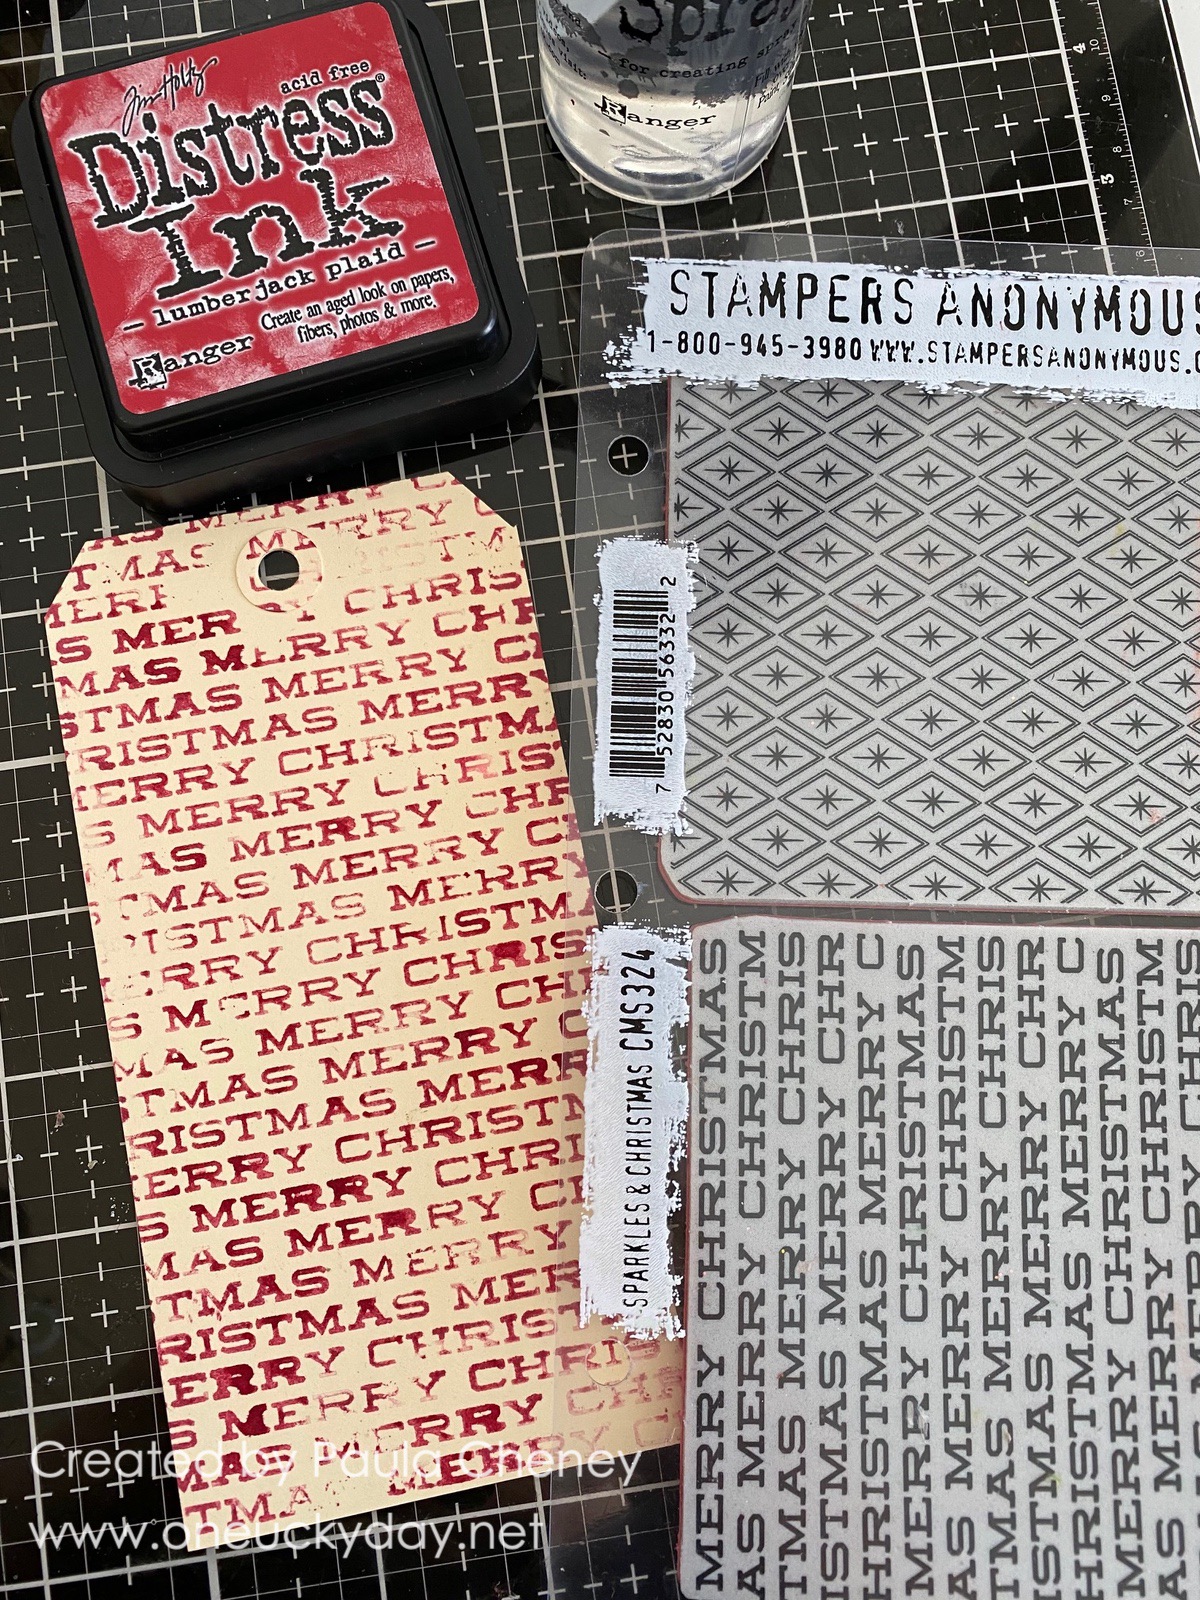
The #8 Mixed Media tag in the background was stamped in Distress Ink using the Christmas background stamp, "Christmas" from the Sparkles and Christmas set (CMS324).  I inked the tag, misted with water, then stamped for a watercolor look.  Every time you stamp it's different, so I stamped multiple tags, then picked the one I liked the best.  The rest I can use on other projects or gifts.
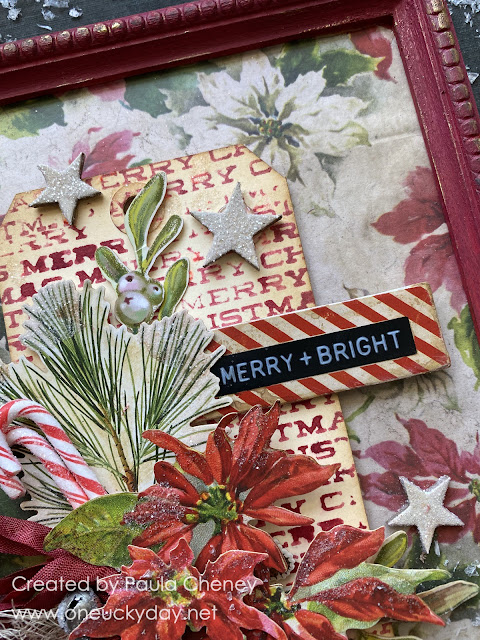
Add the tag to the back of the Framed Panel, then start layering the pine and poinsettias from the Layers, Botanical pack. I used 3D foam squares to create multiple heights as the layers went on.
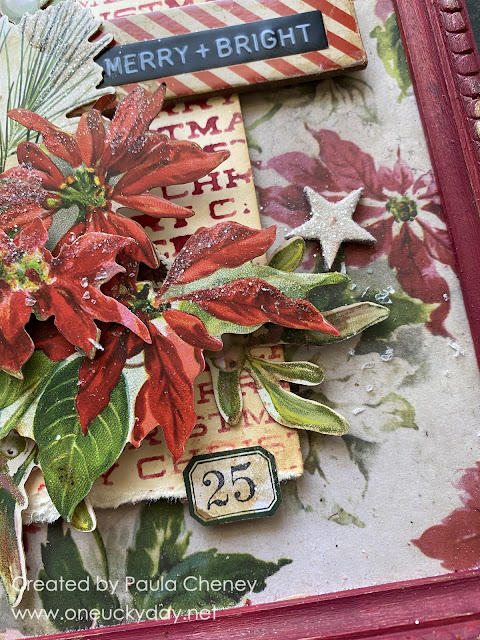
The centerpiece is the grouping of poinsettias. This is really one large piece that has two poinsettias and one singe poinsettia that is layered over the top with foam.
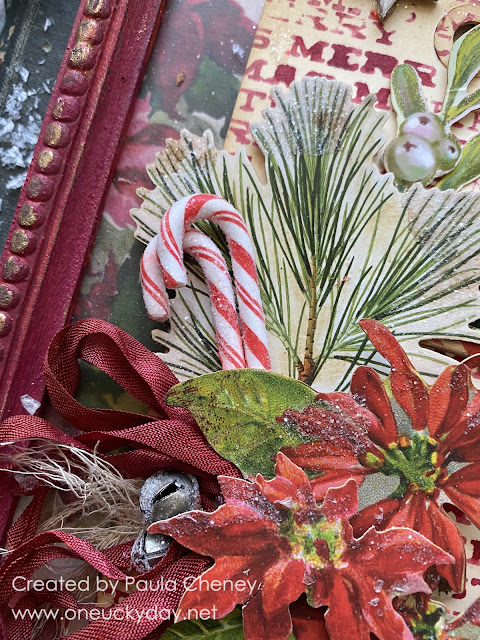
You can see the layering a little better here.
I went back and added the leaves and white berries underneath the poinsettias (collage medium), so there is really three layers over the tag.
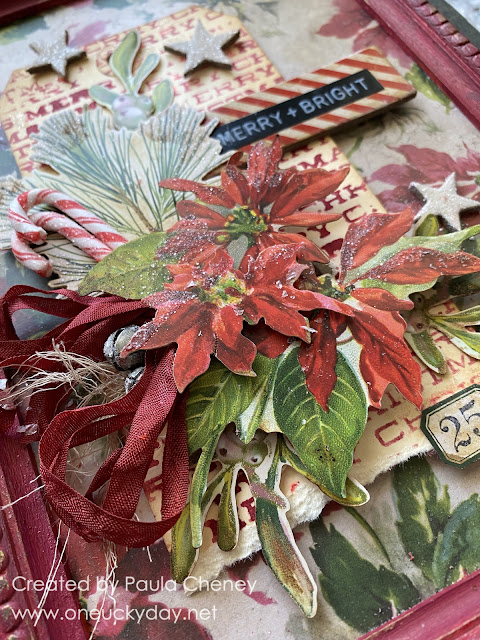
The 25 stamp (a favorite) is from the new Stampers Anonymous "Department Store" stamp set.
Merry and Bright is a Label Sticker added to a candy striped chipboard piece from the Christmas Baseboard pack.  The stars also come from that same pack - all I did was add a thick layer of Rock Candy Glitter.
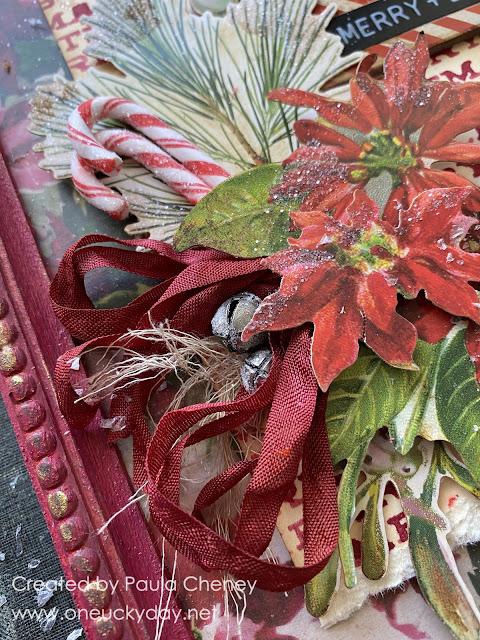
I added 1/4" ribbon that I sprayed with Lumberjack Plaid, along with idea-ology Tiny Bells with added Rock Candy Glitter for a wintery look.
The Candy Canes were also given a Rock Candy Makeover and glued into the arrangement with Collage Medium (you could also use hot glue).
The last thing was to use a paint brush to add random patches of Collage Medium over the pine and poinsettias, then sprinkle more Rock Candy Glitter for added shine.  Once dry, the glue becomes transparent and just the wintery sparkle remains.
I think this is an easy make that anyone could create! (also very easy to store away for the season). Lumberjack Plaid is just the perfect Christmas color!

If you missed the LIVE on Saturday and would like to see all the makes, please go to TIMS BLOG and click on the YouTube link in the post.
now carry on,
paula

Thursday, March 3, 2022

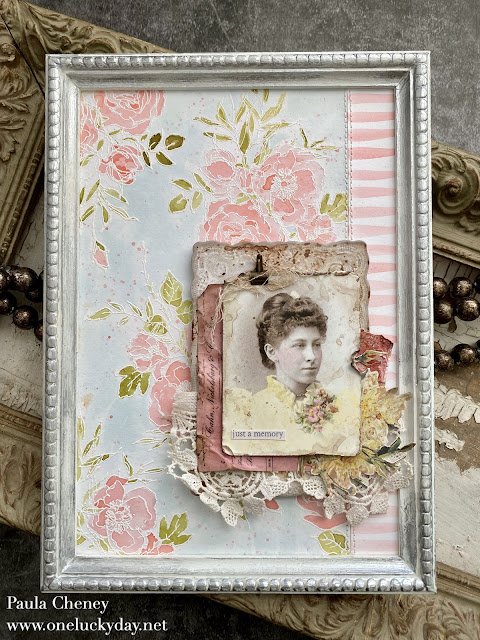
"Just a Memory" with Saltwater Taffy

Hello friends,

Here today sharing my second of the projects using Saltwater Taffy!  Over white Distress Watercolor paper, Saltwater Taffy takes on a "pink" tone...this really seams to be a chameleon color. (and I like that).  Pink-er on white, peachy on Mixed Media Heavystock.  
Lets get started!

Cut a piece of Distress Watercolor paper the size of your substrate.  Mine is a Framed Panel so its 9" long.  I am going to add a stripe strip on the right side so for now I don't need to worry about the width of the paper since I can any size to it.
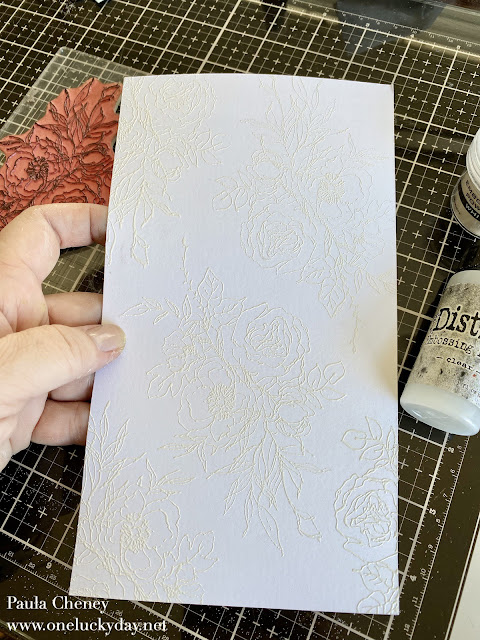
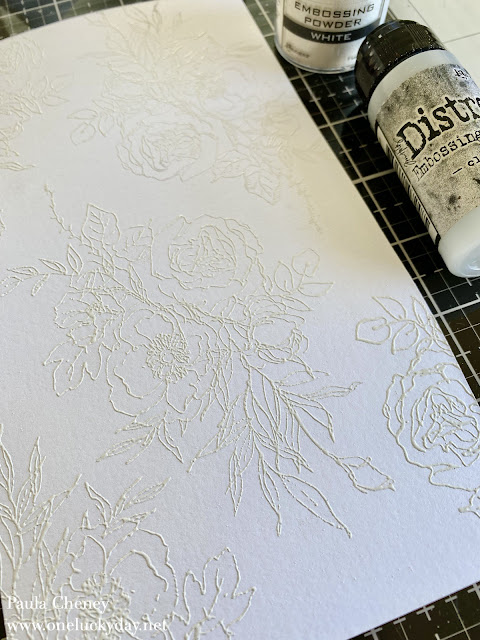
I used the Embossing Dabber to cover the Floral Outlines stamp with embossing ink.  Stamp the image onto the Watercolor paper and cover with white Embossing Powder.  Melt with an Embossing Gun.  Repeat the stamping process until you have created a repeating pattern.
For the next step, you will need a brush that can hold enough water to keep the ink flowing over the background.  
  1. Press Speckled Egg Distress Ink onto glass mat.  You will need a good amount of ink to cover the entire background.
  2. Dip brush into water and and pick up ink from glass mat. 
  3. Working quickly, cover the background with the Speckled Egg ink wash. Don't worry too much about it being even.  In the end, the variations in color will make it more interesting.
  4. Press Saltwater Taffy onto glass mat.
  5. Using the same brush (but rinsed out), pick up Saltwater Taffy and water to create a wash over the flowers.  Go back an add more ink to create variations in the flower petals.  By working all the flowers at the same time, once can be drying while working on another and vice versa.
You can see small spaces in between the leaves where I missed some blue.  I will go back and fill those in where need after I color the leaves.
I used Peeled Paint to color the leaves because I like the brightness of the green.  You could combine with Bundled Sage if you didn't want all the leaves this bright.
I still had some Saltwater Taffy Ink on the glass mat so I used my brush to pick up and flick it across the surface.  Love that little detail!
I cut another piece of watercolor paper the same length as the first.  Then using the same brush, I painted stripes down the length of the paper.  Once dry, I cut the strip and butted it up against the flower paper.  I used masking tape on the back to connect the two pieces before sewing on each side of the line.
I had previously painted the Framed Panel white and had it set aside.
I used Collage Medium to adhere the watercolor paper to the flat part of the panel.  Then added the frame over the top, concealing all the raw edges of the paper.

For the focal point, I used a Baseboard Lace Frame for the foundation, some ephemera from the Keepsakes pack and a Found Relative.
I used Distress Crayon to color her dress and flowers.  Then for good measure, I pressed Gathered Twigs Distress ink onto the glass mat and sprayed water into the ink to make it fluid.  I pressed the edges of the Found Relative photo into the ink and dried with a heat tool.  Since this is a coated card, I took repeated pressing, heating to get the worn look that I love (but I love the way it looks!).  I did avoid getting ink on her face.
Once I adhered the focal point, the white frame seemed bland, so I rubbed Dina Wakley Sterling paint over the frame to give it a bit of shine.  I just used my fingertip to rub the paint on, so it wouldn't look too perfect!
Tiny Clips are my favorite.  I thought the clip needed to "hold" something, so I got a bit of shredded cheesecloth and tucked it underneath.
The Saltwater Taffy is such a beautiful color.  I could not be happier to have this color to work with in more makes!


I'll be back soon with my last make from the live, the patchwork panel...where Saltwater Taffy finds it's peachy side...
Now carry on,
paula

Friday, February 5, 2021

Love is in the Air

Hello friends,

I have post over on the Ranger Projects Blog today, showing how I created this Matchbox Valentine featuring Kitsch Flamingo. I hope you will pop by the Ranger site to see how I created the Valentine, start to finish!

There are unlimited options for filling the boxes so I thought I would share four of them here! 

Salvaged Doll 
  1. Sprinkle Mushroom Alcohol Ink over the top of the doll and wipe over it with felt.
  2. Cut out a small heart (Kitsch Flamingo sprayed on White Heavystock) and glue to the chest.  Cover with Glossy Accents.
  3. Use gold Mixative to color the tiny crown, then glue to head with Glossy Accents

Mini Pocketwatch
  1. Glue in ephemera background.  Add Clippings sticker.  
  2. Cut out a flower from Worn Wallpaper and glue in place.
  3. Secure to the box with 3D foam squares.

Type Chips
  1. Find the 4 letters to spell Love.
  2. Use a piece of scotch tape to secure letter together (they need to be flexible to bend).
  3. Cut away the top, uppercase letters leaving only the lowercase.
  4. Use a doubled foam square to add to the box.

Heart
  1. Cut a heart from wool (I used an old Sizzix Bigz Die called Heartfelt).
  2. Use wire cutters to clip the Adornment Arrow in half (use safety glasses).
  3. Make a small cut into the wool heart for each piece of the arrow to slip inside.
  4. Add Collage Medium to the back of each end of the arrow and slip in the tiny hole.  Hold in place until secure.

I hope you will take the time to pop over to the Ranger blog to see the rest of the project - the Monoprint background is my favorite!
Now carry on!
paula


Wednesday, September 9, 2020

Crackling Campfire Framed Panel

You can find me today over on the Ranger "Projects" page sharing a Framed Panel I created using the new Distress color, Crackling Campfire.  I hope you will stop by to view the step-out tutorial for this easy project full of bright color.  Perfect for fall!


Now carry on,
paula

Tuesday, September 1, 2020

Fall Framed Panel

 Hello friends!

So happy to be here today to share another project I created with Crackling Campfire!  One thing I love about Crackling Campfire is how it pairs so beautifully with my favorite Speckled Egg.  It's like they were meant to be together!  Todays project spotlight features a grungy woodgrain background and leaves cut from a few Sizzix Thinlit dies.

Lets get started!

I'm using a Framed Panel for the substrate.  To start I painted the Frame itself with Speckled Egg Distress Paint and let it dry. Once completely dry, I wiped Texture Paste Crackle on the corners and let it dry for at least 30 minutes.  Set aside.

For the background of the panel:
  1. Adhere Woodgrain paper to the panel back with Collage Medium.
  2. Paint the surface of the Woodgrain with Distress Paint Speckled Egg.  NOTE: I painted it on, then wiped over it with a wet wipe to thin out the color and let more of the grain show through.  
  3. Once dry, rub Pumice Stone ink pad over the surface to bring up the grain pattern.  
  4. Using your finger, wipe on Texture Paste Crackle in random spots.  Immediately lay a stencil next to the Texture Paste then using a Palette Knife add more Crackle Paste through the stencil.  Repeat.  Then set aside to dry for at least 30 minutes.
  5. Using a damp paint brush, add Distress Crayons Walnut Stain and Peeled Paint over the Texture Paste to bring out the crackle finish.  Dab away any excess with a wet wipe.  I did the same technique to the Frame that had been set aside to dry.
Add the Framed Panel over the background with Collage Medium.  Set aside to dry.
Color a few Mixed Media Heavystock cards with Distress Spray Stain.  I used Crackling Campfire, Speckled Egg and Fossilized Amber, plus Oxide Spray Speckled Egg.
Cut out different shapes and sizes of leaves using the Skeleton Leaves and Fall Foliage Thinlits.
Layer the background of the panel with:
Salvaged Tag (string added) 
Lace Baseboard Frame (rubbed with Walnut Stain Distress Crayon)
Clock from Urban Layers pack (Evergreen Bough Distress Crayon rubbed in the middle of the clock)
NOTE:  This photo shows a Label Frame that I was testing...so many choices!  In the end I decided to use the Quote Chip instead.
Add the first layer of leaves to the collage.  I cut two of the same leave shape so it could continue down below the words that will be added next.
I love the sentiment on this Quote chip! I rubbed it with Walnut Stain crayon, then cut the right end like a flag and added the Tiny Clip on the left end.  It was added to the collage with 3D Foam Squares.
I added a few pieces of ephemera from the Field Notes Ephemera Pack plus the small leaves to fill in.  The 82 strip is from Layers Urban (same as the clock).  I colored the little bird from Field Notes with Distress Crayons and a paint brush.

You can see the layers of the leaves and the Baseboard Frame.  I used 3D Foam squares behind some of the leaves for depth.
I love the way the Framed Panel turned out.  Perfect for a Fall display.


I also love the leaves in the piece and it couldn't be any easier to make them using the papers colored with ink.  I sure hope you will try it.
Now carry on,
paula